PlayPosit: Time-Saving Tips

What is PlayPosit? And what can PlayPosit do for you?

What is PlayPosit? PlayPosit is a video resource tool integrated with Canvas that allows instructors to create interactive videos. Using PlayPosit terminology, these videos are referred to as bulbs. Instructors can embed questions or other engagement check-points, called interactions, into recorded lecture videos, YouTube videos, or other Kaltura video recordings. For a more detailed summary of PlayPosit, please see this previous blog created by CATL.

What can PlayPosit do for you? PlayPosit can be used to create alternative learning materials for your course and offers more options besides traditional text-based resources for students to engage with.  Using bulb interactions, you can check student knowledge during a recorded lecture video, provide extra materials via external URL links to highlight a key learning point, provide space for students to anonymously ask clarifying questions, or even allow students to record time-stamped comments and notes for later review. A more detailed breakdown of the different types of interactions offered within PlayPosit bulbs as well as a few use cases like creating quizzes, breaking up long lectures, and much more can be found here.

Increasing Dialogue: How can PlayPosit help you collect student feedback?

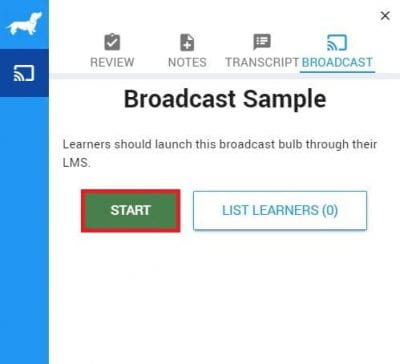
Another powerful feature of this tool is that you can also use PlayPosit within your Canvas course to get live, synchronous feedback from your students. In the past, clickers or Kahoot! may have been used as live polling tools, or even Zoom Polls or Microsoft Teams. Now, you can use a similar feature included with UWGB’s PlayPosit license called PlayPosit Broadcast

If you do not wish to use PlayPosit Broadcast as a live polling feature, you can still increase course dialogue by utilizing the Discussion interaction within your bulbs. This type of interaction allows students to leave timestamped comments and questions within a video, creating a discussion forum within the PlayPosit activity itself. Instructors can modify the discussion forum interaction settings to prevent students from seeing their classmates’ comments until they have posted a comment themselves. You can also moderate discussion forum interactions as the instructor within the PlayPosit interface. Creating PlayPosit discussion forums for points may also offer students an alternative to traditional Canvas Discussions.  

Assignments and Beyond: How can PlayPosit be used for low-stakes or ungraded activities?

A common misconception about PlayPosit is that you can only create PlayPosit bulbs as graded Canvas Assignments. This is not the case. If you would like students to take a PlayPosit assessment or engage with an interactive video activity for points that are reflected within your Canvas gradebook, you can indeed build the PlayPosit bulb as an assignment within Canvas, however you can also build ungraded PlayPosit activities for your students. 

Student self-assessment activities and interactive, supplemental video resources can encourage active learning within the classroom, especially for asynchronous learning environments. Both types of student engagement activities can be created using PlayPosit, and may work best as low-stakes assignments or as ungraded items in Canvas. To create an ungraded PlayPosit bulb, add your PlayPosit bulb as an embedded item in a page or as an external tool within a Module. If you still want students to see some sort of grade for self-assessment purposes, you can assign each bulb interaction a point within the PlayPosit interface. While these interactions will display point values within PlayPosit, the points earned by completing interactions will not push back to Canvas and the PlayPosit activity will not be reflected in the Canvas Gradebook. More information on how to create PlayPosit activities that are graded or ungraded in Canvas can be found in the UWGB IT Knowledgebase, UKnowIt.

How can PlayPosit help save instructors time?

PlayPosit isn’t just a resource that will benefit your students and their learning experience within the classroom. It also has many benefits for instructors. There are several features of this tool that can be time savers for you as an instructor! Not only is building a PlayPosit bulb a quick way to enhance your existing course videos, but PlayPosit automatically saves interactions you make for your bulbs within a personal interaction library. PlayPosit also allows you to create templates for individual interactions or sets of interactions. You can then access these individual interactions, located under My Interactions within the PlayPosit interface, or your saved templates for use in future bulbs to make the bulb creation process even faster! For more information on how to access and use these timesaving PlayPosit features, see this PlayPosit resource. Remember, since UWGB possesses a license for this tool, you as an instructor have access to all of these features.  

Beyond saving the interactions and templates you personally create, PlayPosit also allows you to co-edit bulbs with colleagues using the collaborations feature, or to share out PlayPosit bulbs to fellow instructors by using the folders feature. These sharing features can be used together or separately depending on if you wish to include your colleagues as editors, or to simply provide them with a copy of one of your bulbs. For directions on how to share and copy bulbs, please review this PlayPosit resource. Not only can you share individual bulbs within PlayPosit, but you can also collaborate and share interaction templates with your colleagues! For more information on how to collaborate with other instructors, please see this resource provided by PlayPosit.

Questions?

These are only a few of the features PlayPosit offers instructors and students. If you have any questions about PlayPosit, please feel free to reach out to the UWGB Center for the Advancement of Teaching and Learning through email (catl@uwgb.edu) or for troubleshooting you can contact PlayPosit customer support through their website (PlayPosit Knowledge) by clicking on “Contact” in the upper right corner. For a more detailed discussion of PlayPosit use cases and how you can harness the tool in your own Canvas course, you can schedule a consultation with CATL here

Helpful Terms and Hints

Bulb – The term used to refer to a PlayPosit interactive video.

Interaction – The term for the different questions, images, audio, or other media resources which can be embedded into a PlayPosit bulb. There is no limit to how many can be included within a bulb.

PlayPosit Designer – This is the interface used to create PlayPosit bulbs, insert your video source, embed interactions, and select bulb settings.

PlayPosit 3.0 Designer – This refers to the current version of PlayPosit software being used.

Learner Made Content – This refers to PlayPosit bulbs and interactions created by learners and submitted for assessment to instructors.

If you do not wish to work in the PlayPosit interface within Canvas and prefer a larger screen to build and edit your videos, you can open your PlayPosit account in any browser. In order to do so however, you must have already opened PlayPosit within your UWGB Canvas account. If you have not yet accessed PlayPosit at UWGB, follow the instructions below. 

How to log into PlayPosit through your UWGB Canvas Account: 

  • First, log into your UWGB Canvas account in one tab of a browser of your choice. 
  • Navigate to the Assignments section if you wish to build a graded PlayPosit activity or to the Pages section for an ungraded PlayPosit activity. 
  • For a Page, create a New Page by clicking on + Page and then click the down arrow to the left of the plug-in icon in the Rich Content Toolbar. The plug-in icon looks like a two-prong plug with a cord. Then click on View All and select PlayPosit. This will open a window with the words Set Link in the top right corner. Click on the words Enter PlayPosit in the middle of the window or Set Link in green on the right side of the window. You should now be in PlayPosit, skip to the last step in these instructions to open PlayPosit in a browser. 
  • For an Assignment, create a New Assignment by clicking on + Assignment, then under Submission Type, select External Tool. Next, click on Find under "Find an External Tool URL" and scroll down then select PlayPosit. A window with the words Link Resource form External Tool will open, click on either Enter PlayPosit or Set Link in green. You should now be in PlayPosit, skip to the last step in these instructions to open PlayPosit in a browser. 
  • Now, in a separate tab in the same browser where you logged into Canvas, open PlayPosit Knowledge. Click on the PlayPosit logo in the upper right portion of the screen. The PlayPosit logo is the image of the dog. This will open your PlayPosit account provided by UWGB. Here you can build, share, and collaborate on bulbs using the larger screen view provided by the browser. To set the link to your desired bulb for a graded Assignment in Canvas or in a Canvas Page however, you should follow the instructions above to open PlayPosit in Canvas then select your bulb. 

Yes, in PlayPosit you can include several video segments into a single bulb. Do this in the Video Segments screen when creating a new bulb. If you would like to change the order of the video segments within your bulb, you can toggle on the Enable drag and drop recording option at the top of the Video Segments screen. Move videos into the order in which you would like them to be seen. Once you are finished, toggle off the Enable drag and drop recording.

Note: For new PlayPosit playlists, you should reorder your video segments before you add interactions. Interactions in a playlist will not move with the video when it is reordered. 

Yes, with the UWGB institutional license PlayPosit will automatically pull in caption files that are already associated with your videos (such as YouTube videos with captions or Kaltura videos. You can also upload caption files directly to PlayPosit such as .vtt and .srt files. 

To check your video for captions, navigate to the My Bulbs page in PlayPosit and follow the steps below. 

  • In the far right of the screen under Actions, click on the three vertical dots to the right of the video you wish to check and then from the dropdown menu select Edit. 

  • Click on the Video Segments tab in the PlayPosit Designer and click on the edit icon (it looks like a gray pencil) for the video you wish to caption. The edit icon is in the upper right corner of the video segment.  

  • Select Edit Video Segment from the options presented. Then click on the Captions tab in the Edit Video Segment screen. 

  • In this screen, you can now have PlayPosit search for available captions, or you can upload your caption file.  
  • To search for captions, click on the View Available YouTube Captions, then select from the available options PlayPosit was able to fetch by checking the box to the right of the desired language choice. Once your choices are finalized, select Download in the bottom right corner to save your choices. 

“Required” Reading: Guiding Students Through Your Course with Canvas Module Requirements

When provided with a task, almost invariably, some students will overlook or ignore provided instructions, skip past foundational lessons, and end up taking their own “creative” approach to completing it. While some students can find success going their own way, when a student misses instructions, they often end up making life harder for themselves and their instructor. When teaching with Canvas, you have access to tools that can help add order to how students progress through your lessons, instructions, and assignments. When you organize and present your content in modules, you gain the ability to add requirements that require each student to view and/or interact with specified course items before they can progress and access items positioned further down in the course module order. You can ensure that your students’ route to an assignment goes through the important scaffolding pages. While they are not a panacea and should be applied with careful thought so that they act as a guide and not an unnecessary obstacle for students, implementing module requirements can help prevent students from starting a task before they have engaged with preparatory lessons and activities.

Forcing top-to-bottom progression within a module

Within a single module you can use requirements to force students to progress through that module in top-to-bottom order. These requirements can help enforce that students, for example, view a page with important instructions before they can access and submit to an assignment. To set up a module with requirements that students must complete in order, click the module header’s Options icon, then click Edit to open the Edit Module Settings menu. In this menu, select + Add Requirement to begin adding your first requirement to the module and reveal additional options. Enabling the Students must move through requirements in sequential order checkbox will lock each module item until all the requirements above that item in that module have been completed. This forces students to work through the module requirements in top-to-bottom order. You then need to add requirements to the module. You will need to add one requirement for each module item students need to complete in order.

You add a requirement by selecting + Add Requirement, and then you configure a requirement by making selections in two drop-down menus. In the left drop-down menu, select the module item to which you want to add the requirement. In the right drop-down menu, select how the students must complete that requirement. Depending on the type of the module item, this second drop-down menu will show several options (click each option below to expand it and reveal suggested uses):

Only requires students to open and view the module item. This is a simple requirement well-suited for course Pages.

Requires students to open the item and then click a Mark as done button at the bottom of the page. If you use this type of requirement, make sure to provide students with instructions for marking items as done. Students can overlook the button and feel stuck if they’ve never encountered this requirement before.

Only used for Discussions and Pages that are set to allow students to make edits. Students will satisfy this requirement once they have posted a reply in the Discussion or saved an edit to the Page. Avoid picking this requirement for pages which can only be edited by Teachers, as students will not be able to complete the requirement.

Requires the student to make an Assignment submission, make a reply in a graded Discussion, or complete a Quiz attempt.

Requires students to earn at least the minimum score on the graded item, which you designate when setting up the requirement. This type of requirement works well with Quizzes that allow multiple or unlimited attempts.

Adding a requirement for each module item that contains important information or a required task will ensure students engage with the content in your intended order.

Locking a module until the previous module has been completed

Requirements can also be leveraged to lock an entire module until the student completes the requirements of one or more modules above it. Controlling module-to-module progression is done with the additional step of adding module prerequisites. You can add one or more prerequisites to a module through the same Edit Module Settings menu where you add requirements. When adding a module prerequisite, you select an entire module that appears above the module you are currently editing. Adding one or more prerequisites to a module will prevent a student from accessing all content in that module until they have completed the requirements of each module that is set as a prerequisite. Any module that is selected as a prerequisite must contain at least one requirement—Canvas needs to know the criteria for completing that module and satisfying the prerequisite. A module that is selected as a prerequisite but has no requirements will have no effect on course progression.

Screenshot of the Edit Module Settings menu: “Module 1” is selected as a prerequisite for “Module 2”
Edit Module Settings menu: “Module 1” is selected as a prerequisite for “Module 2”

Here is an example of how you can set this up in a course. Let’s say that the content in Module 1 is so fundamental to the content in Module 2 that you want to prevent students from viewing anything in Module 2 until they’ve fully engaged with the content in Module 1. Imagine that both Module 1 and Module 2 contain a Page, a Discussion, and an Assignment. Your first step in forcing students to complete Module 1 before accessing Module 2 is to edit Module 1 and add three requirements:

  1. Module 1 Page – view the item
  2. Module 1 Discussion – contribute to the page
  3. Module 1 Assignment – submit the assignment
Screenshot of the the Edit Module Settings menu with the example requirements for Module 1 set up
Edit Module Settings menu with the example requirements for Module 1 set up

Adding these requirements tells Canvas how to determine whether a student has completed Module 1: a student has completed Module 1 once they have viewed the Page, made a reply in the Discussion, and submitted to the Assignment. The next step is to edit Module 2 and add a prerequisite, selecting Module 1 as the prerequisite module. That is all that is needed to force students to complete Module 1 before accessing Module 2; it is not necessary to add any requirements to Module 2 unless you plan to use Module 2 as a prerequisite in a subsequent module. You may still want to add requirements to Module 2 just for the additional visual guidance and feedback they provide to students.

Screenshot of two example modules with requirements and prerequisites set up
Two example modules with requirements and prerequisites set up

Use Cases

There are many creative ways you can leverage module requirements and prerequisites to exercise control over the flow of your course. Here are a few illustrative use cases (click each to expand it):

You can require students to acknowledge the policies and essential information contained in your syllabus before they can access the rest of your course by creating a syllabus quiz and setting up module requirements and prerequisites. First, add a quiz to the “Introduction” module at or near the top of your Canvas course and add any number of objective questions to test your student’s knowledge of important syllabus content. Set up the quiz to allow for unlimited attempts and to keep the highest score. Next, edit your “Introduction” module to add a requirement that students score at least X points on the Syllabus Quiz. “X” can be whichever minimum score you deem good enough to allow progress through the course. Finally, edit each subsequent module of the course to add the “Introduction” module as a prerequisite. This setup requires students to take (and retake) the Syllabus Quiz until they score at least X points before they can access any of the content after the “Introduction” module.

You can set up requirements within a single module to have students complete a pretest quiz before going through the module content and then take a post-test quiz after completing the module content. This process could help you evaluate the effectiveness of your instruction and/or apply a metacognitive approach to help students gain awareness of their learning and gaps in their knowledge. To create this setup, add a pretest quiz at or near the top of a module and a post-test quiz at or near the bottom of the module and put lesson content and additional formative assessment activities in between the two quizzes. Edit the module to add a requirement to each module item (including requirements to “submit” to each of the two quizzes) and enable the Students must move through requirements in sequential order checkbox. Students will need to progress through the module in top-to-bottom order, first taking the pretest at the top of the module, then engaging with the content, and finally taking the post-test at the bottom of the module. You can set your pretest quiz to be a “Practice Quiz” so that scores are not added to the gradebook.

Even if you don’t need to force a linear progression through your course modules, adding requirements to your modules automatically adds visual feedback that helps to communicate expectations to students and helps students track their own progress through the course. Any module item that is used in a module requirement will display its requirement underneath its title within the module. This is a simple automatic piece of visual feedback that can help students keep track of their tasks. Students also see additional indicators of their progress. After a student completes a requirement, the module item is marked with a green checkmark to signal completion. If a student has started a module but has not yet completed all its requirements, that module’s header is marked with a red circle; once the student completes all of a module’s requirements, this indicator changes to a green checkmark. Instructors can monitor student progress through module requirements by clicking the View Progress button located above the first module of the course.

The visual feedback provided by module requirements adds a light element of gamification to your course, turning each module into a list of sub-missions to be completed. Requirements can be further leveraged to add game-based learning elements to your courses. Use requirements to set minimum scores on low-stakes quizzes that allow multiple attempts and unlock harder “levels” of your course once a student achieves the target score. You can further add the Canvas Badges (Badgr) integration to your course to award “achievements” for the completion of modules and (optionally) enable an anonymous leaderboard to foster competitive motivation among students.

Conclusion (Prerequisite: Read All Above Sections)

We hope this blog post has given you a sense of how and when you can use module requirements in your Canvas courses. When used thoughtfully, module requirements are an effective tool for encouraging students to move through your course in the sequence you intended. Recall from your past teaching that assignment or a module in a course where students got off-track because they somehow managed to miss vital information that was right there for them. Next time you teach that course, try employing requirements to funnel students through that important supporting content before they can start work on the assignment. If you have an idea for employing module requirements in your Canvas course and would like to discuss how to best put it together, please reach out to catl@uwgb.edu or request a CATL consultation to meet with a member of the CATL team!

Hypothesis for Canvas

The logo for Hypothesis (stylized as “hypothes.is”).

Hypothesis, a “social annotation tool” that integrates with Canvas, is a digital and social take on the classic practice of physically writing in the margins of a text. It is an annotation overlay that you can add to any PDF or website reading assigned in your Canvas course. Adding an annotation to a passage is as simple as selecting a word or phrase and then typing the annotation in the Hypothesis overlay. Students and instructors can view and reply to each other’s annotations to ask and answer questions and build upon each other’s ideas. This post contains ideas for using Hypothesis in your course and instructions for creating activities with the Hypothesis Canvas integration, which is available in all UWGB courses.

Hypothesis Use Cases

The Hypothesis overlay being used to annotate a New York Times article on a reptile fossil.

Annotation with Hypothesis can facilitate many types of class activities. Here are a few example activities:

  • Assign a reading and ask students to leave questions as annotations on passages they find difficult. Instructors can reply to annotations to answer these questions, use the questions to inform lessons and follow-up resources, or assign students to review and answer their peers’ questions.
  • Instructors can add their own annotations to a reading before assigning it to students to create a guided reading experience that signals areas of importance and offers clarification at potential sticking points. Instructor annotations can include questions for discussion that students can reply to right “in the margins” of the reading, placing discussions in context.
  • Task students with developing a glossary layer on an assigned text by adding annotations to difficult words, passages, or allusions. Encourage students to include definitions, contextual research, and possible interpretations in their annotations.
  • Present an example of an essay, lab write-up, or proof that intentionally has errors. Ask students to identify and correct these missteps by adding annotations to the document either as a group or as an entire class.

These use cases were inspired by the post Back to School With Annotation: 10 Ways to Annotate With Students on the Hypothesis blog. Read that post and explore other posts on their blog to collect even more ideas!

Learning Hypothesis

The app overlay has a quick start guide on how to create your first annotation, highlight, or reply to another annotation, along with support links.

Hypothesis has a robust online user guide with several resources tailored specifically to helping instructors and students use Hypothesis in Canvas.

Resources for Instructors

The following guides cover the technical basics of adding Hypothesis activities to your Canvas course.

Resources for Students Everyone!

Providing these resources to your students can help them understand how to use Hypothesis and how to write quality annotations. The insights in these articles are valuable for anyone new to Hypothesis and digital annotation, so we also encourage instructors to review them!

Finding Support

Technical support for Hypothesis is available by contacting the vendor’s support team through their simple Help Request web form and additional user guides are available on Hypothesis’s Help website. As always, CATL staff are available to provide consultations to discuss how to best leverage Hypothesis in your courses! Request a CATL consultation online or email your questions to us at catl@uwgb.edu.

End-of-Semester Canvas Survival Guide

We know instructors and students are both tired at this point in the semester. We at CATL want to provide as much help and support as we can as you work to finish up both teaching and grading. One thing we can offer is a list of resources about Canvas that may make the grading process a bit easier or even show you things that you didn’t know you could do. Click on one of the suggestions below to expand the accordion and see the related guides.

Quizzes and Assignments

Assigning Alternate Assignment Due Dates to Specific Students – Do you need to grant an extension on an assignment or quiz to a specific student or students? This guide shows you how to set up alternate student-specific due dates and availability dates.

Using Quiz Moderation (Classic Quizzes) - Are you giving a final exam in Canvas? This guide explains how to use the quiz moderation page to view student attempts, grant additional time to a specific student, and allow additional attempts for a specific student. 

Using Quiz Moderation (New Quizzes) - Have you already made the switch to using “New Quizzes” in Canvas? Use this guide to learn about the New Quizzes moderation page to view attempts and allow additional time or attempts to individual students. 

Regrading Quiz Questions (Classic Quizzes) - If you find an issue with a multiple choice, true/false, or multiple answer quiz question after students have taken a quiz, this guide explains how you can use the regrade option to change a question’s correct answer and automatically award points for the question to some or all students. 

Regrading Quiz Questions (New Quizzes) - If you’ve already made the switch to using “New Quizzes” in Canvas, this guide explains the regrade options in the new tool. 

Finalizing Grades 

Create Grade Columns for Non-Submission Assignments - Non-submission assignments are useful for providing grades for work outside of Canvas. Creating a non-submission assignment adds a column to the Canvas gradebook for you to enter these grades. 

Awarding Extra Credit in Canvas - Canvas has a few methods for handling extra credit. You might award “bonus” points by creating an assignment worth 0 points, or by adding extra points to a regular assignment or quiz in SpeedGrader, for example. 

Total Grade Calculation with Missing Assignments – This guide explains how Canvas calculates final grades and the importance of regularly entering zeroes for missing work in the Canvas gradebook.

Sending Final Grades to SIS - This guide explains how to use the time-saving grade sync feature that allows you to quickly send final grades from Canvas to SIS. 

Student Course Access 

Course Dates and Access FAQ and Information - Read this guide to learn about how term dates and course dates work in Canvas and how you can allow or restrict your students’ ability to view the Canvas course after its conclusion. 

Extend Student Access Tool - Do you have a student taking an “Incomplete in your course? This guide shows you how to use the “Extend Student Access” tool to give an individual student more time to access and finish work in the Canvas course. 

Other Canvas Tips

Using "Undelete" to Recover Deleted Items - If you accidentally deleted something in your course while cleaning it up and need to get it back, this guide explains how to access your course’s “undelete” page to restore deleted content. 

Where to Get Help 

You can get 24/7 support from Canvas by live chat, phone, or email by clicking the “Help” button in the Canvas global navigation menu bar on the left side of any page in Canvas. 

As always, CATL is also here to help you design your course, set up your assignments, and work through the process of grading. Fill out our consultation request form to schedule a meeting with a member of the CATL team.

PlayPosit Use Cases

PlayPosit has many potential applications for teaching, so it can be overwhelming to decide how you might use it in your own course. We’ve collected some use cases spanning a range of disciplines and course formats as a way to help you think about how other instructors are already using the tool, and then, by extension, how you might adopt it for your own teaching style and content area. The use cases below are organized by four of PlayPosit’s features: 

  • Core Platform, which refers to PlayPosit’s interactive video builder and player used for asynchronous learner engagement 
  • Broadcast, which is PlayPosit’s live audience response system used for synchronous learner engagement 
  • Learner Made Content, which refers to PlayPosit bulbs or interactions created by learners and assessed by instructors 
  • Peer Review, in which learners review and provide feedback on PlayPosit content created by their peers 

Core Platform (Asynchronous Learner Engagement)

Knowledge Checks

One of the most common ways to use PlayPosit’s main platform is to add knowledge checks to videos. These knowledge checks might be as simple as an objective true-false question, or as complex as a subjective free response question requiring students to reflect, analyze, or extrapolate. 

PlayPosit player, paused with a multiple choice question popped up.
In this example by the Digital Learning staff at the University of Arizona, the instructor added a knowledge check in their syllabus overview video about the number of attempts for reading quizzes.

Since PlayPosit bulbs can be either graded or ungraded, you can pick the option that works best for the function of the bulb. If you wish to keep the knowledge checks in your lectures low-stakes and for the sole benefit of the users, they might remain ungraded. Alternatively, perhaps you wish to replace some of your formative assessments (e.g. a post-lecture quiz) with an in-lecture quiz in the form of a PlayPosit bulb, in which case you would want to create a graded item. Learn more about graded and ungraded bulbs, as well as the types of interactions available, in this other PlayPosit toolbox article. 

Engagement Checks

Another way to keep your PlayPosit interactions low stakes is to use engagement checks, rather than knowledge checks. In distance learning environments, instructors often worry that students won’t watch their videos. PlayPosit interactions can be built in to ensure just that. For these scenarios, you might make use of the poll and pause point interaction types in particular. 

Polls function like a multiple-choice question but with no correct or incorrect answers. Since there are no right answers, polls are a simple, low-stakes way to add student engagement your bulbs. If the bulb is graded and you add a point value to the polling interaction, students are awarded points simply for responding.  

Pause points are interactions where students simply have to click a button to continue. Pause points might be useful for adding extra tips or reminders or linking to external resources. Like polls, if you add a point value to the interaction, students will receive full points for simply “completing” the interaction when used in a graded bulb. 

PlayPosit player paused with a pause point interaction popped up. The interaction includes a statement with a hyperlink and a blue "Continue" button.
In this example, a pause point interaction was added to direct learners to a supplemental resource in the form of an external link.

Learner Notes 

The notes feature is not an interaction type, but a default feature built into the PlayPosit video player. Learners can add timestamped notes while watching PlayPosit bulb, making it easy for them to go back and review certain points of a bulb at a later time. It also lets learners add content like images, links, and equations to their notes. If you would like students to make use of this feature, consider adding a few pause point interactions to your videos with suggestions for what points to include in their notes, like an important equation or acronym. You can also use PlayPosit’s pre-built learner notes template from the template gallery. 

PlayPosit player with the "notes" tab selected. The learner has left a note with a link.
In this example, the learner left a note at 0:25 in the video with a “note to self” and a link to a web resource.

Potential Use Cases

In the first session of a synchronous course, instructors often spend a good chunk of time going over the syllabus. With PlayPosit, you could instead record a syllabus overview video and then add knowledge checks with questions like, “when are office hours?” or “how many times can you take a quiz?”. See this example from the University of Arizona if you want to try it out from the learner's perspective.

In both empirical studies and student surveys, the prevailing messaging around lecture videos is that shorter is better. If you have a 45-minute lecture recording, consider breaking it down into smaller chunks of 5–15 minutes and then delivering them as PlayPosit bulbs. Adding PlayPosit interactions can incentivize students to watch all the way through and help you track which students are interacting with the lectures.

Some instructors are moving away entirely from synchronous lectures, opting for pre-recorded content delivery. Synchronous class time, whether face-to-face or virtual, can then be used to answer student questions, go over homework, or hold class discussions instead. One way to start is by using bulbs for pre-lab training, in which you assign PlayPosit bulbs in advance that deliver the necessary background information needed to engage in a lab, studio, or other hands-on activity that takes place during class.

Several PlayPosit interactions or features allow asynchronous viewers to contribute their thoughts and questions. Instructors can review learner feedback to get a sense of what is working in the class and identify concepts that require additional review. See our follow-up posts from What Will You Carry Forward?, Collecting and Working with Mid-Semester Feedback, and Building Information Literacy and Racial Literacy Together for a few examples. The bulbs in each of these posts use a different type of interaction (pause point, discussion, and free response, respectively) so it may be worth taking a look at all three to compare.

Broadcast (Synchronous Learner Engagement) 

The use cases in the previous sections make use of what PlayPosit refers to as its “core platform”, however, our license includes additional features. One of these features is “Broadcast“, PlayPosit’s audience response system. Unlike the core platform, Broadcast is used in synchronous learning environments.  

Broadcast allows instructors to push interactive learning content (quiz questions, polls, etc.) to both in-person and remote synchronous learners’ personal devices for real-time engagement and feedback. You can learn more about using Broadcast in this PlayPosit guide. 

The PlayPosit player before launching a Broadcast bulb as a student.
Like regular, graded PlayPosit bulbs, students will launch PlayPosit broadcasts through a Canvas assignment. Image credit: PlayPosit.

Potential Use Cases

Julie Wondergem in Chemistry has used the Broadcast feature to send out multiple choice questions during her lectures to check student understanding and increase engagement. Students are allowed to work together and the questions are only a half-point each, keeping the task low-stakes while still rewarding students for engagement and attentiveness.
Students are often hesitant to raise their hand and ask for something to be repeated, a certain problem or concept be reviewed, or request that the instructor move more slowly. Polls or free-response questions can be used to gauge how students are doing during class while keeping their responses anonymous to their peers.

Learner-Made Content

All of the examples up until this point have focused on instructor-made content, but did you know that you can have students create bulbs too? PlayPosit refers to bulbs, interactions, and other content made by students as “learner made content“, and student-created bulbs as “learner made bulbs ” (LMBs).  

You can either have students select their own video for creating a bulb or provide them with a video link to use. In the latter scenario, students will add their own annotations or interactions to demonstrate their understanding of the video’s content. Another nice feature of learner-made bulbs is that the instructor can leave timestamped feedback on students’ bulbs. This could be particularly useful for student presentations, instrumental or vocal performances, or other activities that you would like students to record for assessment. You can learn more about creating assignments for learner-made bulbs in this PlayPosit guide. 

Learner-made content assignment in Canvas from a student perspective.
The image above is what a student will see in Canvas when they click on a learner-made content assignment. Clicking “Start” will launch the PlayPosit bulb designer. Image credit: PlayPosit.

Potential Use Cases

Some fields like nursing or counseling require a lot of instructor observation, which can prove challenging in distance learning environments. One nursing instructor was able to simulate one-on-one, face-to-face observation by having her students record their activities and then create PlayPosit bulbs out of the videos. The instructor could then provide timestamped feedback and supply additional resources if needed (images, links, etc.). Another instructor in counseling has her students use learner-made content in a very similar way.

When you create a learner-made content assignment, you can provide a video link for your students to use. The students’ task then is to add interactions or annotations based on your guidelines in the instructions. For example, perhaps you find a YouTube video of a lab experiment. The instructions might ask students to add this video to their bulb and then add timestamped annotations identifying and describing the steps of the scientific process as they occur in the video.

Peer Review

Peer review builds on the previous feature, learner-made content. Like a regular peer review Canvas assignment, students first submit their own video to the PlayPosit peer review assignment and are then assigned peers’ video submissions to review and leave feedback.  

One useful aspect of this tool is that student reviewers leave their feedback as discussion comments that are each timestamped to indicate the exact moment of the video when the reviewer paused and entered the comment. Instructors may additionally create a rubric for student reviewers to complete. You may also appreciate that PlayPosit requires reviewers to watch the video in full before submitting their review. As the instructor, you can view both the learner videos and the feedback left by other students and assign grades accordingly. Learn more about peer review in this PlayPosit guide. 

Peer Review assignment in Canvas. Students can toggle between tabs to give feedback, view (peer) feedback, and view instructor feedback, as well as see their own bulb and assigned bulbs.
After a student has submitted their own video, they will be able to see which students they have been assigned to for peer review, leave feedback for submitted videos, and view their own feedback from peers or the instructor. Image credit: PlayPosit.

Potential Use Cases

Students will be assigned certain videos to view, which they can then leave timestamped feedback for. You can set the perimeters of the assignment to control what kind of feedback is provided. For example, do you want students to leave questions about the presentation content on their peers’ videos? Do you wish for them to critique or correct the information presented? Or are they assessing their peers’ presentation and public speaking skills?
Similar to the nursing and counseling scenarios described above in the learner-made content section, you can also have students record their activities and create a video for peer review. This could be useful for peer observation activities in courses where in-person observation is not feasible. The video format allows students to see their peers’ skills across time and space, while the PlayPosit player allows them to leave timestamped feedback and fill out a rubric created by the instructor.

Questions?

As you explore PlayPosit, we encourage you to consult PlayPosit’s extensive knowledgebase of instructor guides, including this guide for Canvas users. You can contact PlayPosit support directly by clicking the “Contact” link on their support site and filling out their web form. PlayPosit also offers live trainings, webinars, and office hours. If you are interested in any of these vendor-led training opportunities, contact dle@uwgb.edu to learn more. 

As always, we also welcome you to request a CATL consultation if you’d like to see a demo of PlayPosit or talk through how you might use it in your course.