As a follow-up to Mays Imad’s recent talk at our university, we invite you to explore the resources below on topics related to student and employee mental health, as well as trauma-informed education in general and some specific strategies for instructors and staff members. Please know that we are focusing on individual well-being and intervention strategies simply because that is what people have the most power to change. We fully recognize that there are also larger systems and structures (and pandemics) in place that play a significant role in the issues Dr. Imad addressed.
College Student Mental Health: Challenges & Resources
We know instructors and students are both tired at this point in the semester. We at CATL want to provide as much help and support as we can as you work to finish up both teaching and grading. One thing we can offer is a list of resources about Canvas that may make the grading process a bit easier or even show you things that you didn’t know you could do. Click on one of the suggestions below to expand the accordion and see the related guides.
Quizzes and Assignments
Provide a student with an extension for submitting an assignment or quiz.
Assigning Alternate Assignment Due Dates to Specific Students – Do you need to grant an extension on an assignment or quiz to a specific student or students? This guide shows you how to set up alternate student-specific due dates and availability dates.
Provide a student with additional time or attempts for a quiz.
Regrading Quiz Questions (Classic Quizzes) - If you find an issue with a multiple choice, true/false, or multiple answer quiz question after students have taken a quiz, this guide explains how you can use the regrade option to change a question’s correct answer and automatically award points for the question to some or all students.
Regrading Quiz Questions (New Quizzes) - If you’ve already made the switch to using “New Quizzes” in Canvas, this guide explains the regrade options in the new tool.
Finalizing Grades
Enter grades for participation, in-class work, or other work submitted outside of Canvas.
Create Grade Columns for Non-Submission Assignments - Non-submission assignments are useful for providing grades for work outside of Canvas. Creating a non-submission assignment adds a column to the Canvas gradebook for you to enter these grades.
Enter extra credit.
Awarding Extra Credit in Canvas - Canvas has a few methods for handling extra credit. You might award “bonus” points by creating an assignment worth 0 points, or by adding extra points to a regular assignment or quiz in SpeedGrader, for example.
Adjust final grades by entering “0s” for missing work.
Total Grade Calculation with Missing Assignments – This guide explains how Canvas calculates final grades and the importance of regularly entering zeroes for missing work in the Canvas gradebook.
Send final grades from Canvas to SIS.
Sending Final Grades to SIS - This guide explains how to use the time-saving grade sync feature that allows you to quickly send final grades from Canvas to SIS.
Student Course Access
Set or adjust course access dates.
Course Dates and Access FAQ and Information - Read this guide to learn about how term dates and course dates work in Canvas and how you can allow or restrict your students’ ability to view the Canvas course after its conclusion.
Provide students assigned a grade of "Incomplete" with extended course access.
Extend Student Access Tool - Do you have a student taking an “Incomplete” in your course? This guide shows you how to use the “Extend Student Access” tool togive an individual student more time to access and finish work in the Canvas course.
Other Canvas Tips
Recover deleted items.
Using "Undelete" to Recover Deleted Items - If you accidentally deleted something in your course while cleaning it up and need to get it back, this guide explains how to access your course’s “undelete” page to restore deleted content.
Where to Get Help
You can get 24/7 support from Canvas by live chat, phone, or email by clicking the “Help” button in the Canvas global navigation menu bar on the left side of any page in Canvas.
As always, CATL is also here to help you design your course, set up your assignments, and work through the process of grading. Fill out our consultation request form to schedule a meeting with a member of the CATL team.
PlayPosit has many potential applications for teaching, so it can be overwhelming to decide how you might use it in your own course. We’ve collected some use cases spanning a range of disciplines and course formats as a way to help you think about how other instructors are already using the tool, and then, by extension, how you might adopt it for your own teaching style and content area. The use cases below are organized by four of PlayPosit’s features:
Core Platform, which refers to PlayPosit’s interactive video builder and player used for asynchronous learner engagement
Broadcast, which is PlayPosit’s live audience response system used for synchronous learner engagement
Learner Made Content, which refers to PlayPosit bulbs or interactions created by learners and assessed by instructors
Peer Review, in which learners review and provide feedback on PlayPosit content created by their peers
Core Platform (Asynchronous Learner Engagement)
Knowledge Checks
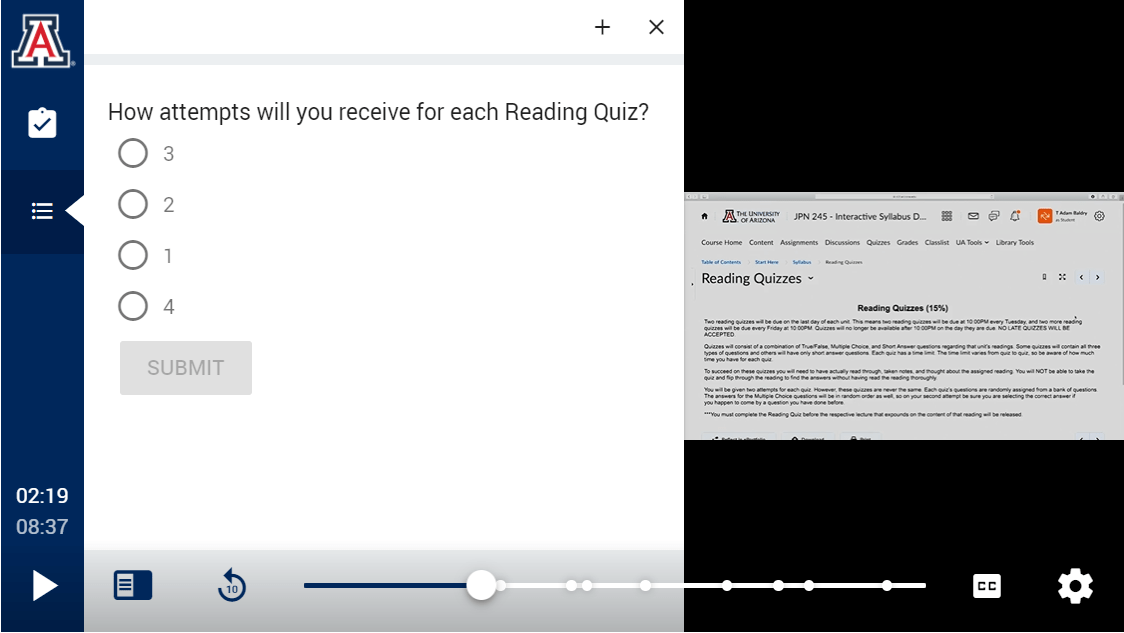
One of the most common ways to use PlayPosit’s main platform is to add knowledge checks to videos. These knowledge checks might be as simple as an objective true-false question, or as complex as a subjective free response question requiring students to reflect, analyze, or extrapolate.
In this example by the Digital Learning staff at the University of Arizona, the instructor added a knowledge check in their syllabus overview video about the number of attempts for reading quizzes.
Since PlayPosit bulbs can be either graded or ungraded, you can pick the option that works best for the function of the bulb. If you wish to keep the knowledge checks in your lectures low-stakes and for the sole benefit of the users, they might remain ungraded. Alternatively, perhaps you wish to replace some of your formative assessments (e.g. a post-lecture quiz) with an in-lecture quiz in the form of a PlayPosit bulb, in which case you would want to create a graded item. Learn more about graded and ungraded bulbs, as well as the types of interactions available, in this other PlayPosit toolbox article.
Engagement Checks
Another way to keep your PlayPosit interactions low stakes is to use engagement checks, rather than knowledge checks. In distance learning environments, instructors often worry that students won’t watch their videos. PlayPosit interactions can be built in to ensure just that. For these scenarios, you might make use of the poll and pause point interaction types in particular.
Polls function like a multiple-choice question but with no correct or incorrect answers. Since there are no right answers, polls are a simple, low-stakes way to add student engagement your bulbs. If the bulb is graded and you add a point value to the polling interaction, students are awarded points simply for responding.
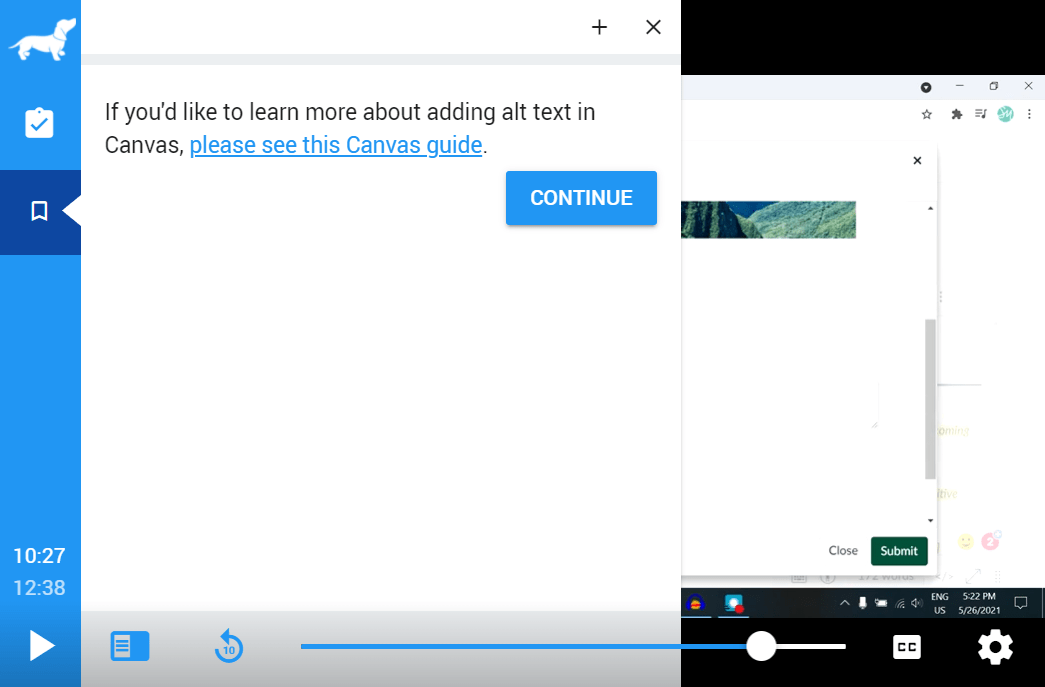
Pause points are interactions where students simply have to click a button to continue. Pause points might be useful for adding extra tips or reminders or linking to external resources. Like polls, if you add a point value to the interaction, students will receive full points for simply “completing” the interaction when used in a graded bulb.
In this example, a pause point interaction was added to direct learners to a supplemental resource in the form of an external link.
Learner Notes
The notes feature is not an interaction type, but a default feature built into the PlayPosit video player. Learners can add timestamped notes while watching PlayPosit bulb, making it easy for them to go back and review certain points of a bulb at a later time. It also lets learners add content like images, links, and equations to their notes. If you would like students to make use of this feature, consider adding a few pause point interactions to your videos with suggestions for what points to include in their notes, like an important equation or acronym. You can also use PlayPosit’s pre-built learner notes template from the template gallery.
In this example, the learner left a note at 0:25 in the video with a “note to self” and a link to a web resource.
Potential Use Cases
Create a syllabus quiz
In the first session of a synchronous course, instructors often spend a good chunk of time going over the syllabus. With PlayPosit, you could instead record a syllabus overview video and then add knowledge checks with questions like, “when are office hours?” or “how many times can you take a quiz?”. See this example from the University of Arizona if you want to try it out from the learner's perspective.
Break up long lectures and documentaries
In both empirical studies and student surveys, the prevailing messaging around lecture videos is that shorter is better. If you have a 45-minute lecture recording, consider breaking it down into smaller chunks of 5–15 minutes and then delivering them as PlayPosit bulbs. Adding PlayPosit interactions can incentivize students to watch all the way through and help you track which students are interacting with the lectures.
Flip your classroom
Some instructors are moving away entirely from synchronous lectures, opting for pre-recorded content delivery. Synchronous class time, whether face-to-face or virtual, can then be used to answer student questions, go over homework, or hold class discussions instead. One way to start is by using bulbs for pre-lab training, in which you assign PlayPosit bulbs in advance that deliver the necessary background information needed to engage in a lab, studio, or other hands-on activity that takes place during class.
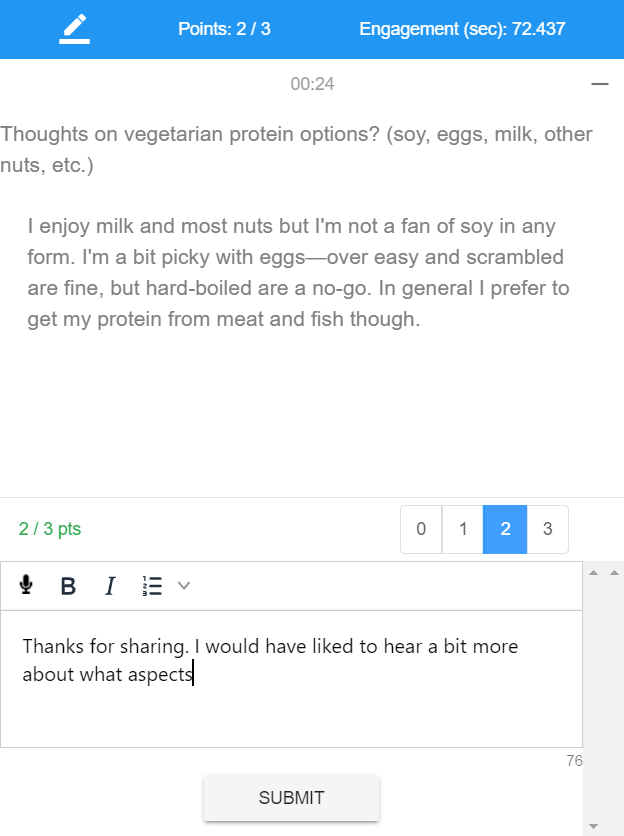
Solicit comments and questions from asynchronous learners
Several PlayPosit interactions or features allow asynchronous viewers to contribute their thoughts and questions. Instructors can review learner feedback to get a sense of what is working in the class and identify concepts that require additional review. See our follow-up posts from What Will You Carry Forward?, Collecting and Working with Mid-Semester Feedback, and Building Information Literacy and Racial Literacy Together for a few examples. The bulbs in each of these posts use a different type of interaction (pause point, discussion, and free response, respectively) so it may be worth taking a look at all three to compare.
Broadcast (Synchronous Learner Engagement)
The use cases in the previous sections make use of what PlayPosit refers to as its “core platform”, however, our license includes additional features. One of these features is “Broadcast“, PlayPosit’s audience response system. Unlike the core platform, Broadcast is used in synchronous learning environments.
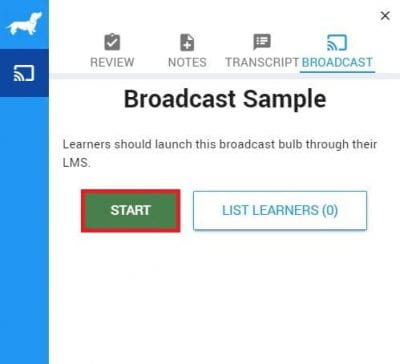
Broadcast allows instructors to push interactive learning content (quiz questions, polls, etc.) to both in-person and remote synchronous learners’ personal devices for real-time engagement and feedback. You can learn more about using Broadcast in this PlayPosit guide.
Like regular, graded PlayPosit bulbs, students will launch PlayPosit broadcasts through a Canvas assignment. Image credit: PlayPosit.
Potential Use Cases
Provide low-stakes active learning opportunities during class
Julie Wondergem in Chemistry has used the Broadcast feature to send out multiple choice questions during her lectures to check student understanding and increase engagement. Students are allowed to work together and the questions are only a half-point each, keeping the task low-stakes while still rewarding students for engagement and attentiveness.
Get real-time student feedback
Students are often hesitant to raise their hand and ask for something to be repeated, a certain problem or concept be reviewed, or request that the instructor move more slowly. Polls or free-response questions can be used to gauge how students are doing during class while keeping their responses anonymous to their peers.
Learner-Made Content
All of the examples up until this point have focused on instructor-made content, but did you know that you can have students create bulbs too? PlayPosit refers to bulbs, interactions, and other content made by students as “learner made content“, and student-created bulbs as “learner made bulbs ” (LMBs).
You can either have students select their own video for creating a bulb or provide them with a video link to use. In the latter scenario, students will add their own annotations or interactions to demonstrate their understanding of the video’s content. Another nice feature of learner-made bulbs is that the instructor can leave timestamped feedback on students’ bulbs. This could be particularly useful for student presentations, instrumental or vocal performances, or other activities that you would like students to record for assessment. You can learn more about creating assignments for learner-made bulbs in this PlayPosit guide.
The image above is what a student will see in Canvas when they click on a learner-made content assignment. Clicking “Start” will launch the PlayPosit bulb designer. Image credit: PlayPosit.
Potential Use Cases
Assess students performing complex tasks
Some fields like nursing or counseling require a lot of instructor observation, which can prove challenging in distance learning environments. One nursing instructor was able to simulate one-on-one, face-to-face observation by having her students record their activities and then create PlayPosit bulbs out of the videos. The instructor could then provide timestamped feedback and supply additional resources if needed (images, links, etc.). Another instructor in counseling has her students use learner-made content in a very similar way.
Ask students to annotate a pre-selected video
When you create a learner-made content assignment, you can provide a video link for your students to use. The students’ task then is to add interactions or annotations based on your guidelines in the instructions. For example, perhaps you find a YouTube video of a lab experiment. The instructions might ask students to add this video to their bulb and then add timestamped annotations identifying and describing the steps of the scientific process as they occur in the video.
Peer Review
Peer review builds on the previous feature, learner-made content. Like a regular peer review Canvas assignment, students first submit their own video to the PlayPosit peer review assignment and are then assigned peers’ video submissions to review and leave feedback.
One useful aspect of this tool is that student reviewers leave their feedback as discussion comments that are each timestamped to indicate the exact moment of the video when the reviewer paused and entered the comment. Instructors may additionally create a rubric for student reviewers to complete. You may also appreciate that PlayPosit requires reviewers to watch the video in full before submitting their review. As the instructor, you can view both the learner videos and the feedback left by other students and assign grades accordingly. Learn more about peer review in this PlayPosit guide.
After a student has submitted their own video, they will be able to see which students they have been assigned to for peer review, leave feedback for submitted videos, and view their own feedback from peers or the instructor. Image credit: PlayPosit.
Potential Use Cases
Have students provide feedback on peer presentations
Students will be assigned certain videos to view, which they can then leave timestamped feedback for. You can set the perimeters of the assignment to control what kind of feedback is provided. For example, do you want students to leave questions about the presentation content on their peers’ videos? Do you wish for them to critique or correct the information presented? Or are they assessing their peers’ presentation and public speaking skills?
Simulate peer observation
Similar to the nursing and counseling scenarios described above in the learner-made content section, you can also have students record their activities and create a video for peer review. This could be useful for peer observation activities in courses where in-person observation is not feasible. The video format allows students to see their peers’ skills across time and space, while the PlayPosit player allows them to leave timestamped feedback and fill out a rubric created by the instructor.
Questions?
As you explore PlayPosit, we encourage you to consult PlayPosit’s extensive knowledgebase of instructor guides, including this guide for Canvas users. You can contact PlayPosit support directly by clicking the “Contact” link on their support site and filling out their web form. PlayPosit also offers live trainings, webinars, and office hours. If you are interested in any of these vendor-led training opportunities, contact dle@uwgb.edu to learn more.
As always, we also welcome you to request a CATL consultation if you’d like to see a demo of PlayPosit or talk through how you might use it in your course.
The PlayPosit logo; in written copy, PlayPosit is written with no spaces and both “p’s” capitalized.
What is PlayPosit?
PlayPosit is a platform for building and viewing interactive video content. With PlayPosit, learners are invited to engage in interactions at various points throughout a video. These interactions can be simple or complex, and graded or ungraded. PlayPosit’s uses are broad and varied, but one thing they all have in common is that they can help increase the engagement and attentivenessof learners, particularly in asynchronous environments.
An interactive video built with PlayPosit is called a “bulb.” A bulb is made up of a video or series of videos and a set of timestamped interaction points. When building a bulb, you can import videos from YouTube, Kaltura (My Media), and Vimeo, and then arrange and trim the clips as necessary. After that step, you pick points on the timeline to add interactions—multiple choice questions, polls, reflective pause points, and more—and then determine other important settings, like whether the interactions will be worth points or whether students can attempt a bulb multiple times.
When building a PlayPosit bulb, you can pull in videos right from your Kaltura (My Media) library, such as lectures recorded with Kaltura Capture.
When a viewer watches a PlayPosit bulb, the video clips play until the player reaches the first interaction point on the timeline. Though it depends on the bulb’s settings, generally video playback will pause at an interaction point and a menu will pop up, asking the viewer to answer a question, complete an activity, or engage with an external resource. After doing so, the viewer can click “continue” and then proceed with the video until the next interaction, and so on, until they reach the end of the PlayPosit bulb.
An example of what the PlayPosit player looks like from a learner’s perspective. In this scenario, the student submitted the incorrect answer to a true/false question presented at the end of the video. As in this example, you can add automatic feedback for a correct or incorrect answer when building a PlayPosit interaction.
PlayPosit Canvas Integration
PlayPosit at UWGB is integrated with Canvas, and instructors can build and assign bulbs directly within their Canvas courses. Instructors can add bulbs to their Canvas course as either graded or ungraded activities:
Instructors can build and assign graded PlayPosit bulbs within Canvas assignments that sync with the Canvas gradebook.
Instructors can build and add ungraded PlayPosit bulbs to their course by embedding a bulb in a page with the Rich Content Editor or adding a bulb as an external tool link in a module.
Graded Bulbs
Graded bulbs are bulbs that are tied to the Canvas gradebook. Graded bulbs can contain both automatically graded interaction types like multiple choice questions and manually graded interaction types like free response. To create a graded bulb, you will create a Canvas assignment and then select “PlayPosit” from the “External Tool” submission options. You can read this knowledgebase article to learn more about how to create graded bulbs.
You will find PlayPosit as an option in the “External Tool” submission type in Canvas assignments.
For a graded PlayPosit assignment, a student’s score in the Canvas gradebook is calculated by applying the percentage of points earned out of points possible in the bulb to the total points the assignment is worth in Canvas. For example, let’s say you create a Canvas assignment worth ten points and link a PlayPosit blub within that assignment which contains two questions worth a point each. A student who answers one out of two questions correctly would earn 1 out of 2 possible points in the bulb (50%), which would translate to a score of 5 out of 10 (50%) in the Canvas gradebook.
Ungraded Bulbs
Ungraded bulbs are completely independent from the Canvas gradebook. While they can still have interactions that are worth points in PlayPosit, these points are not tied to any gradebook item in Canvas. For ungraded bulbs, points and grades are only there for the learner to check and assess their own understanding. If you wish to add an ungraded bulb to your course, you can either add it to a module as an item or embed it with the Rich Content Editor (the editor found in Canvas pages, discussions, etc.).
One advantage of the PlayPosit Canvas integration is that learners can complete PlayPosit activities without going to an external site. For example, this PlayPosit bulb linked in a module will open in Canvas when a user clicks on it (unless the “Load in a New Tab” box was checked when adding the link).
Types of Interactions
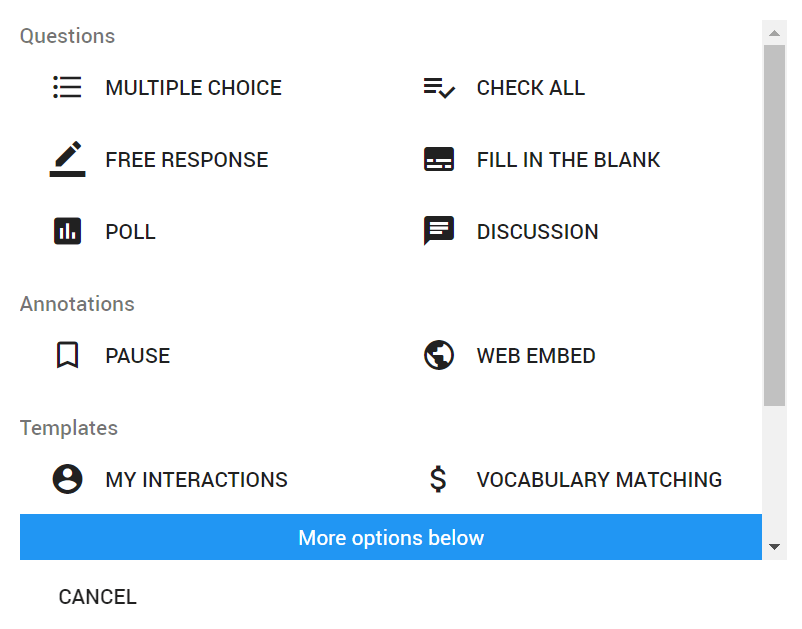
PlayPosit has eight main types of interactions. Each type of interaction is either auto-graded, manually graded, or ungraded by default. For graded interactions, keep in mind that the points only impact students’ grades in Canvas if the bulb is added to the course as a Canvas assignment. Below are the types of PlayPosit interactions. You can also read descriptions of the interaction types in this PlayPosit guide.
PlayPosit’s interaction menu also includes the option to use a template for building an interaction. Templates still use one of the eight interaction types but have pre-sets for common question styles. For example, the vocabulary matching template makes use of the “fill in the blank” interaction type.
Auto-Graded Interactions
Auto-graded interactions are graded by PlayPosit. When you create one of the interactions below, you will be asked to provide the correct answer(s) for auto-grading. These interactions can also be set to “0 points” if you wish for them to not count toward a student’s score.
Multiple choice
Check all
Fill in the blank
Manually Graded Interactions
Manually graded interactions require the instructor to read students’ submissions and then assign a grade. These interactions can also be set to “0 points” if you wish for them to be ungraded.
Free response
Ungraded Interactions
Ungraded interactions are not scored and therefore are set to “0 points.” You can assign points to these interactions if you choose, in which case PlayPosit will award full points for completing the interaction (clicking “continue” for a pause or web embed, or submitting a response for a poll or discussion).
Pause
Web embed
Poll
Discussion
When reviewing a student’s PlayPosit submission, you can change the points they received for an interaction and in some cases, like free response interactions, leave feedback.
Questions?
As you explore PlayPosit, we encourage you to consult PlayPosit’s extensive knowledgebase of instructor guides, including this guide for Canvas users. You can contact PlayPosit support directly by clicking the “Contact” link on their support site and filling out their web form. PlayPosit also offers live trainings, webinars, and office hours. If you are interested in any of these vendor-led training opportunities, contact dle@uwgb.edu to learn more.
As always, we also welcome you to request a CATL consultation if you’d like to see a demo of PlayPosit or talk through how you might use it in your course.
Whether your course is held completely online, face-to-face, or somewhere in between, offering your students the opportunity to meet for office hours remotely rather than just in person is a great way to offer additional flexibility and help meet your students’ needs. With its robust Canvas integration, Zoom is a solid choice for virtual office hours. Using Zoom for office hours is mostly the same as setting up a meeting for a virtual class session, though there are a few additional options you may wish to consider.
Enabling the Waiting Room
For office hours, we highly suggest enabling the waiting room in your meeting settings. When the waiting room is enabled, it means that each attendee will have to be manually let into the Zoom meeting by you, the host. This gives you more control of who joins the call and when, and you can prevent a student from “popping in” and accidentally intruding on a private meeting.
The waiting room is one of the options you can select in the “Security” section of your meeting settings. You can require both a passcode and the waiting room, if you desire.
Setting Up a Recurrence
If you have office hours at the same time each day and each week, you can set up a recurring meeting just like you would for virtual sessions. Let’s say you have office hours from 11 a.m. to 1 p.m. on Tuesdays and Thursdays. You would set your recurrence to “weekly”, check Tuesday and Thursday, set the start time as 11 a.m., and set the duration to two hours. The start and end dates of the recurrence would be the first and last days of the semester. When you set up your office hours through the Zoom Canvas integration, this will also populate the Canvas calendar with these meeting times.
Sample office hour recurrence settings based on the scenario described above.
But what if your office hours don’t occur during the same time slot each day, such as 8 to 10 a.m. on Mondays and 1 to 3 p.m. on Thursdays? You could set up two recurring meetings, one for Mondays and one for Thursdays. In this case, you will want to make sure your two meeting links are clearly labeled with the day of the week so students don’t mix them up. You could also set up a single recurring meeting and ignore the fact that the meeting time for one of the two days is incorrect—the link will still work outside of the designated time slot, but it does mean that it will also list the incorrect time on the Canvas calendar and in Zoom.
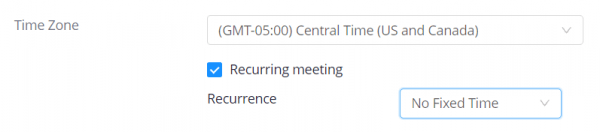
In these cases, another solution is to create a recurring meeting with “no fixed time”, which can be set from the “recurrence” dropdown menu when adjusting your meeting’s settings. This will create an open-ended meeting link that won’t expire for 365 days. Note that “no fixed time” meetings will not show up on the calendar in Canvas, though you could still manually add your office hours to the Canvas calendar and your Outlook calendar.
Recurrence settings can be managed under the “Time Zone” section of your meeting settings in the Zoom Canvas integration.