Workshop Wednesday: Using Universal Design for Learning (UDL) to Increase Access (Apr. 3, 3:30 – 4:30 p.m.)

Throughout the 2024 spring semester, CATL’s “Workshop Wednesday” series has been centered around understanding neurodiversity and enhancing the accessibility of our courses to better serve our students. Join us as we conclude this semester’s workshop series with a session on using Universal Design for Learning (UDL) led by the Director of UW-Green Bay’s Student Accessibility Services, Lynn Niemi, and Art and Design Professor, Alison Gates. Attendees will continue the conversation about neurodiversity and explore how to use UDL to remove barriers in course materials and increase student access. This workshop will be held virtually via Zoom on Apr. 3rd, 2024, from 3:30 – 4:30 p.m. Register today to receive an Outlook calendar invitation with the Zoom link.

Event Follow-Up: Students’ Experiences at UWGB via Neurodiverse Viewpoints

On Wednesday, Feb. 7, 2024, CATL collaborated with Assistant Vice Chancellor Stacie Christian to host a student panel on neurodiversity. Six student panelists shared their experiences as neurodiverse learners, including common barriers and misconceptions related to neurodiversity. One of the topics the panel discussed was how instructors can support them. A few common themes emerged from students’ responses so we’ve compiled them below, along with resources for ways you might implement these recommendations in your teaching.

Make Assignment Details Transparent

The student panelists shared that they find it extremely helpful when professors explain the purpose of an assignment and provide clear instructions. Their recommendation aligns with the transparency in learning and teaching (TILT) framework, a concept you may be familiar with if you’ve taken LITE 201. The TILT framework is an evidence-based approach to assignment design in which instructors demystify activities by explaining their purpose, detailing the task that students need to complete, and providing concrete grading criteria. Not sure where to start? Check out this checklist for designing transparent assignments from TILT Higher Ed. Or, for a deeper dive into the topic, consider taking a look at this webinar recording on transparent assignment design.

Explicitly Communicate Your Support

One of the “unwritten rules” of college is that students can go to their instructors when they have a question about the course or the need to connect with another institutional resource, such as tutoring or counseling. While this fact may be obvious to some students, it is not to everyone. Whether due to anxiety, trouble picking up on subtext, or unfamiliarity with the norms of higher education, some students may not ask their instructor for help unless they are given explicit permission to do so. Panelists suggested that instructors include a statement in their syllabus to remind students that they can come to the instructor if they have questions or concerns for help and/or referral to the best resource. It’s a small action but adding a statement like this can help reassure students that you care about their success and wellbeing. For more ideas on how to create a welcoming syllabus, check out this post on liquid syllabi and CATL’s liquid syllabus template. If you want to explore other ways of building trust with your students, consider creating a “getting to know you” survey, establishing class norms, or incorporating a name pronunciation activity.

Provide Alternative Formats for Information

Several student panelists emphasized the importance of providing alternate ways of communicating information whenever possible. This recommendation is not only related to “multiple means of representation” from universal design for learning (UDL) theory, but it also aligns with best practices for digital accessibility. Adding alternative means of representation doesn’t have to be complicated. For example, if you include audio or video files in your course, try to pick resources that also provide captions or a transcript. Or, if you use images, make sure you include a caption or alt text when the image is being used to convey information. If you’d like to learn more about accessibility, we encourage you to sign up for LITE 120, a self-paced training course that covers the basics of accessibility in Canvas, as well as SAS’s training course on creating accessible documents (i.e., with Word, PowerPoint, or PDF).

Related Events and Opportunities

Want to learn more about supporting diverse learners? CATL’s “Workshop Wednesday” series this semester has two upcoming sessions that may be of interest to you! First, on Wednesday, Mar. 6, we’ll take a look at how to make course materials more accessible. Then, on Wednesday, Apr. 3, we’ll explore universal design for learning (UDL) and some practical ways to apply UDL concepts in our teaching and learning. Both workshops will be from 3:30 – 4:30 p.m. via Zoom. Registration for the March workshop on accessibility is already open. Stay tuned for details on registration for April’s workshop.

As always, CATL also welcomes you to connect with us if you’d like to learn more about any of these topics. Send us an email or request a consultation to get started!

10 Dos and Don’ts of Digital Accessibility

Accessibility involves designing materials so that as many people as possible can engage with them, regardless of users’ physical or cognitive abilities. Meeting baseline accessibility standards is key to inclusive course design, and the digital age has made it faster and easier than ever to create accessible materials. Small changes to a document, like using a clear font and appropriately-sized text, can significantly improve the user experience. To get you started, we have assembled a list of some critical “dos and don’ts” of digital accessibility, along with guides from Microsoft Word, Microsoft PowerPoint, and Canvas for each category.

Contents

Text Styles

Screenshot of black text displayed on a white background that reads, ‘Your video submission must be in MP4 format.’ The words ‘MP4 format’ are emphasized in red text font and yellow highlight.

Don’t… ❌

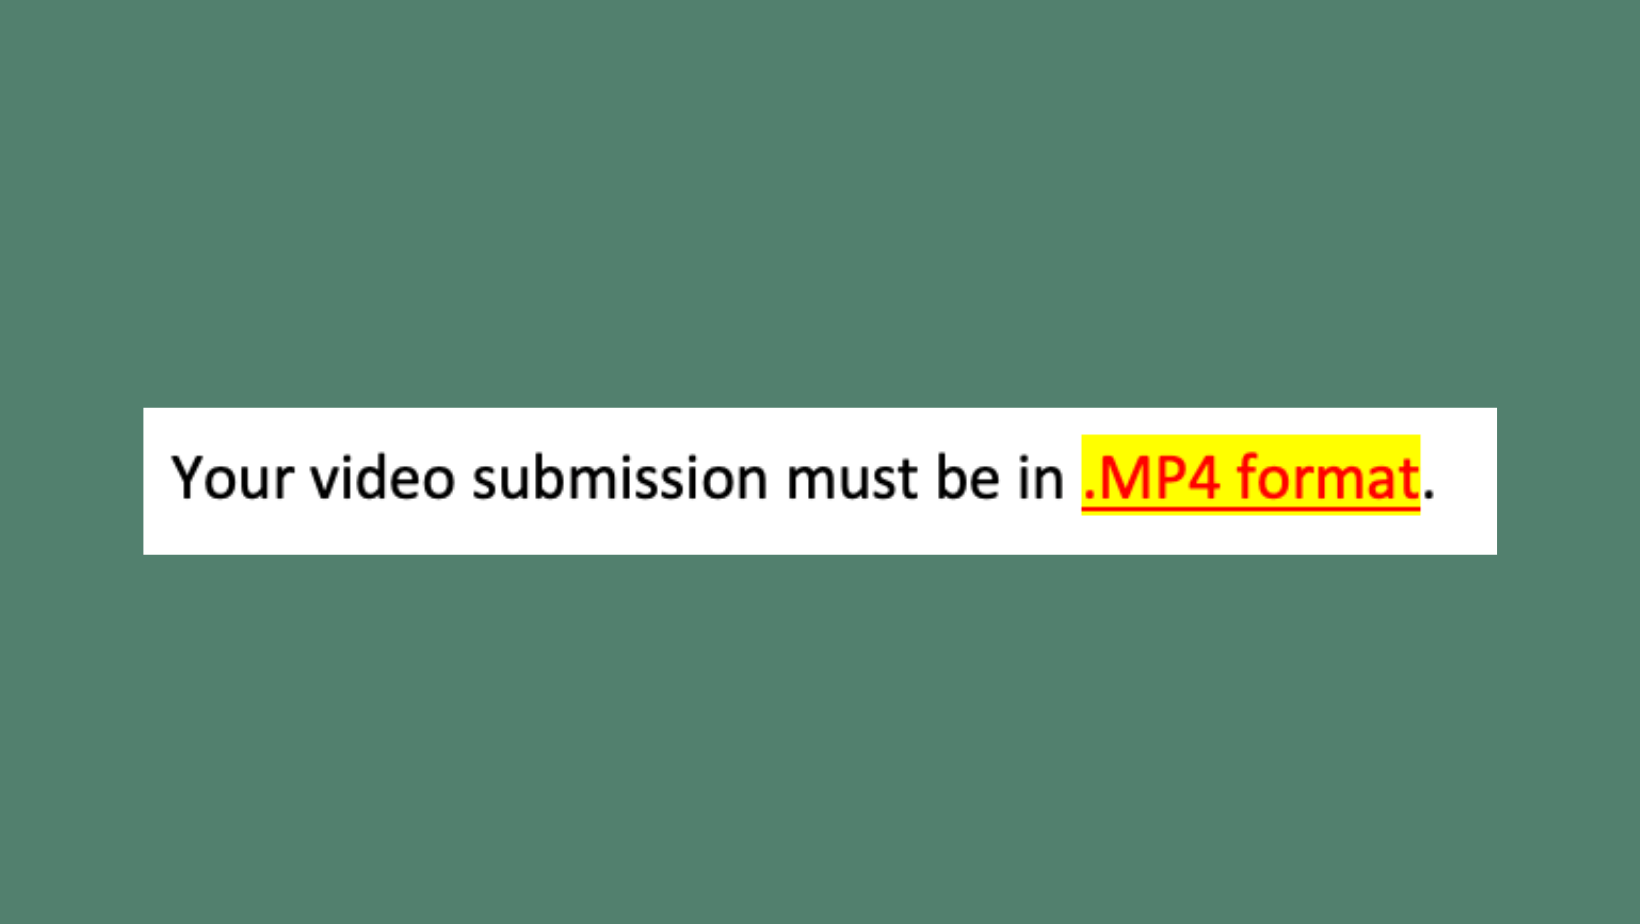
Use underlining, highlighting, or text color alone to denote emphasis or create meaning.

Screenshot of black text on a white background that reads, Important: Your video submission must be in MP4 format. The words Important and MP4 format are emphasized in bold.

Do… ✅

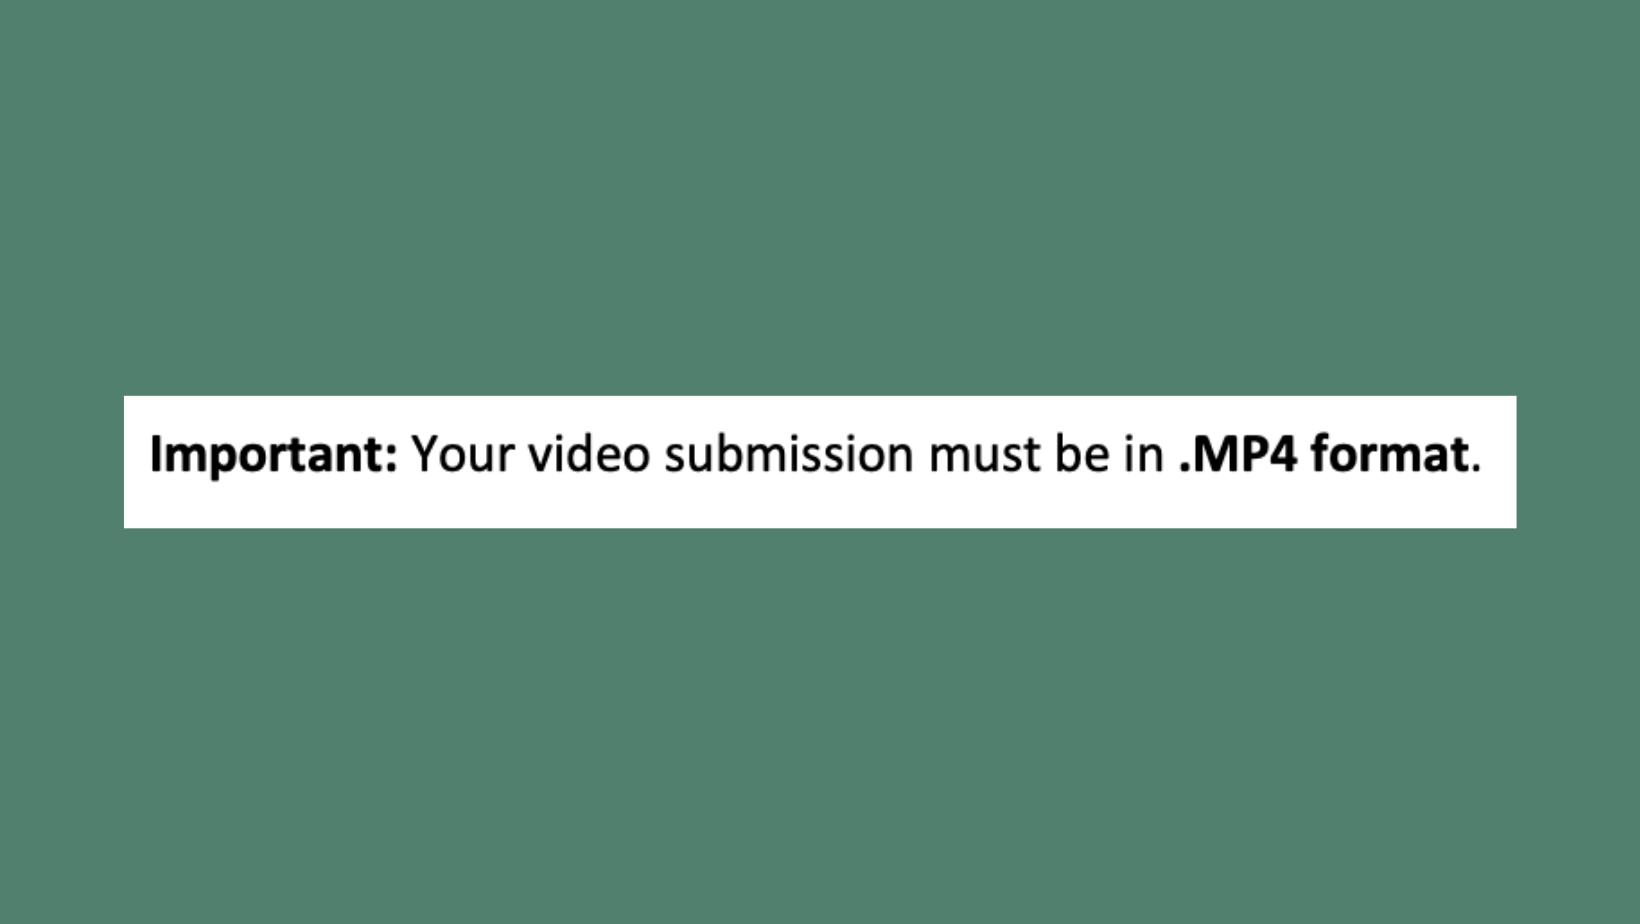
Use bold or italic styling sparingly to emphasize words or short phrases within the body of a text. To call attention to an entire sentence or section, consider writing “Important” before the content.

Use underlining only for hyperlinks to assist people who are color blind in differentiating them from regular text. Similarly, avoid using text color and highlighting alone for emphasis as they may be challenging to distinguish. Some screen readers do not announce bold or italicized text, so refrain from using text styles alone to create meaning.

Headings & Document Structure

Image containing two screenshots. The first screenshot shows a document with the word ‘Purpose’ emphasized in blue and bolded text. Below ‘Purpose’ is plain black text that reads, ‘In this activity, you will learn about.’ The document ends with the word ‘Task’ also emphasized in blue and bolded text. The second screenshot displays the text style pane in Microsoft Word. It indicates that the text in the screenshot is formatted with the ‘Normal’ text style.

Don’t… ❌

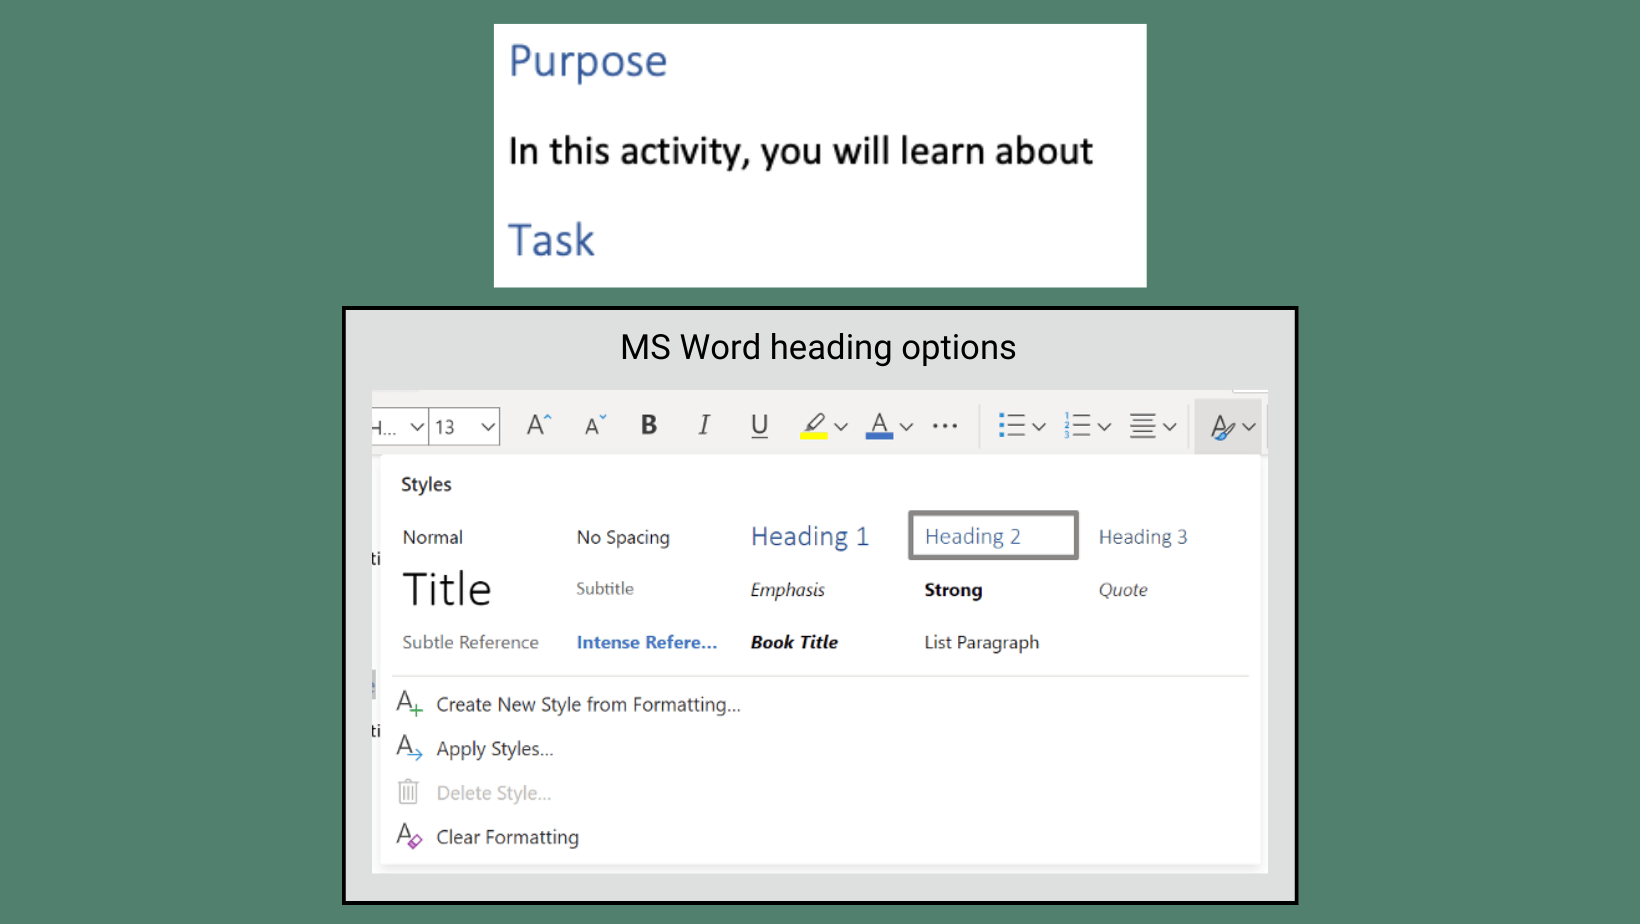
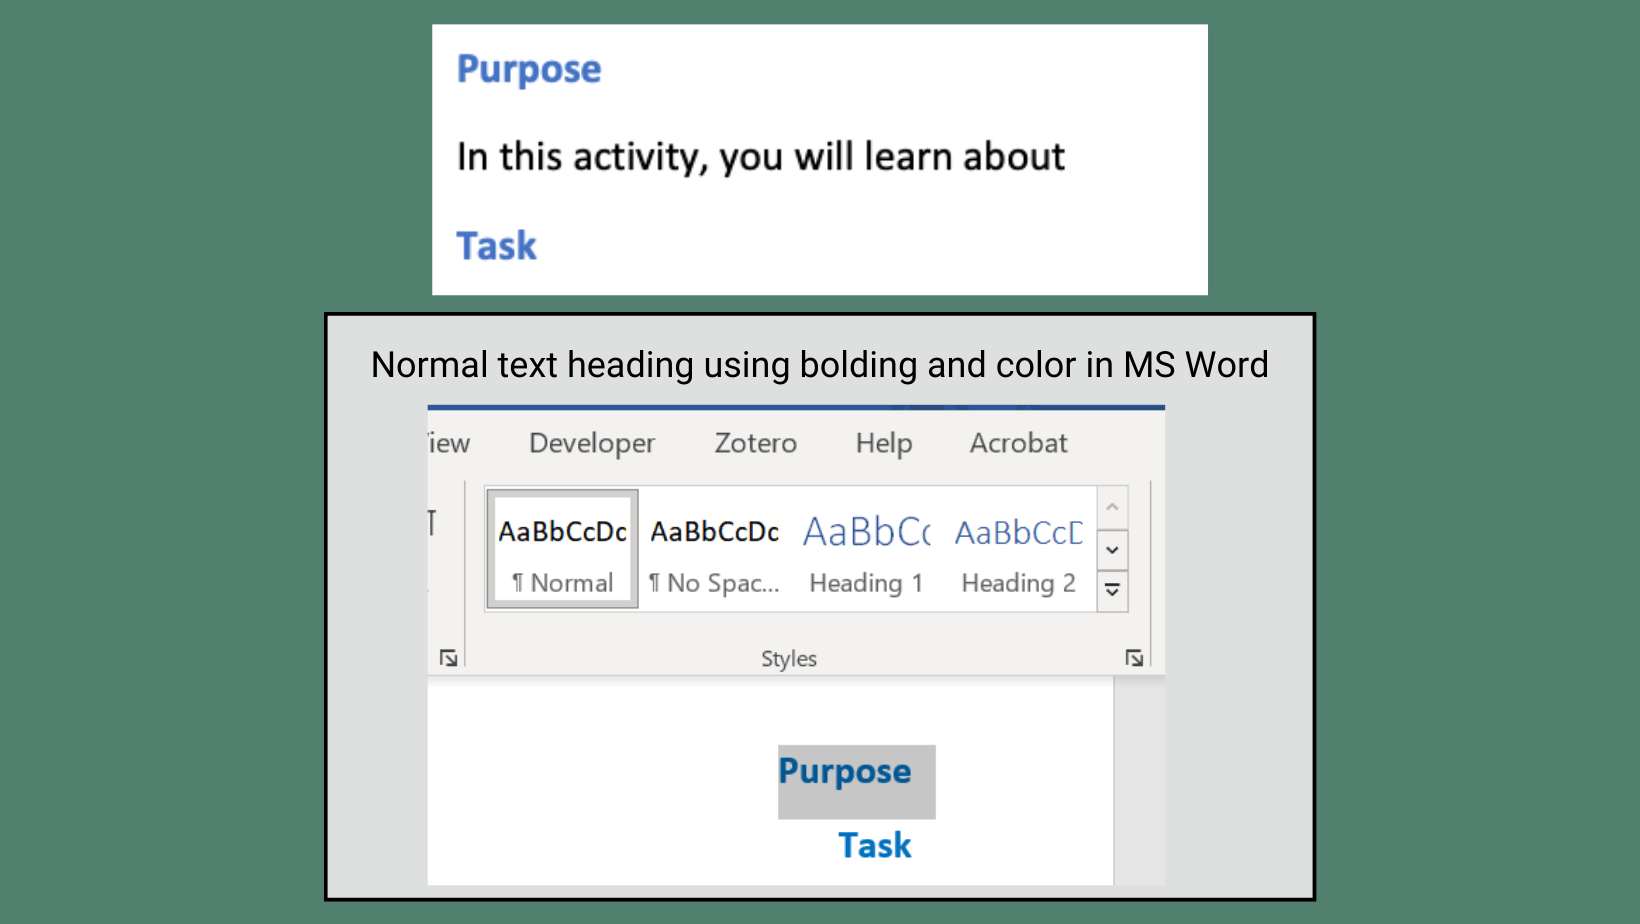
Create headings by manually adjusting text sizes, styles, or colors.

Image containing two screenshots from Microsoft Word. The first screenshot shows a document with the word ‘Purpose’ using the built-in Heading 2 style option. Below ‘Purpose’ is plain black text that reads, ‘In this activity, you will learn about.’ The document ends with the word ‘Task’ also using the Heading 2 style option. The second screenshot, positioned below the first, displays the Heading style panel in Microsoft Word.

Do… ✅

Use built-in heading styles in Word and the Canvas Rich Content Editor to organize content hierarchy. In PowerPoint, make sure to use an accessible template, add a title to every slide, and double-check slide reading order.

The built-in heading styles in these applications add special HTML code that makes it easier for people who use assistive tools to navigate a document.

Screenshot of a hyperlink formatted as a raw web URL, shown in blue underlined text. Below the URL, there is another hyperlink formatted in blue underlined text that reads ‘Click Here’.

Don’t… ❌

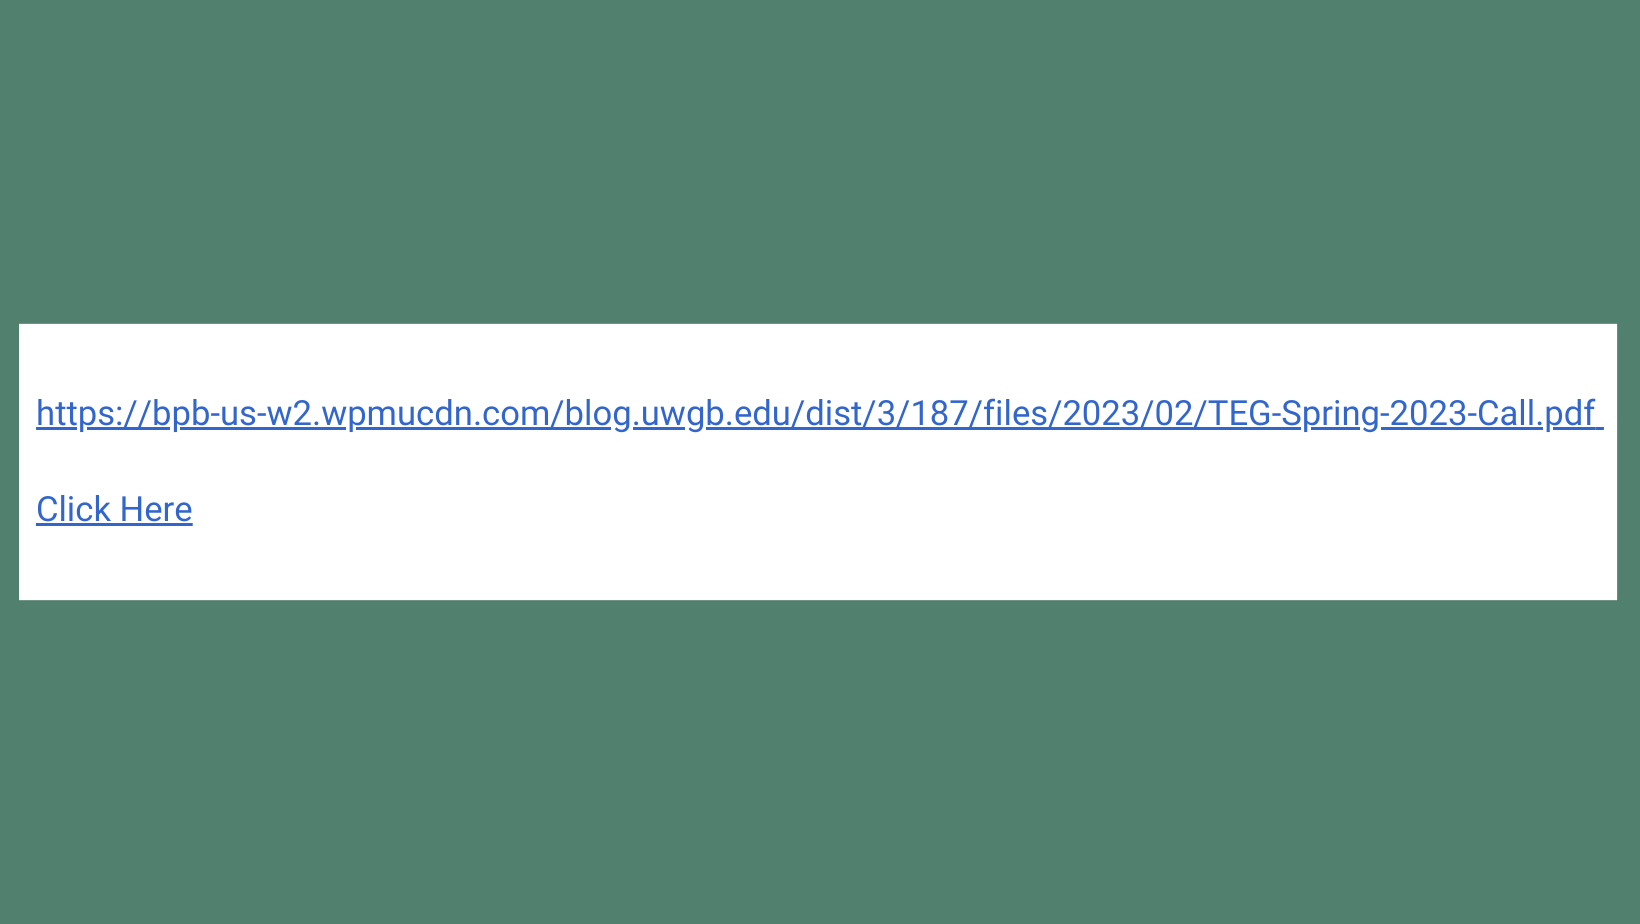
Use messy URLs or hyperlinks that do not make sense without context.

Screenshot of a hyperlink formatted in blue underlined text that reads ‘Spring 2023 TEG Call’. Below the text, there is another hyperlink formatted in blue underlined text that reads ‘uwgb.edu/catl’.

Do… ✅

Create concise hyperlinks with text that identifies or describes the link in a self-contained way.

Providing meaningful links helps people understand what to expect when they click the link. It also makes it easier for users who rely on assistive technology to navigate between links.

Images

A screenshot showing an image of the Cofrin Library in the Canvas RCE (Rich Content Editor). A text box below the image displays the Canvas HTML editor view of the Cofrin Library image with no descriptive alt text. The image file name consisting of numbers is used as the alt text, and it is underlined in red to indicate that it is not a sufficient description.

Don’t… ❌

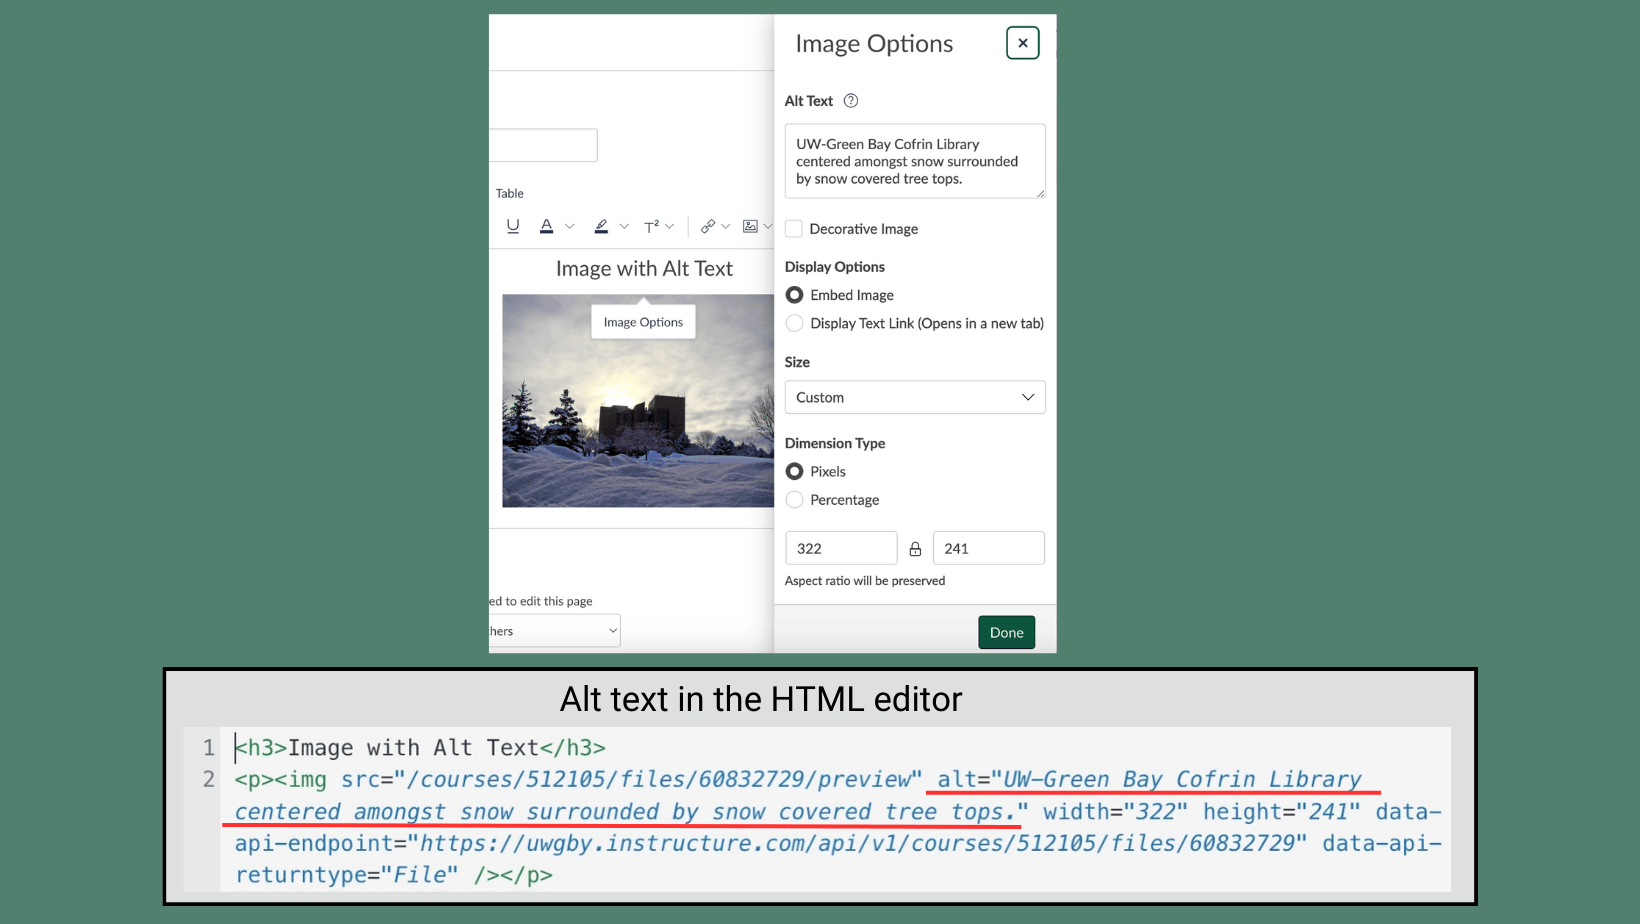
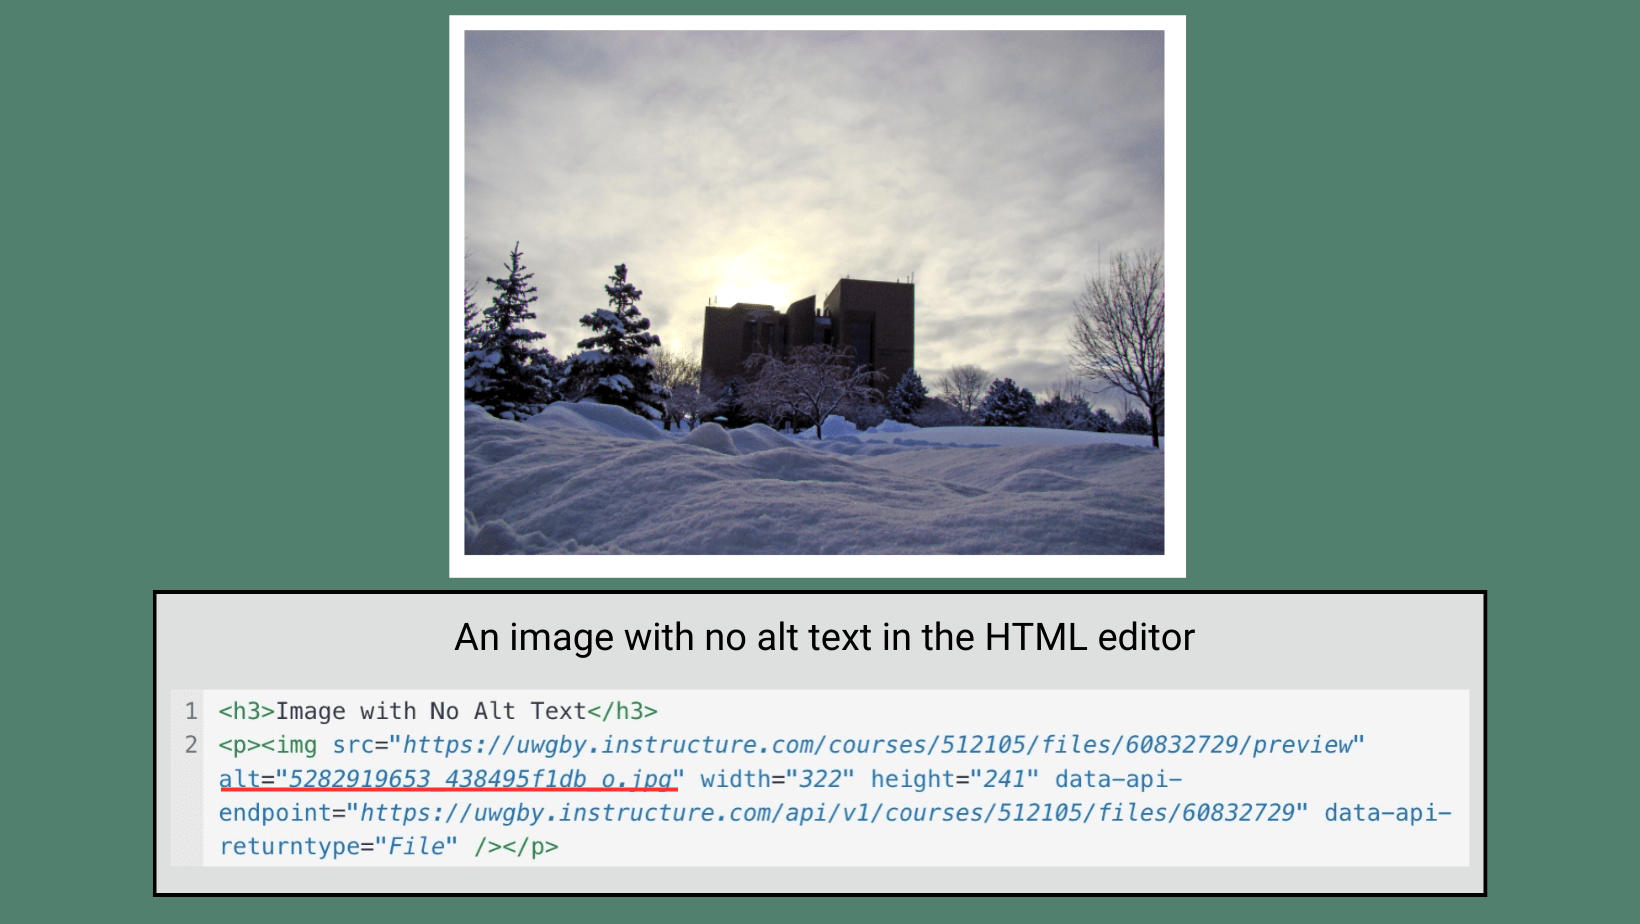
Use an image alone to provide information.

A screenshot of the Canvas RCE. On the left is an image of the Cofrin Library. To the right is the Image Options panel in the Canvas RCE, including a field for alt text. Below that is a screenshot of the Canvas HTML editor view. The alt text for the image is underlined in red and reads 'UW-Green Bay Cofrin Library Centered amongst snow surrounded by snow covered treetops.'

Do… ✅

Add alt text or captions to describe images that convey information in Word, PowerPoint, and Canvas. Mark other images as “decorative” so they are ignored by screen readers.

Providing alt text or a caption helps people with low or no vision understand images.

Audio & Video

Screenshot displaying text that reads ‘Video without CC and Transcript.’ Below the text is a video titled ‘The Kiss by Gustav Klimt: Great Art Explained.’ The video does not display an option to turn on closed captioning.

Don’t… ❌

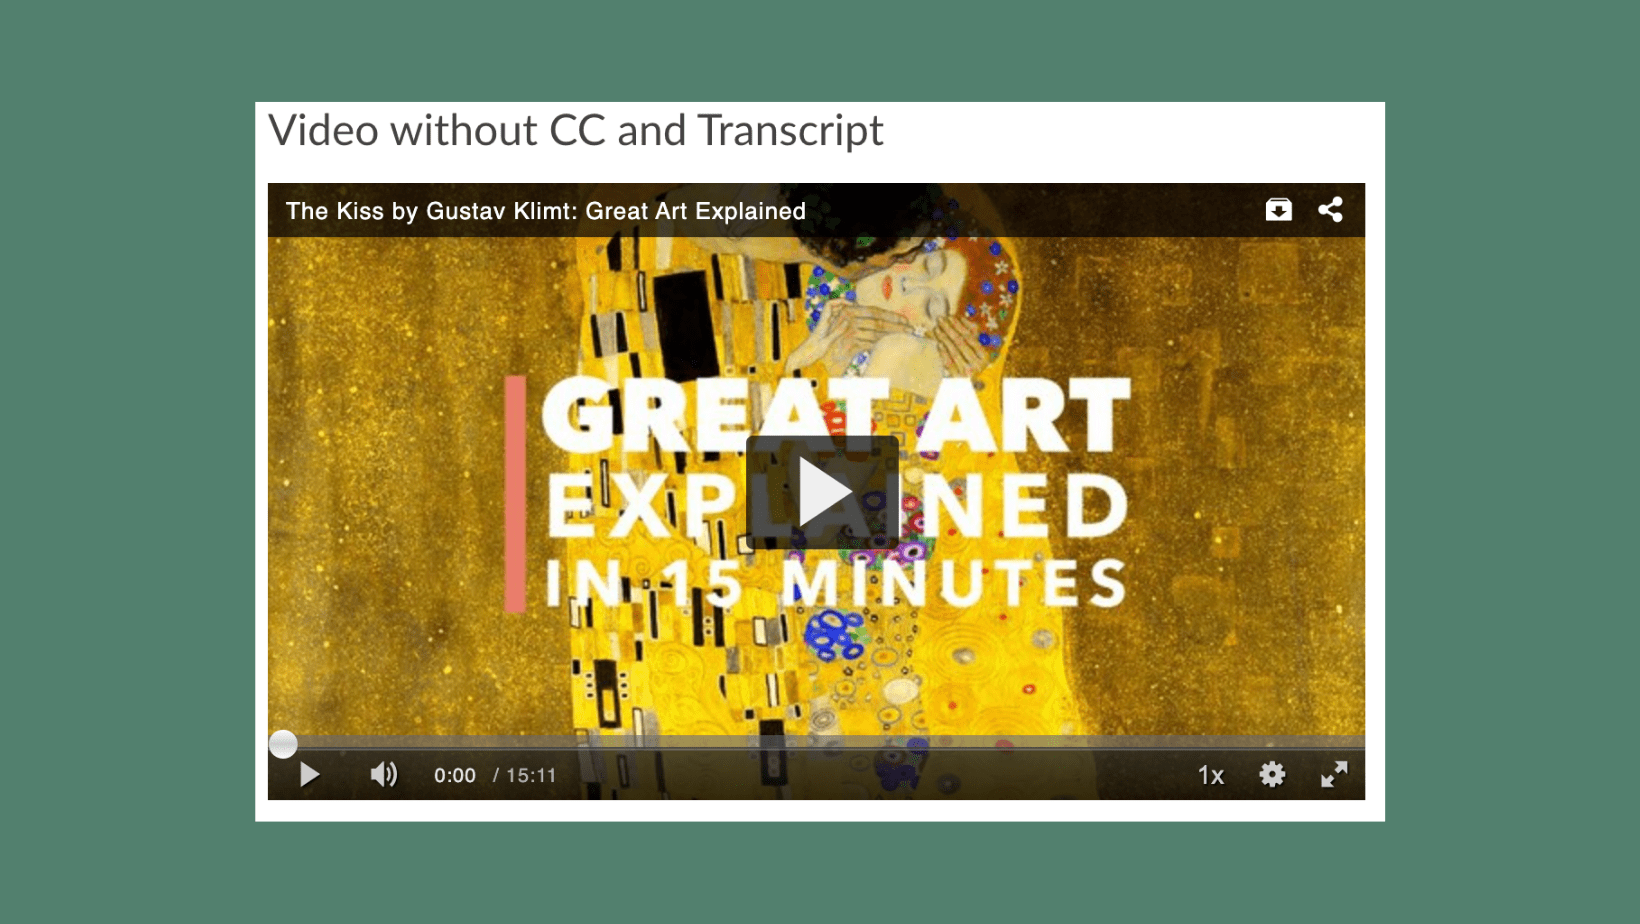
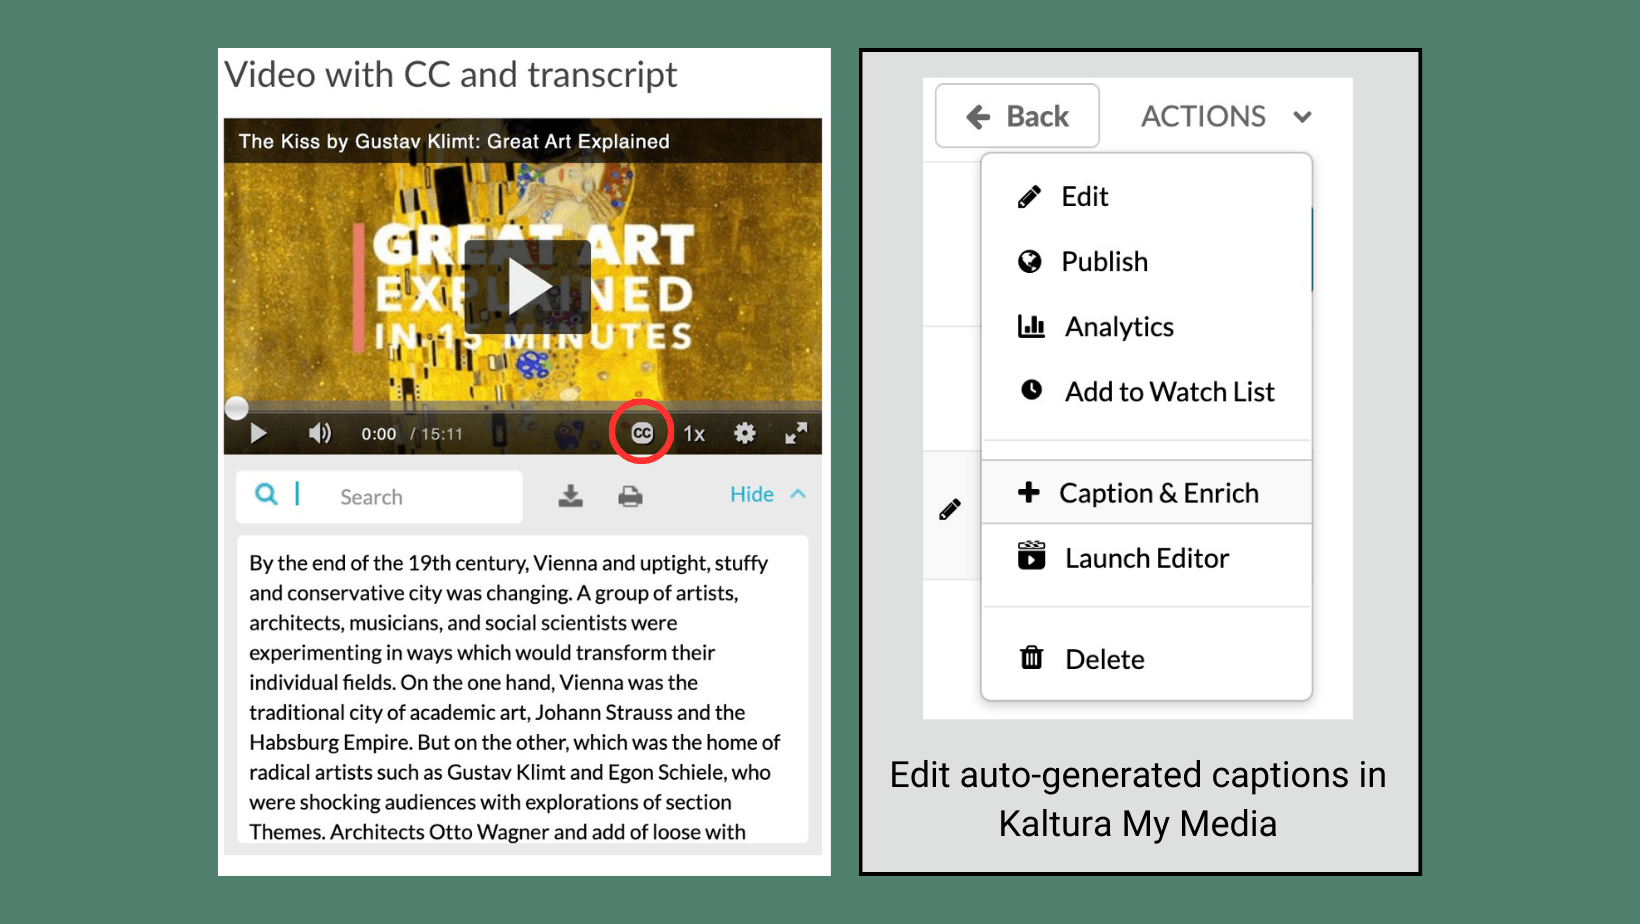
Share audio or video without closed captioning or another text alternative.

Image containing two screenshots side by side. The first screenshot displays text that reads ‘Video with CC and transcript.’ Below the text is a video titled ‘The Kiss by Gustav Klimt: Great Art Explained’ with a red circle positioned over the closed captioning button on the video player. Below the video is a transcription box. The second screenshot on the right displays the Kaltura My Media options, with the ‘Captions & Enrich’ option highlighted in grey. This option allows users to edit the auto-generated captions in Kaltura My Media.

Do… ✅

Upload your recordings into Kaltura (My Media) for automatic captions or search for media that is captioned. For spoken audio that does not have a visual component, such as a podcast stream, provide a transcript instead.

Captions and transcripts allow people with limited or no hearing to engage with audio and video media, plus they benefit those with other access barriers. Users can also benefit from having a searchable transcript.

Lists

Screenshot of the Canvas Rich Content Editor (RCE) displaying an unformatted numbered list titled ‘List with No Formatting.’ The list contains the items ‘1. Red, 2. Blue, 3. Yellow’ without proper formatting. A gray box outlines the HTML editor view of the Canvas RCE, showing the use of heading 3 tags for the page title and paragraph tags for the list of colors.

Don’t… ❌

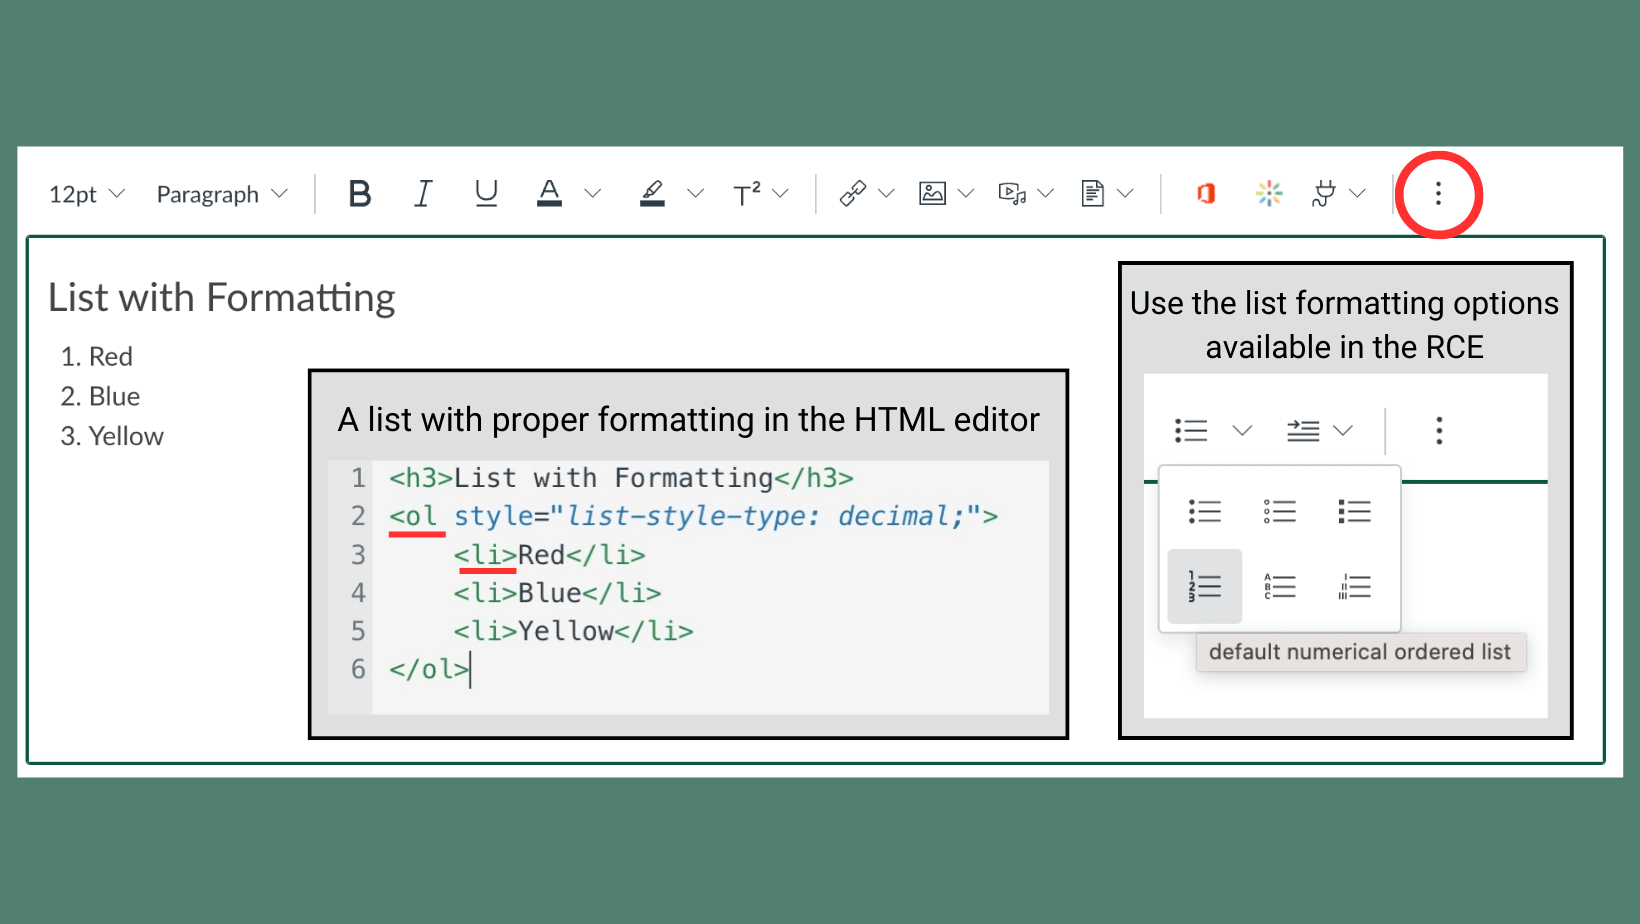
Manually type numbers or bullets to create lists.

Screenshot of the Canvas Rich Content Editor (RCE) displaying a properly formatted numbered list titled ‘List with Formatting.’ The list contains the items ‘1. Red, 2. Blue, 3. Yellow’ with proper formatting. An inset screenshot shows the HTML editor view of the Canvas RCE, including the tags which give the list proper formatting. Another inset screenshot displays the list formatting options available in the 'more' menu of the RCE toolbar, which is circled in red.

Do… ✅

Use the bullet and numbering buttons in the toolbars of Word, PowerPoint, and the Canvas Rich Content Editor.

The built-in list formatting options in these applications add special HTML code that makes it easier for people who use assistive technologies to navigate a document.

Tables

An image containing three screenshots. The first screenshot shows a table in the Canvas RCE. The text above the table reads ‘Table without a Header Row/Column and Caption.’ The table contains syllabus assignments with weeks labeled 1-2 in the right columns, and weekdays Monday and Wednesday in the first row of the table. The second screenshot displays a table in the Canvas RCE. The text above the table reads ‘Table Used for Formatting Non-Tabular Content.’ It seems that this table is intended for formatting purposes and not for displaying tabular data. The third screenshot, positioned below the first two, presents the HTML editor view of the Canvas RCE. The code illustrates a table that lacks a caption and header row/column.

Don’t… ❌

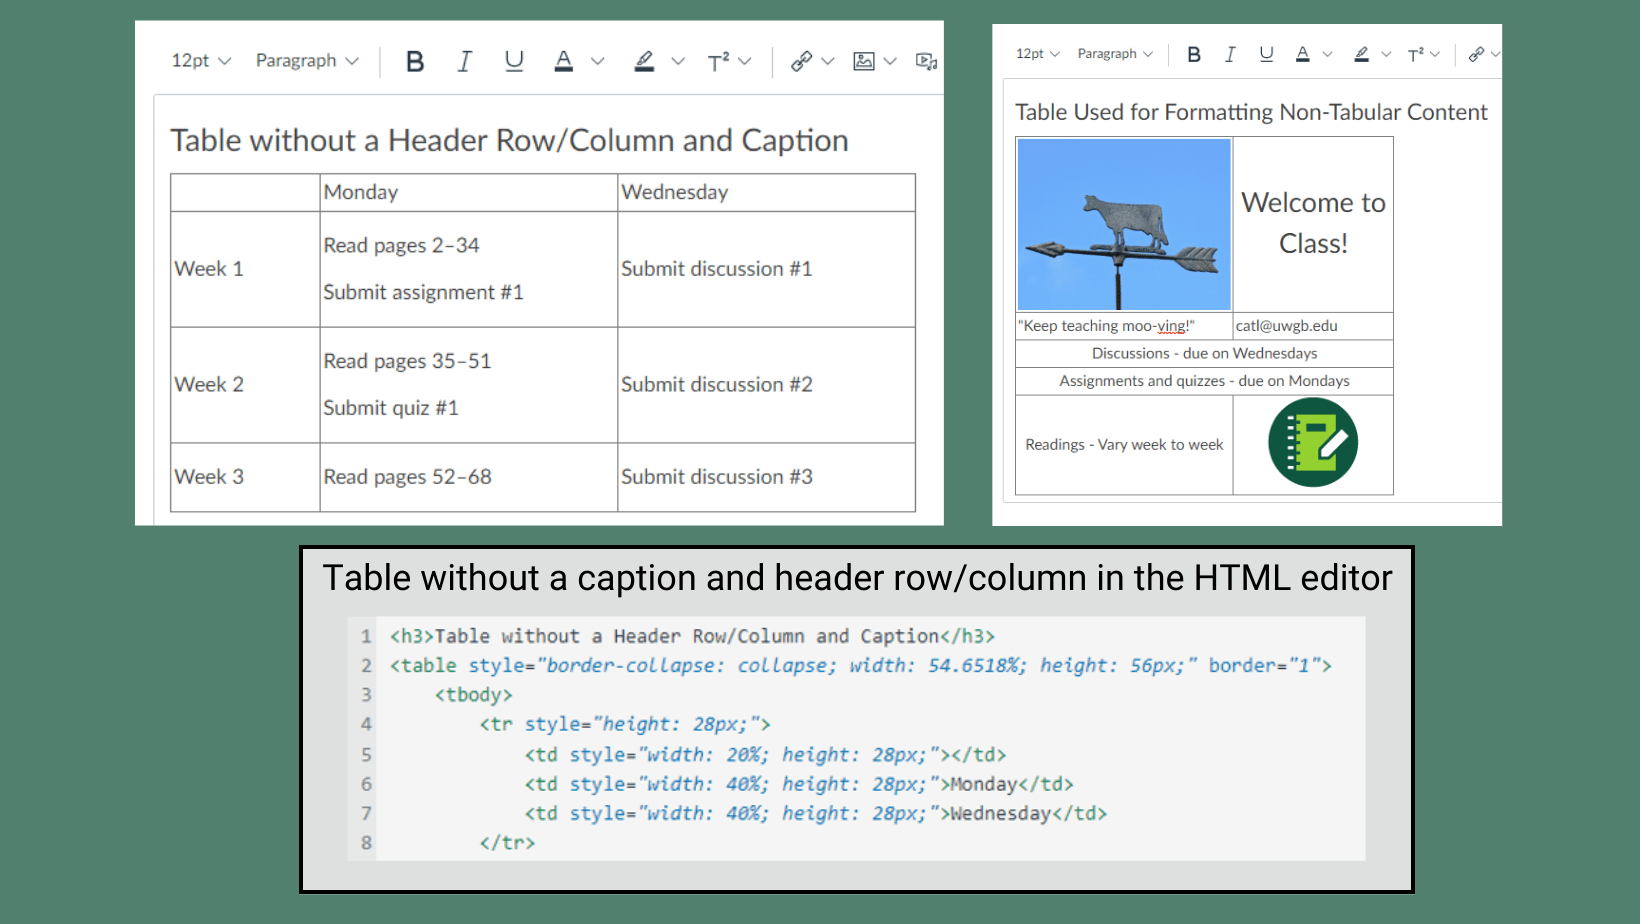
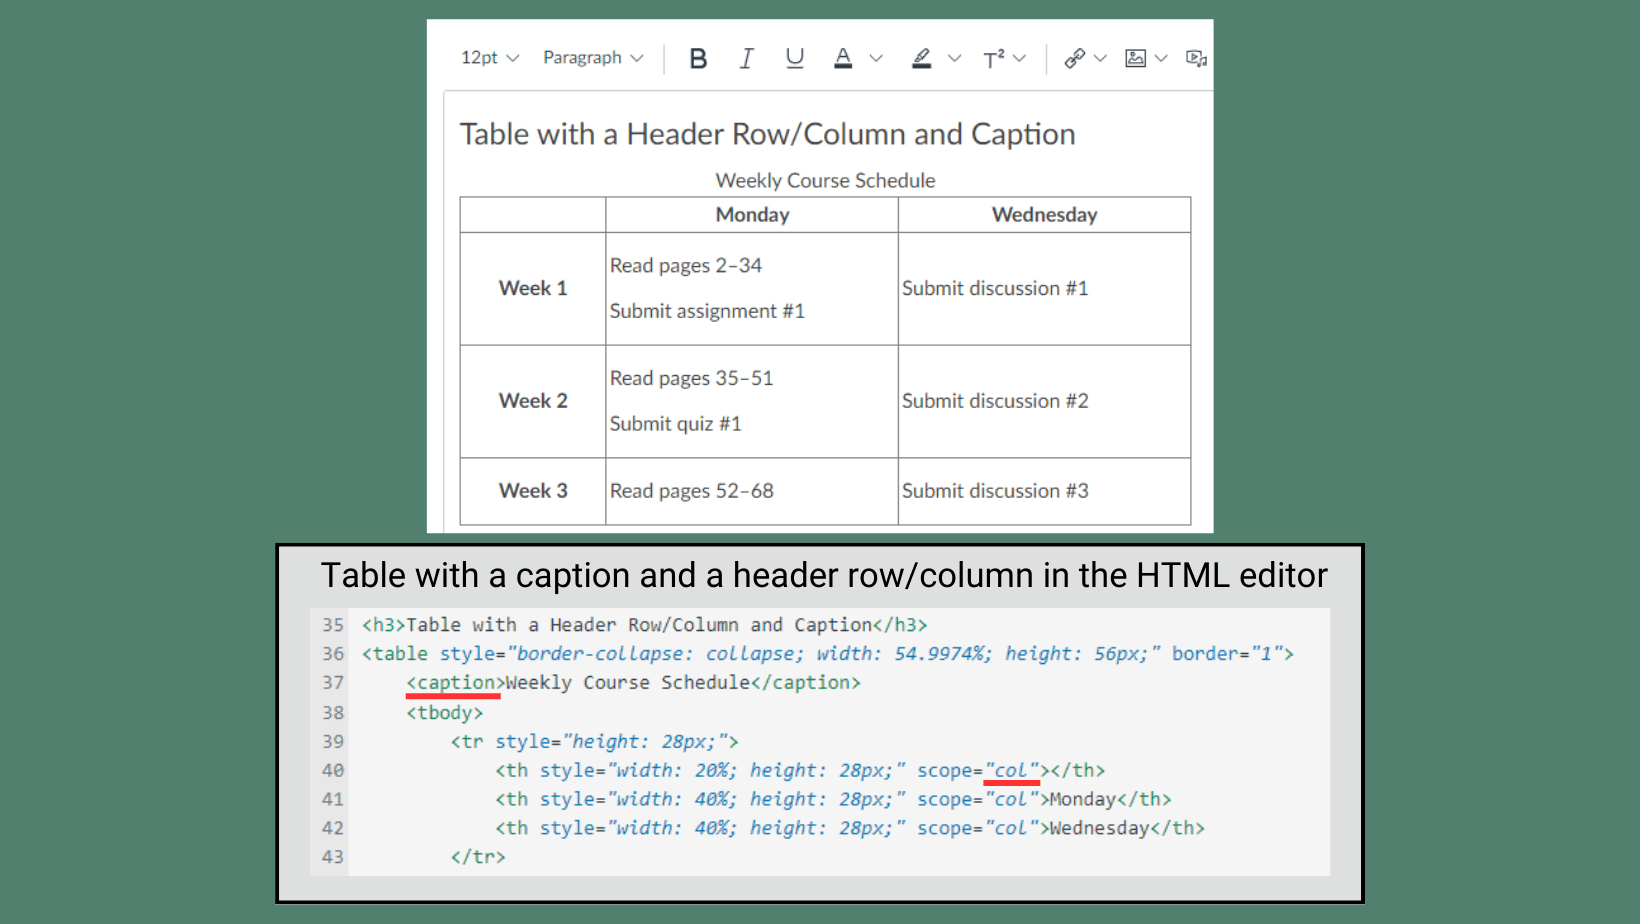
Subdivide and merge cells, omit captions and row/column headers, or use tables as a “hack” for formatting content.

A screenshot depicting a properly formatted table in the Canvas RCE. The table is captioned ‘Weekly Course Schedule,’ with the header row displaying the weekdays Monday and Wednesday, while the header column includes weeks 1-3. A text box below the image displays the HTML editor view of the Canvas RCE. The words 'caption' and 'col' are underlined in the editor, indicating how a table with a caption and header columns are coded.

Do… ✅

Use tables to present data in rows and columns with a logical layout. Use the built-in tools in Word and the accessibility checker in the Canvas Rich Content Editor to include a caption and set a header row and/or header column for data tables. Avoid using tables in PowerPoint if possible, but if you do, follow these guidelines.

Adding a caption and setting a header row/column with the built-in formatting options adds special HTML code that helps users who rely on assistive technology understand and navigate the table. Screen readers may struggle to interpret the layout and hierarchy of the information presented when tables are used to format content other than data. Subdivided and merged cells also pose challenges for users that navigate with a keyboard or rely on screen readers.

Charts & Graphs

Screenshot of a pie graph titled Sales created in Microsoft Word. The pie graph consists of four slices of different colors, with blue being the largest, followed by orange, gray, and yellow. The legend positioned below the pie graph indicates the blue represents the 1st quarter, orange represents the 2nd quarter, gray represents the 3rd quarter, and yellow represents the 4th quarter.

Don’t… ❌

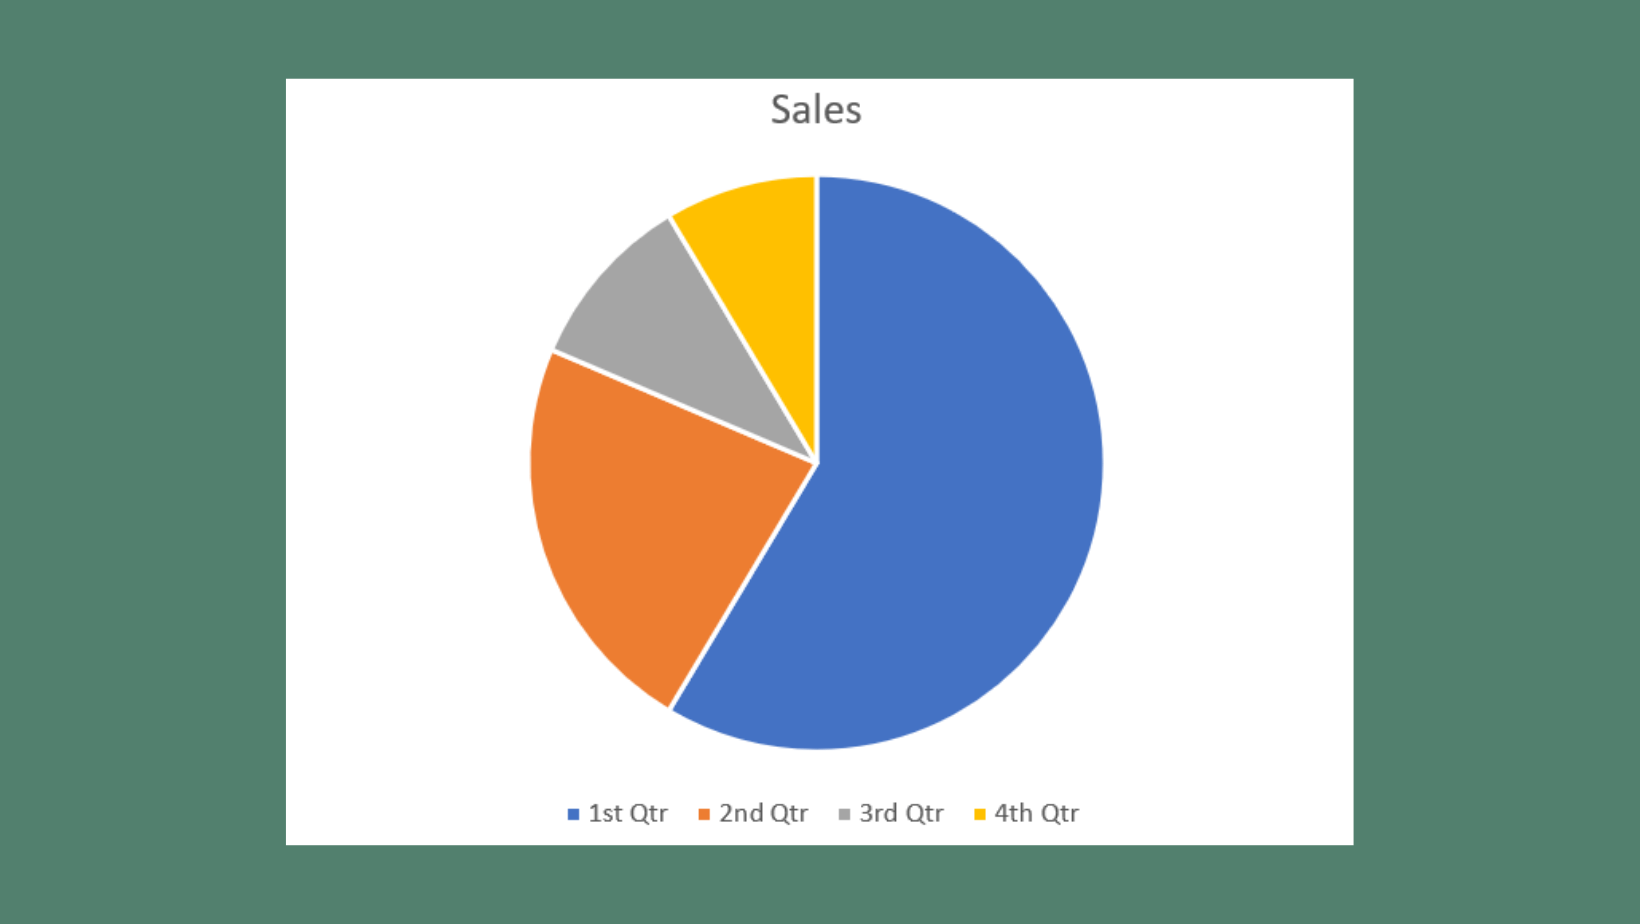
Use color alone to create meaning in charts and graphs.

An image containing two screenshots. The first displays a pie chart titled 'Sales' created in Microsoft Word. The Chart Elements settings are displayed with the boxes for title, data labels, and legend all checked. The second screenshot, positioned on the right, displays the Format Data Labels panel, which presents additional label options. A text box below reads 'Labeling chart and graph element settings in MS Word.'

Do… ✅

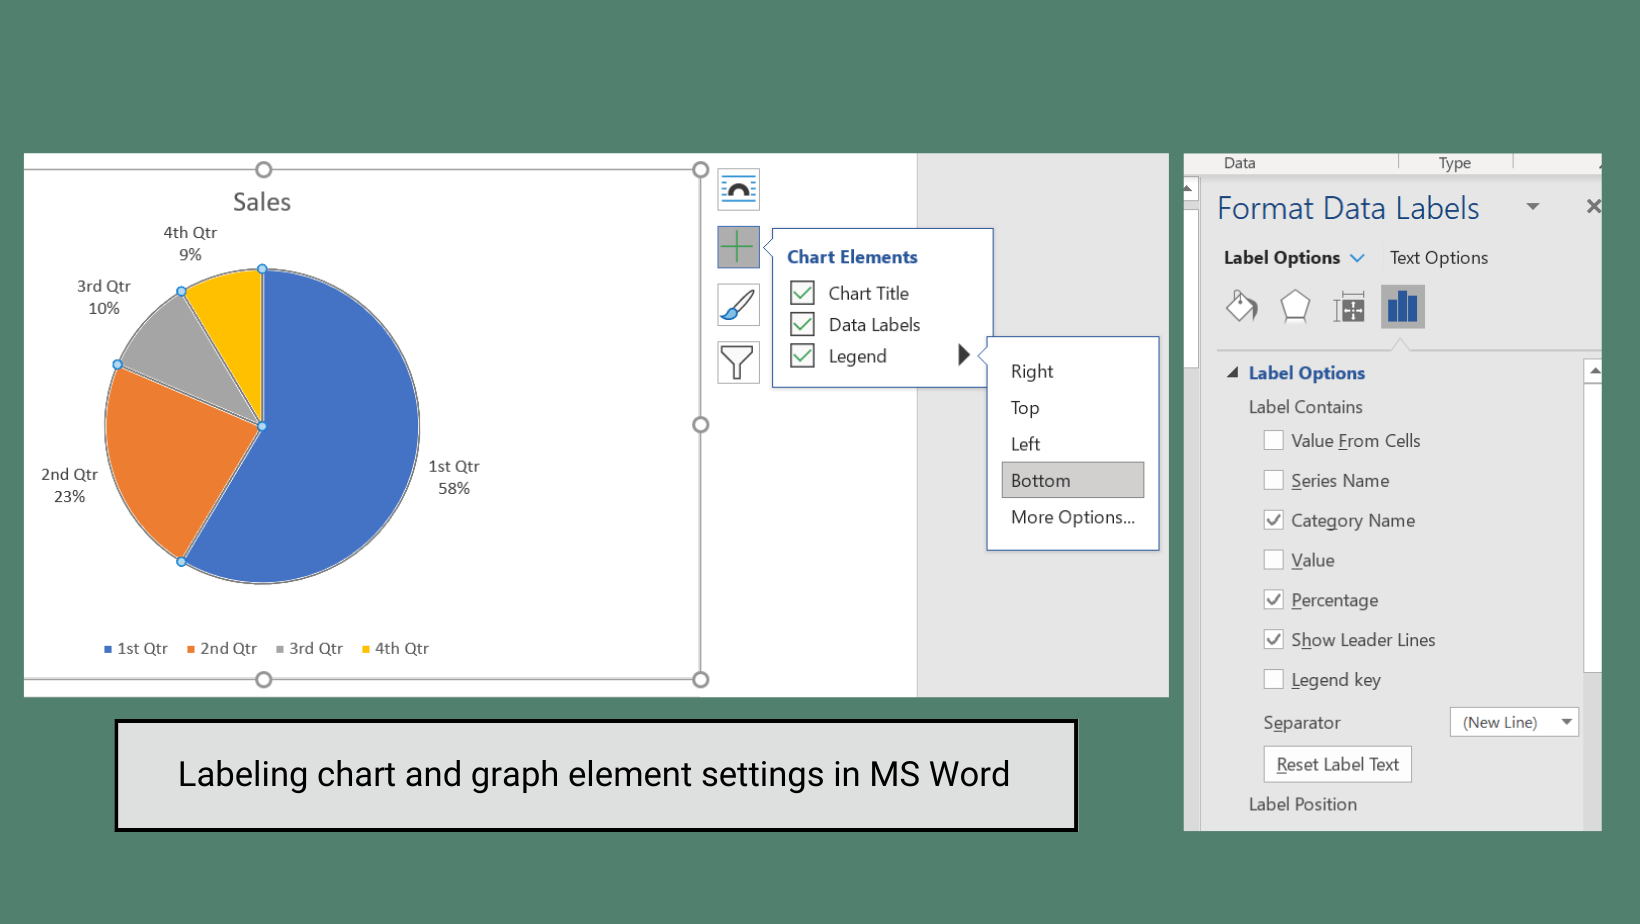
Directly label elements in charts and graphs and/or use shapes or patterns to differentiate elements.

People who are color blind or who have low vision may have trouble differentiating colors.

Scanned Documents

Screenshot of a scanned image of a book page in Adobe Acrobat. A solid blue box overlays a paragraph of text in the image, indicating that each word in the book is not scannable. Below the image, there is a text box that reads “Scanned image without a searchable text.”

Don’t… ❌

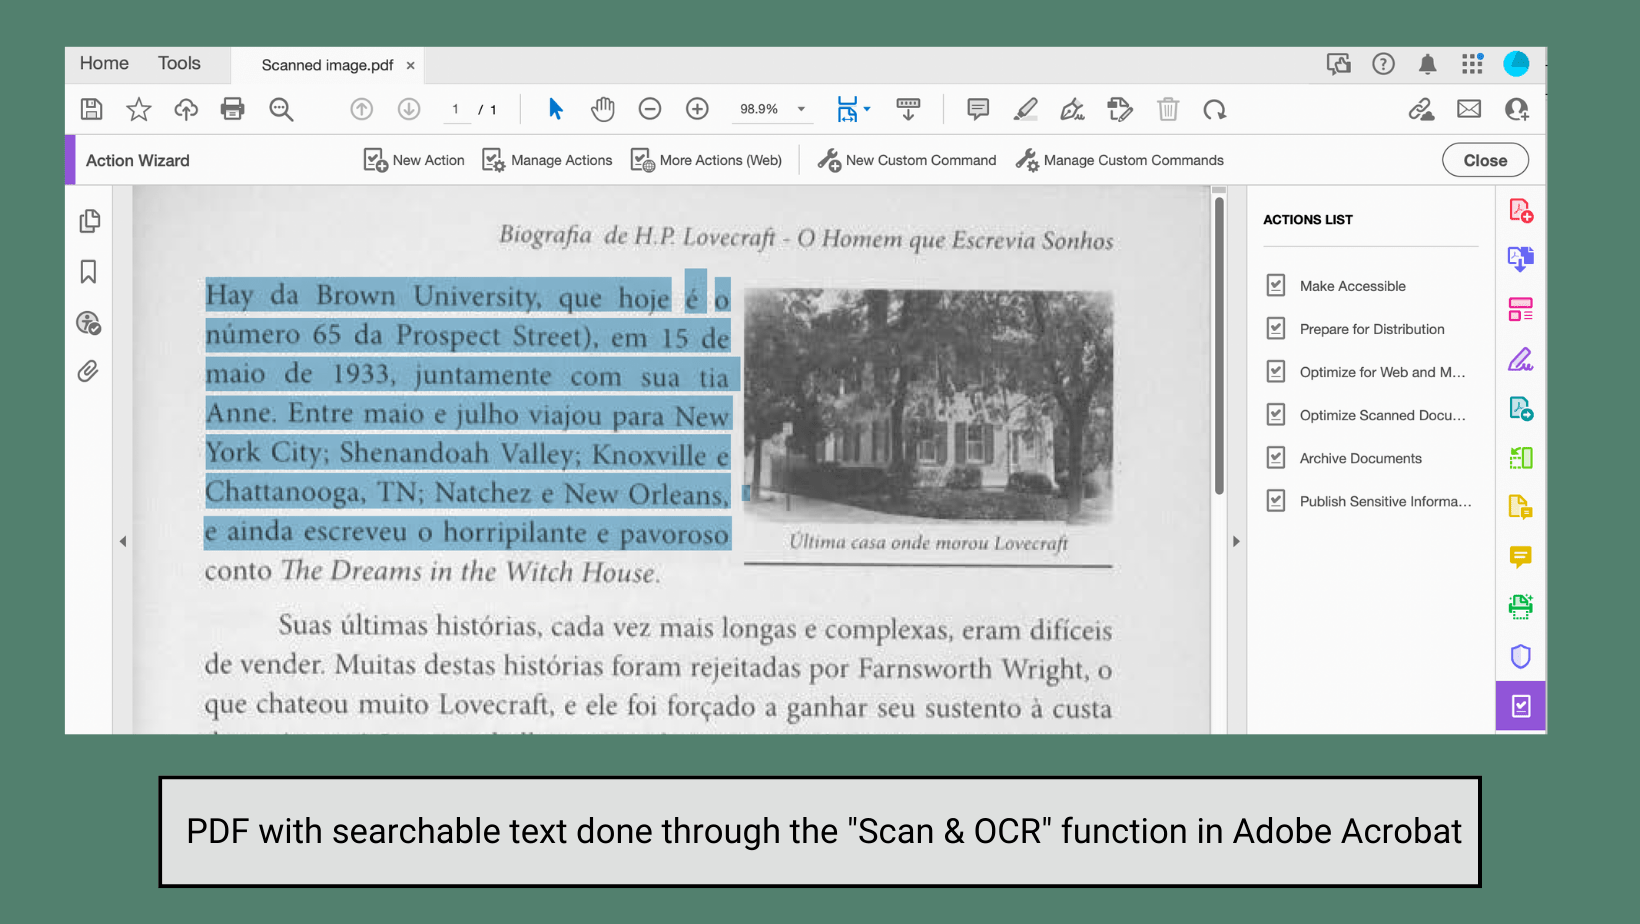
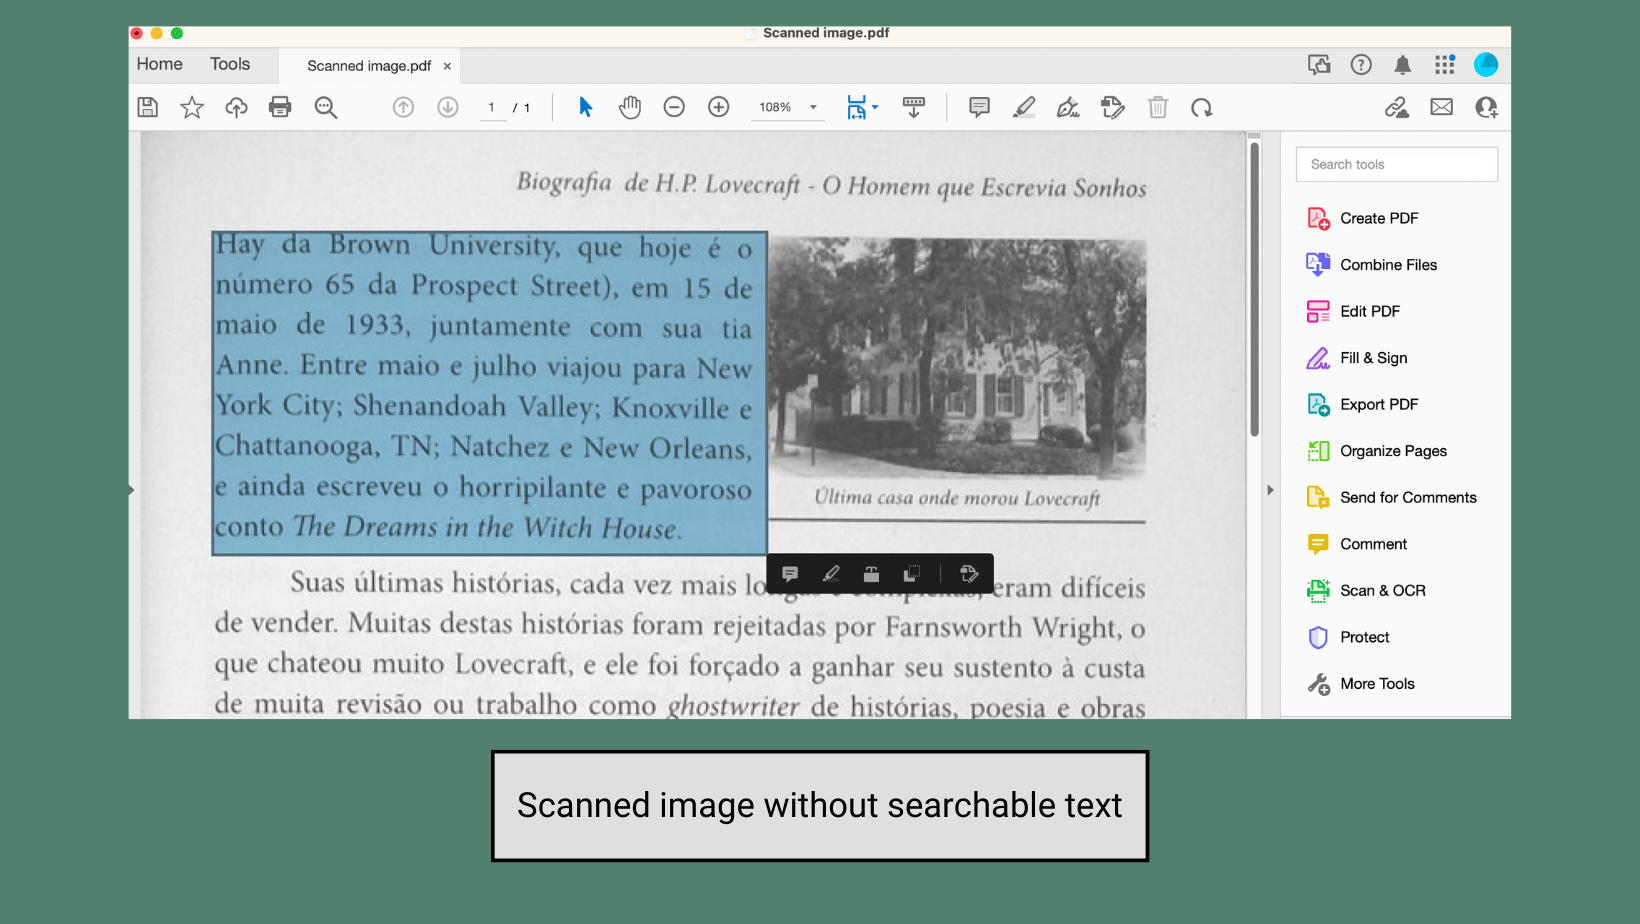
Use photos or scans of text without checking for accessibility.

Screenshot of a scanned image of a book page in Adobe Acrobat. Blue highlight overlays a paragraph showing each word is scannable. Below the image, there is a text box that reads 'PDF with searchable text done through the Scan & OCR function in Adobe Acrobat.'

Do… ✅

Find an alternative accessible resource or use the optical character recognition (OCR) tools in Adobe Acrobat to turn a scan into an accessible PDF with selectable text and a logical reading order.

Digital scans of physical texts are encoded like images and are not readable by most screen readers. OCR converts a scanned document into a format that allows people who use assistive technologies to engage with the text, plus it benefits all users by making the document searchable.

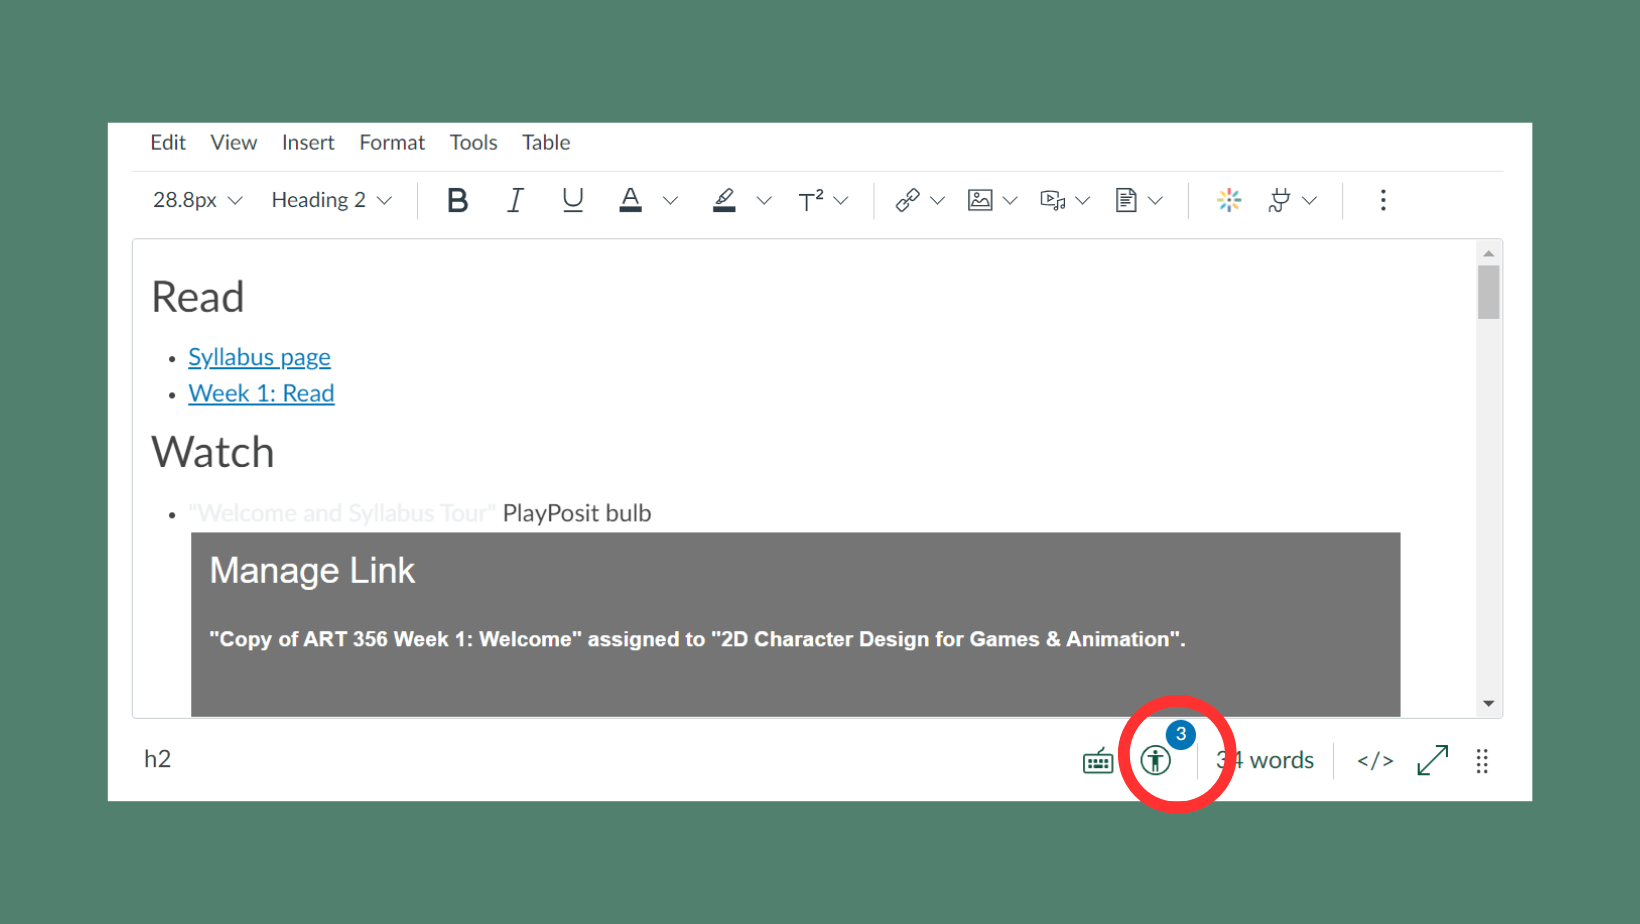
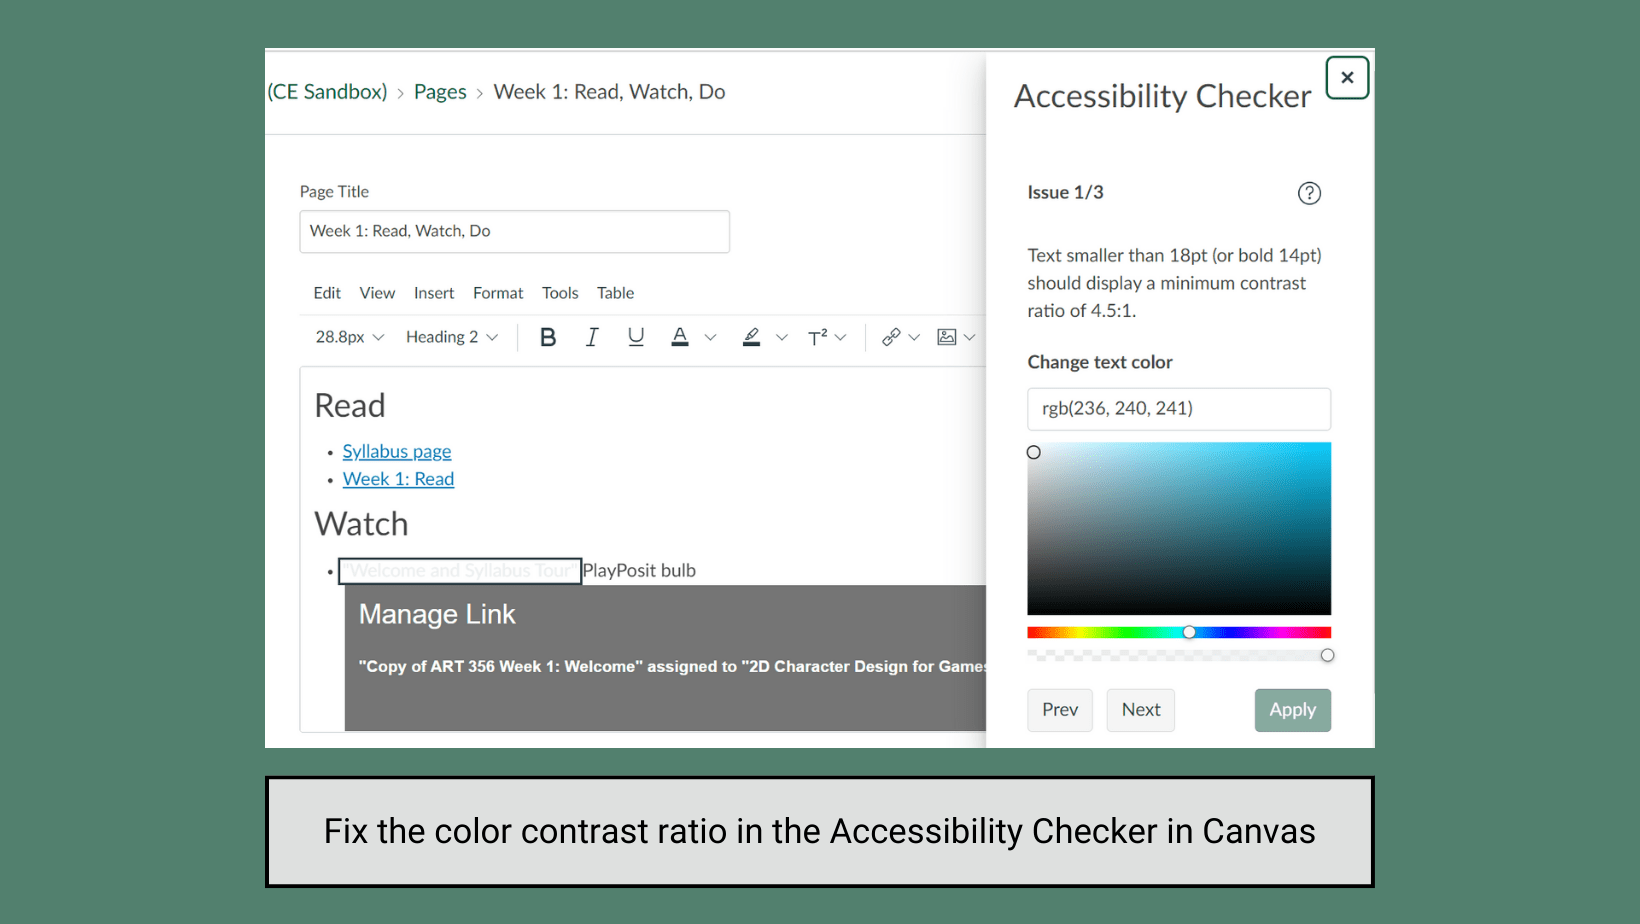
Accessibility Checkers

Screenshot of the Canvas RCE displaying some sample headings and text, including text that is light gray and very difficult to read. Under the RCE box, there is a red circle around the accessibility checker indicator, which notifies the editor that there are three accessibility issues within the page.

Don’t… ❌

Ignore the accessibility checker tools in Word, PowerPoint, and Canvas.

Screenshot of the Canvas RCE with the Accessibility Checker panel on the right-hand side. The panel highlights three accessibility issues and provides recommendations for how to fix them. The first issue identified in the panel is the insufficient color contrast ratio for light gray text against a white background.

Do… ✅

Use the accessibility checker tools in Word, PowerPoint, and Canvas to scan for and repair common issues – including many of the issues described in this resource – before exporting, publishing, or sharing materials. For Canvas, you can also use the UDOIT accessibility checker to scan your whole course.

Using built-in accessibility checker tools can help ensure that your course materials meet accessibility standards.

Resources by Application

For accessibility resources specific to Word, PowerPoint, and Canvas, respectively, please see the guides and tip sheets below:

Need Help?

This resource is meant to be a starting point for best practices in digital accessibility, but if you have questions beyond the scope of this guide, we welcome you to reach out to CATL! Send us an email at CATL@uwgb.edu or fill out our consultation request form to discuss digital accessibility in your own courses.