Guide and Recommendations for Using Digital Whiteboards

Unsplash image of whiteboard markers and a table.

Introduction to Digital Whiteboards 

Digital whiteboards, such as Microsoft whiteboards and Zoom whiteboards, provide a virtual space for both instructors and students to communicate and collaborate simultaneously about course concepts on a shared digital canvas. Digital whiteboards, alternatively called virtual whiteboards, have been a recent addition to the modern interactive, online classroom. With physical whiteboards, instructors can write out important concepts and illustrate examples to the class quickly and with ease. For students, the whiteboard presents the information in a way for them to visualize and collect key points from the lesson. Virtual whiteboards take the concepts of a traditional whiteboard and make them available online for instructors to use without changing their lesson dramatically and are easy to incorporate into a Teams or Zoom class meeting. 

In this blog post, we will explore two types of virtual whiteboards instructors can use in their teaching as well as the support available for instructors looking to incorporate virtual whiteboards in the classroom. While there are several different online whiteboards, UW-Green Bay instructors have supported access to Microsoft Whiteboards and Zoom Whiteboards. We encourage you to stick with these two whiteboard options, as students already have access to Microsoft whiteboards and Zoom whiteboards through their UWGB accounts. We will begin by reviewing these two whiteboard applications and the features available to use within each whiteboard. To broaden the discussion, we have provided instructors with a list of potential use cases, benefits, and limitations to consider when incorporating a digital whiteboard in your class.  

The Case for Microsoft Teams Whiteboards or Zoom Whiteboards 

Microsoft Whiteboards with Microsoft Teams 

Microsoft Whiteboard Cause and Effect Diagram
Microsoft Whiteboard modeling the “Cause and Effect Diagram” template

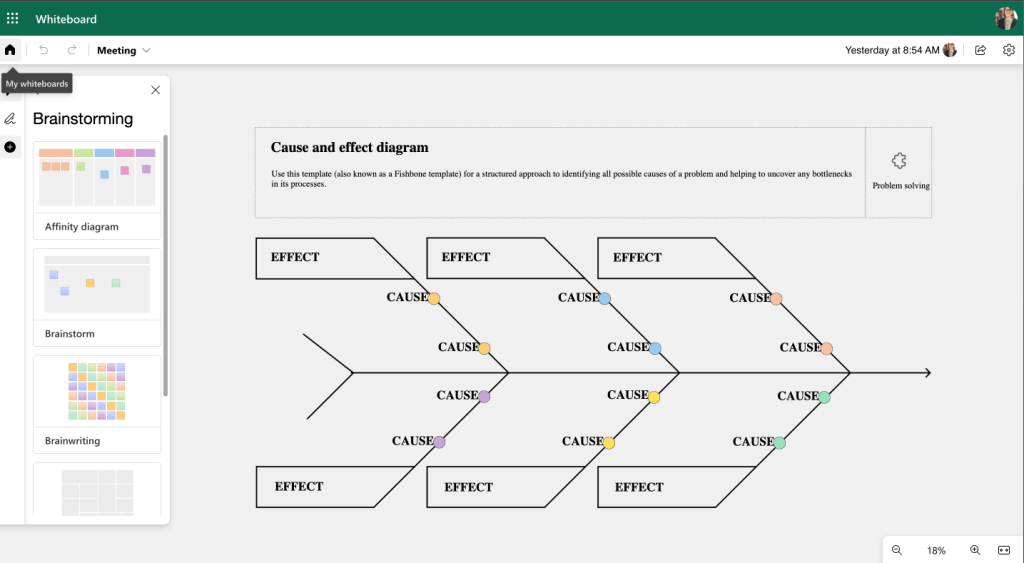
The Microsoft Whiteboard application allows instructors and students to collaborate in a hybrid or remote classroom both inside and outside of Microsoft Teams meetings. With Microsoft Whiteboards, instructors and students can brainstorm, plan, and share with others on a digital canvas asynchronously and synchronously. You can access your whiteboards through your desktop browsers, in Microsoft Teams meetings, breakout rooms, chat, and channels. You can also download the application to use on your smartphone or tablet.  

Zoom Whiteboards

Zoom whiteboard basic flow chart template
Zoom whiteboard modeling the “Basic Flow Chart” template.

Zoom whiteboards can be created and shared using the desktop application and the Zoom web portal. Instructors can share whiteboards with students before, during, and after a Zoom classroom meeting. Zoom whiteboards can be viewed and edited on a computer using the Zoom app or web browser and on a tablet or iPad with the Zoom app. If you use the Zoom mobile app on a smaller device, such as a phone, you will only be able to view Zoom whiteboards. In-app collaboration does not allow attendees to edit the same whiteboard simultaneously across multiple breakout rooms, so breakout room attendees will have to navigate between two windows (one with the whiteboard and one with their breakout group) to participate in the activity.  

Resources and Support

Considerations and Use Cases for Using Whiteboards for Instruction

Like most teaching and learning tools, there is no singular perfect way to use digital whiteboards in the classroom. One class might find it easier to incorporate whiteboards than another classroom might. If you are interested in using whiteboards, think about how you can use the whiteboard to facilitate the desired learning outcomes of the course content, activity, or assessment.  Below is a list of some possible use cases for digital whiteboards and how instructors and students can benefit from the interactive application.  

  • Annotating and visual explanations: Digital whiteboards can offer space for annotation on images, documents, text, and visualizations. Whiteboard editors and collaborators can add images and documents to the whiteboard and can write, draw, and mark up images, insert sticky notes, and connect ideas using lines and shapes.  
  • Building community: Incorporate digital whiteboards for quick icebreakers, mid-semester check-ins, or even for first-day introductions. For remote learners and instructors, digital whiteboards can be a great tool to engage with one another in the virtual classroom and outside of the class session. Students can gain and create a sense of class community as they interact with each other’s ideas and course information in a shared whiteboard canvas.  
  • Brainstorming, practice, and review: Digital whiteboards allow multiple students to contribute to a whiteboard and the whiteboard is saved for students to return to in the future. Instructors and students can share examples and study notes with the whole class or in small groups. Students can use whiteboards as a study tool to practice for assessments, track projects, and review materials from previous whiteboard sessions. This may also allow students to navigate coursework and material with more autonomy by supporting their ability to set goals, organize their learning, and problem-solve individually or in a group.  
  • Student engagement and collaboration: Students and instructors can engage in real-time collaborative editing, annotating, formatting, and more. Students can participate in the lesson or learning activity by visually seeing the instructors’ connections and explanations. Additionally, instructors and students can use multiple different annotation and drawing tools during a collaborative learning activity. Ask students to solve problems, connect points, and unpack more abstract topics by using the whiteboard’s interactive tools. Consider even making a whiteboard activity a non-graded or low-stakes assessment to gauge the progress of your students’ understanding and connection to the course content.  
  • Group projects or activities: Create structured whiteboards or guide students in creating their own for group projects.  Instructors can share whiteboards outside of class meetings with specific groups of students to structure group projects and provide students with the whiteboard space prior to class. Students can use whiteboards to track project goals, brainstorm ideas, and serve as a shared project workspace. 
  • Breaking up class lectures: If you are looking to break up a class lecture or content that might require a great deal of student concentration, consider pausing the lecture and using a quick whiteboard for a recap or lecture review. For example, you could share a whiteboard you have already created as a part of the lecture and allow students to annotate it. This allows students to interact with the lecture material in different ways, giving students the space to make deeper connections or understand difficult concepts.  
  • Use templates for structured activities: To reduce set-up time during a class session, consider using the various Microsoft or Zoom whiteboard templates available to help structure collaborative activities ranging from concept maps, project planning and timelines, to icebreakers and games. 
  • Provide students with guidance and instruction: Be intentional with your use of digital whiteboards. Students will need to learn how to gain access to and use the digital application. They will also require guidance on how you would like them to interact with it. What tools would you like them to use (sticky notes, pen, text, etc.)? Where should they add their contributions? 
  • Use “view only” for large classes: To eliminate overwhelming the whiteboard with student collaborations in a large virtual class, consider presenting the whiteboard in a view state only. This allows you to present the whiteboard and its content in a focused and structured way. 
  • Remember that whiteboards will not be recorded: If you are recording your virtual meeting using Microsoft Teams or Zoom, the recording will not capture the whiteboard collaboration. While the whiteboard session will not be in the recording, Zoom and Teams will save the whiteboards for students and instructors to view after the session is over. Alternatively, you can use external software to record your screen during the session, like Kaltura Capture.  
  • Avoid reliance on drawing tools for annotations: Drawing on a computer or phone can be difficult for students and instructors. Consider limiting the need for drawing tools and ask students to use shapes, sticky notes, or text tools instead. If the whiteboard activity requires detailed sketches or handwritten notes, consider asking students to upload a file to the whiteboard instead. 
  • Keep in mind access and accessibility: A stable internet connection is required for both students and instructors to create and collaborate on a digital whiteboard. This may exclude students who have limited or inconsistent internet access from participating in the activity. Additionally, whiteboards are not compatible with screen readers, though you can still add alt text to images, shapes, and lines to explain the visual elements. 

Questions?

CATL is here to help! If you would like to discuss Microsoft or Zoom whiteboard features and functions or learn more about how to use whiteboards in your class, fill out our consultation request form to schedule a meeting with a member of the CATL team.  

Taking the Guesswork Out of Grades: Canvas Features for Grade Transparency

If you’ve been teaching for a while, “transparency” is probably a buzzword you’re accustomed to hearing by now. In several CATL resources, we’ve highlighted the Transparency in Learning and Teaching (TiLT) framework, which is designed to help instructors clearly communicate the purpose, task, and criteria of a learning activity. In this article, however, we’ll be covering some other ways you can incorporate transparency in your course, as well as the features built into Canvas that will allow you to do so. In each section we will highlight how these features are beneficial to both you and your students. When students and instructors are on the same page regarding grades, it can alleviate a lot of potential problems and unnecessary stress.

Set Up a Grading Scheme

When you create your syllabus, one of the pieces that you need to include is a grading scale, or how you plan on correlating grade percentages with letter grades. Instructors can generally decide which percentage range to set for each letter grade as long as they use UWGB’s A-AB letter scale; however, some departments or programs may have a set grading scale.

Regardless of what scale you use, it is best practice to set up a grading scheme in Canvas that matches what you have in your syllabus. This will tell Canvas what overall letter grade to display in your Canvas gradebook when a student’s overall score falls within a certain percentage range (e.g., AB: < 92% to 89%).

The View/Edit Grading Scheme menu in Canvas; the sample grading scheme is broken down by percentage ranges and uses an A-AB pattern
An example of a potential grading scheme in Canvas

How it helps students: Setting a grading scheme will give students a better idea of what their overall letter grade in the course is at any point during the semester.

How it helps you: Establishing your grading scheme in Canvas will make it easier to see at a glance how your students are doing in your class, which is helpful for submitting Navigate progress reports. Using a Canvas grading scheme is also a necessary step if you plan on using the “sync to SIS” feature for sending final grades to SIS.

Regularly Enter Grades, Including Work Submitted Outside of Canvas

Most courses have some activities or metrics that factor into grading that don’t include an actual student submission in Canvas, such as participation points or in-class activities. To record these grades in Canvas, you will need to set up no-submission Canvas assignments, which are assignments that create a column in the Canvas gradebook where you can simply enter students’ scores. Though many instructors wait until the end of the semester to enter these scores, updating them on a weekly or biweekly basis will help keep you and your students on track. For recurring points like participation, you may wish to lump together points by week or unit (e.g., create an assignment for “Week 1 Participation,” “Week 2 Participation,” etc.).

Three weekly participation point gradebook columns in Canvas with various scores filled in
An example of how you might set up weekly participation grades in Canvas

How it helps students: Factoring these grades into your course as you go will help students get a more well-rounded picture of where they stand in your class. It also makes the importance of regular participation and attendance more evident to students.

How it helps you: Regularly entering or updating scores for things like participation will prevent the headache of entering them all at the end of the semester. It can also give you a sense if there are students that may need an intervention from a professional advisor due to poor attendance (in these cases, you can issue an hoc Navigate attendance alert for students of concern).

Enter Zeroes for Missing Work

One of the most deceptive parts about grades in Canvas is that, by default, missing work does not negatively impact a student’s overall grade in a Canvas course. When calculating the total grade of a student, Canvas ignores any assignment for which no grade has been entered, regardless of due date. The result of this is that students with missing work may see a grade in Canvas that is artificially inflated. To combat this, you can manually enter zeroes for missing work on a regular basis, but Canvas also has two features that can automate part of the process.

Set a Canvas Late Policy

You can set a late work policy in Canvas so that all missing submissions will be automatically set to “zero” after a due date has passed. If enabled during an active course, it will also retroactively apply “zeroes” to all missing work from past assignments. Note that the late policy only affects assignments in which students need to submit something in Canvas (Canvas quizzes, graded discussions, and assignments with the “online” submission type).

The Canvas gradebook settings with the "late policy" tab selected; a box is checked and the default grade for missing submissions is set to "0"
The Canvas gradebook settings menu where you can set a late policy

Set Default Score as “Zero”

For individual assignments, including “no submission” and “on paper” assignments, you can set the score of all students without a graded submission to “zero” with just two clicks by setting zero as the assignment’s default grade. This is especially important to do at the end of the semester, but you can do it throughout the semester whenever you have finished grading submissions for an assignment that is past due.

How it helps students: Students will be able to see how their missing work impacts their overall grade, preventing any “gotchas” at the end of the semester where a student finds out their actual grade is much worse than that what Canvas would have them believe.

How it helps you: Before exporting final grades to SIS at the end of the semester, it is crucial that all missing work is set to “zero” to ensure that grades are accurate. Both the “late work policy” feature and the “default grade” feature remove some of the labor of entering those zeroes manually. Using these features will also ensure more accurate midterm grades, should you choose to post them.

Other Considerations

While the suggestions above apply to nearly every instructor and course, regardless of pedagogical style or modality, the following features may or may not apply to your own courses.

If you have final grades broken down by weighted percentages in your syllabus, you can set up your gradebook to follow the same weighting scheme with a few extra steps of setup. Start by creating assignment groups and then setting those groups to be weighted based on percentage. By using weighted assignments groups, you can be confident that the way things are weighted in your syllabus matches what’s in your gradebook.

Using rubrics to assess student work is a great strategy for grading transparency because it allows students to see exactly what criteria you are assessing them with and what they are expected to do to receive a satisfactory grade. While you can add a rubric as a Word doc to an assignment or discussion description, you can also create your rubrics right in Canvas and use them for grading. You can fill out Canvas rubrics in SpeedGrader to optimize your grading workflow, plus if the rubric has points, Canvas will calculate the point total automatically.

Many online assessment tools like Canvas quizzes, PlayPosit bulbs, and textbook quizzing integrations have the option of including both auto-graded questions, like multiple-choice, and manually graded questions, like essay questions. The problem arises when a student completes an auto-graded quiz and then sees a score that is artificially lowered only because the instructor has not yet graded some questions. Besides regularly keeping up with grading these types of manually reviewed questions, it might also be helpful to include a note in the assessment description so students are aware that their quiz score will not be accurate until you have had a chance to review and update their scores. If the quiz is tied to a Canvas gradebook column, you can also choose to set the assignment's grades to be manually posted so that students do not see grades until you have had a chance to review them.

Questions?

You can get 24/7 support from Canvas by live chat, phone, or email by clicking the “Help” button in the Canvas global navigation menu bar on the left side of any page in Canvas. They are the experts on all of these features in Canvas and can help walk you through the steps if you have questions.

As always, CATL is also here to help as well. If you want to discuss the features above or any other strategies for making your grading more transparent, fill out our consultation request form to schedule a meeting with a member of the CATL team.

Cold Lunch & Hot Topics: “To Record or Not to Record? That is the Question” (Sept. 26 & 27)

Bring your lunch and join the conversation with CATL and instructors from across the institution as we discuss a hot topic in teaching and learning! Our September conversations will explore the issue of recording in-person classes for students. What are the potential benefits, drawbacks, issues, or alternatives?

  • Dates and Times:
    • Monday, Sept. 26 from 11:30 a.m. – 12:30 p.m. 
    • Tuesday, Sept. 27 from 12:30 – 1:30 p.m. 
  • Location: Cofrin Library 405C (CATL conference room) and virtual

Register to receive a calendar reminder and the virtual meeting links in advance or drop in during one or both sessions. If you’d like to prepare your thoughts before our meeting, you may find Romanelli, Smith, and Cain’s (2011) article, To record or not to record?, a good starting point.

Do you have an idea for a future Cold Lunch & Hot Topic? Email CATL Director Kris Vespia (vespiak@uwgb.edu).

Session Recording: “Hypothesis: A Social Annotation Tool” (Thursday, Sept. 1, 2:30 p.m.)

Session Description

Learn more about our new tool, Hypothesis, and transform reading from a passive, individual activity to an active, collaborative exchange.

*Session led by vendor representative with CATL input.


What’s in a Name? Tips for Learning & Using Students’ Names in Class

Research tells us that learning and using students’ names in class has benefits for belonging and engagement, both of which are associated with positive educational outcomes. Instructors also know, however, that it can be quite a challenge to learn dozens and, in some cases, even hundreds, of student names in a semester. There is no one easy solution, but here are some different strategies you might consider, along with a healthy dose of reviewing and rehearsing. 

  • Use the classic standby table tent method. Provide card stock or thick paper and bold markers. Pass materials out and ask students to make a nameplate that they use for class each day. You can even collect them and pass them back to students each day for the first couple of weeks if having to return them helps you learn names. 
  • Call the roll and consider doing it on more than the first day. You can even explain to students that you are doing so because you genuinely want to work on learning and correctly pronouncing their names. Ask them to correct mistakes you make. Write phonetic pronunciations next to names on your roster. They may appreciate your efforts at getting to know them even if it takes a few minutes of class time.
  • Ask students to complete a course survey for you and submit it in Canvas as an assignment. Have them provide their preferred name, correct pronouns, and a typed-out phonetic pronunciation of their name as some of the items. Include other questions that help you learn a bit about them, so you can associate that with their name. You can invite them to include a photo if they feel comfortable doing so. 
  • Take pictures in class. Have students write their names in large letters on a full sheet of paper. Ask them to hold it up, and then take photos of groups of students in the classroom. Practice reviewing the images before class each day. You should offer students the choice to opt-out of this exercise because they may have legitimate cultural, safety, or other reasons for not wanting to participate. 
  • Remember that your class rosters in SIS include photos, and you can print rosters to take to class with you that include thumbnails of those images. You can also use the rosters to practice learning names. Do keep in mind, though, that the photos are typically first-year student ID pictures and may not be accurate representations of your students today 
  • Assign students to visit your office for just a couple of minutes to introduce themselves to you. It may help you learn names, assist them in finding your office and make them more likely to seek you out when they have questions.  
  • Spend time before class speaking individually with students. Try calling them by name or ask them to provide or remind you of their name as a part of the conversation.  
  • Be aware that UW-Green Bay does have a preferred name policy, and students can request to have their preferred name on class rosters, in Canvas, and in email. If you have a student in class who requests you use an entirely different name than is currently on your roster, let them know that there is a mechanism to ask for a name change in many of our systems.   
  • Teaching online? Ask students to share an image and description of their real or fictional dream vacation destination, favorite food, or a favorite book to a discussion board to introduce themselves. Although you may not have to memorize names in asynchronous online classes in the same way you do when teaching face to face, getting to know your students from the start of the semester and encouraging interaction among them is important.
  • Pair students and ask them to interview each other and introduce each other to the rest of the class in a virtual or interactive video class. It can help you and the students learn names and increase comfort with the breakout rooms and cameras before you engage in content-focused conversations.