Hands of students completing a cloud-shaped puzzle which reads "Online Collaboration"

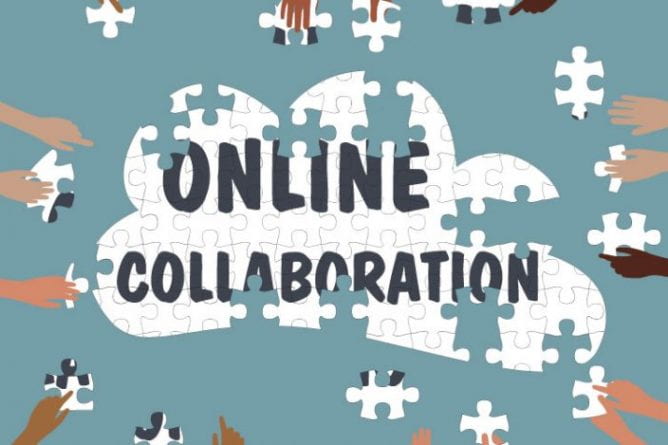
Up and Running with Remote Group Work

A Case for Group Work

Group work can elicit negative reactions from instructors and students alike. Often enough, students groan about doing it and instructors dread grading it. The process is ripe for communication breakdowns resulting in stress from both perspectives. On top of this, the digital learning environment tends to compound these issues. Why then is group work so prevalent?

The answer is that, when done well, group activities help foster engagement and build relationships. Collaborative work helps students develop important skills like effectively articulating ideas, active listening, and cooperation with peers. Collaborative assignments correlate strongly with student success positioning them as one of eight high-impact practices identified by the Association of American Colleges and Universities. Making group work a worthwhile experience for students requires extra consideration and planning, but the positive gains are worth the effort.

Designing Group Work for Student Success

How can we design collaborative activities that are a quality learning experience for students? Scaffolding makes sure students are confident in their understanding of and ability to execute the activity. UW-Extension has created a helpful guide on facilitating group work that outlines three key suggestions to get you started. First, be sure students understand the purpose of the activity, in terms of what they are supposed to learn from it and why it is a group activity. Second, provide support so students have the necessary tools and training to collaborate. You are clear how and when students are to collaborate or provide suggestions. You ensure students understand how to use the needed technologies. Finally, providing opportunities for peer- and self-evaluation can alleviate frustrations of unequal workload by having students evaluate their own and their peers’ contributions. As challenges arise, guide groups toward solutions that are flexible but fair to all members. When embarking on group projects, be prepared to provide students with guidance about what to do when someone on the team is not meeting the group’s expectations.

One example of this as you design your group projects is to ask yourself whether it’s important students meet synchronously. If so, how might you design the project for students with caregiving responsibilities or with full-time or “off hours” work schedules? These students may not be able to meet as regularly or at the same time as other students. You might also consider whether all students need to hold the same role within the group, or if their collective project be split up based on group roles.

Consider how the group dynamics can impact student experiences. Helping students come up with a plan for group work and methods of holding one another accountable promotes an equitable learning environment. Consider any of these tools to help your students coordinate these efforts:

Assessing Group Work

Equitable, specific, and transparent grading are crucial to group-work success. The Eberly Center for Teaching Excellence of Carnegie Mellon University has a great resource on how to assess group work, including samples. This resource breaks grading group work down into three areas. First, assess group work based on both individual and group learning and performance. Include an individual assessment component to motivate all students to contribute and help them to feel their individual efforts are recognized. Also assess the process along with the product. What skills are you hoping students develop by working in groups? Your choice of assessment should point to these skills. One way to meet this need is to have students complete reflective team, peer, or individual evaluations as described above. Finally, outline your assessment criteria and grading scheme upfront. Students should have clear expectations of how you will assess them. Include percentages for team vs. individual components and product vs. process components as they relate to the total project grade.

Tools for Working Collaboratively

Picking the right tool among the many of what is available is an important step. First, consider how you would like students to collaborate for the activity. Is it important that students talk or chat synchronously, asynchronously, or both? Will students share files?

The following suggestions include the main collaboration tools supported at UWGB. Click to expand the sections for the various tools below.

If you are interested in learning more about any of these tools, consider scheduling a consultation with a CATL member.

Canvas discussions are one option for student collaboration. Operating much like an online forum, discussions are best suited for asynchronous communication, meaning students can post and reply to messages at any time, in any order. If you have groups set up in Canvas, you can create group discussions in which group members can only see one another’s posts. You can also adjust your course settings so that students can create their own discussion threads as well.

Hypothesis is a Canvas integration that lets instructors and students collaboratively annotate a digital document or website. Hypothesis annotation activities can be completed synchronously, such as over a Zoom call, or asynchronously on students' own time. Activities can be created for either the whole class or for small groups and are a great way for students to bounce around ideas about a text or reading. 

Office 365 refers to the online Microsoft Office Suite, including Word, PowerPoint, and Excel. Students can work collaboratively and asynchronously on projects using online document versions of any of these software, which updates changes in nearly real time. Microsoft Office 365 has partial integration with Canvas, allowing students to set up and share Office documents from within Canvas using the Collaborations feature. Students will have to log in to Office 365 through their Canvas course before they can use most features of Canvas and Office 365 integration.

Zoom is one of two web conferencing tools supported by the university, the other being Teams. The Zoom Canvas integration allows instructors to set up meetings within a Canvas course. Students can then access meeting and recording links from within the Canvas course. As such, it is generally easy to for students to access and use. One downside to Zoom is that it is a purely synchronous meeting tool, so students will have to coordinate their schedules or find other ways of including members that may not be able to attend a live meeting. Students that wish to set up meetings amongst themselves are not able to set up meetings with the Canvas integration, though they can use the Zoom desktop app or web portal and their UWGB account.

Microsoft Teams is a collaboration tool that combines web conferencing, synchronous and asynchronous text communications (in the form of chat and posts), and shared, collaborative file space. Microsoft Teams also has partial integration with Canvas, meaning students and instructors can create and share Teams meeting links within the Rich Content Editor of Canvas (in pages, announcements, discussions, etc.).

Putting It into Practice

When we ask students to work collaboratively, it’s important we reveal the “hidden curriculum” by building in the steps they should take to be a successful team. As a starting point, asking students to answer these questions helps clarify the work of the group:

  • “Who’s on the team?”
  • “What are your tasks as a group?”
  • “How will you communicate?” (Asynchronously? Synchronously?)
  • “How will you ensure everyone can meet the deadlines you set?”
  • “If or when someone misses a meeting, how will you ensure that everyone has access to the information they’ll need to help you all complete the project on time?”
  • “When will you give each other feedback before you turn in the final assignment?”

For a ‘bare bones’ group assignment, take the above considerations on designing and assessing groupwork into account and create a worksheet for the student groups to fill out together. Create a Canvas group assignment to collect those agreements, assign it points that will be a part of the whole project grade, and set the deadline for turning it in early so that students establish their plan early enough for it to benefit their group. Scaffolded activities that give students enough structure and agency is a delicate balance, but these kinds of guided worksheets and steps can help students focus their energy on the project, assignment, or task once everyone is on the same page.

Let’s keep the conversation going!

Do you have some tried and tested strategies for helping students coordinate and complete group work online? Send them our way by emailing: CATL@uwgb.edu or comment below!

Generative Artificial Intelligence (GAI) and Acknowledging or Citing Use

UW-Green Bay’s libraries have an excellent student-facing webpage on how to acknowledge or formally cite the use of GAI. This blog is intended to supplement that resource with information more specific to instructors. Professors will be vital in helping students understand both the ethics and practicalities of transparency when employing GAI tools in our work. Please keep the following caveats in mind as you explore this resource.

  • As with all things GAI, new developments are rapid and commonplace, which means everyone needs to be on the alert for changes.
  • Instructors are the ones who decide their specific course policies on disclosing or citing GAI. The information below provides some options for formatting acknowledgments, but they are not exhaustive.
  • Providing acknowledgment for the use of GAI may seem straightforward, but it is actually a very nuanced topic. Questions about copyright implications, whether AI can be considered an “author,” and the ethics of relationships between large AI entities and publishing houses are beyond the scope of this blog. Know, though, that such issues are being discussed.
  • Please remember that it is not only important for students to acknowledge or cite the use of GAI. Instructors need to do so with their use of it, as well.

Acknowledgment or Citation of GAI

There is a difference between acknowledging the use of GAI with a simple statement at the end of a paper, requiring students to submit a full transcript of their GAI chat in an appendix, and providing a formal citation in APA, MLA, or Chicago styles.

  • UWGB Libraries have some excellent acknowledgment examples on their page.
  • UWM’s library page provides basic templates for citations intended to be consistent with APA, MLA, and Chicago styles.
  • There are also lengthy blog explanations and detailed citation examples available directly from APA, MLA, and the Chicago Manual of Style.

Regardless of the specific format being used, the information likely to be required to acknowledge or cite GAI includes:

  1. The name of the GAI tool (e.g., Copilot, ChatGPT)
    Microsoft Copilot, OpenAI’s ChatGPT 4.o (May 23, 2024 version), etc.
  2. The specific use of the GAI tool
    “to correct grammar and reduce the length in one paragraph of a 15-page paper”
  3. The precise prompts entered (initial and follow-up)
    “please reduce this paragraph by 50 words and correct grammatical errors”; follow-up prompt: “now cut 50 words from this revised version”
  4. The specific output and how it was used (perhaps even a full transcript)
    “specific suggestions, some of which were followed, of words to cut and run-on sentences to revise”
  5. The date the content was created
    August 13, 2024

Ultimately, instructors decide what format is best for their course based on their field of study, the nature and extent of GAI use permitted, and the purpose of the assignment. It is important to proactively provide specific information to students about assignments. Professors who are particularly interested in whether students are using GAI effectively may focus on the prompts used or even ask for the full transcript of a session. If, in a specific assignment, the instructor is more interested in students learning their discipline’s citation style, then they might ask for a formal citation using APA format. Although the decision is up to the professor, they should tell students in advance and strongly encourage them to have separate Word documents for each of their classes in which they save any GAI chats (including prompts and output) and their date. That way they have records to go back to; If they use Copilot with data protection, it does not save the content of sessions.

What Messages Might I Give to Students about Using, Disclosing, or Citing GAI?

Instructors should consider how they will apply this information about acknowledgments and citations in their own classes. CATL encourages you to do the following in your work with students.

  1. Decide on a policy for acknowledging/citing GAI use for each course assignment and communicate it in your syllabus and any applicable handouts, Canvas pages, etc.
  2. Reinforce for students that GAI makes mistakes. Students are ultimately responsible for the accuracy of the work they submit and for not using others’ intellectual property without proper acknowledgment. They should be encouraged to check on the actual existence of any sources cited by a GAI tool because they are sometimes “hallucinated,” not genuine.
  3. Talk to students about the peer review and publication processes and what those mean for source credibility compared to the “scraping” process used to train GAI models.
  4. Explain that GAI is not objective. It can contain bias. It has been created by humans and trained on data primarily produced by humans, which means it can reflect their very real biases.
  5. Communicate that transparency in GAI use is critical. Instructors should be clear with their students about when and how they may use GAI to complete specific assignments. At the same time, one of the best ways instructors can share the importance of transparency and attribution is through modeling it themselves (e.g., an instructor disclosing that they used Copilot to create a case study for their course and modeling how to format the disclosure).
  6. Remind students that even if the specific format varies, the information they are most likely to have to produce for a disclosure/acknowledgment or citation is: a) the name of the tool, b) the specific use of the tool, c) the prompts used, d) the output produced, and e) the date of use.
  7. Finally, encourage students to copy and paste all GAI interaction information, including an entire chat history, into a Word document for your course and to save it for future reference. One advantage of Microsoft Copilot with data protections is that it does not retain chat histories. That’s wonderful from a security perspective, but it makes it impossible to re-create that information once a session has ended. They should also know that even GAI tools that save interactions and use them to train their model are unlikely to re-produce a session even if the same prompt is entered.

Canvas Discussions Redesign Arrives May 13, 2024 

In Summer 2024, Canvas will officially roll out its “Discussions Redesign,” which will bring a visual refresh to Canvas Discussions while adding some new features. UW-Green Bay will be turning on the redesign between the Spring and Summer terms on Monday, May 13, 2024. On this date, all discussions will automatically upgrade to the redesign with no action needed from instructors. Read this post to learn about the new features coming to Discussions and where to look for familiar buttons that have changed locations within the Discussions Redesign.

New Features

The Discussions Redesign adds the following new ways for students and instructors to interact and to view discussion activity:

Anonymous Discussions

Screenshot of the Anonymous Discussion settings seen while creating or editing a Canvas discussion

With the Discussions Redesign, the options shown when creating a new discussion in a Canvas course remain largely unchanged except for the addition of a setting that allows instructors to enable full or partial anonymity while setting up an ungraded discussion. With “full” anonymity, all student replies will appear anonymously without the student’s name and profile picture. With “partial” anonymity, students can choose whether to reveal their name and profile picture while making a reply. Anonymity only applies to students; instructor posts and replies are always shown with names and profile pictures. If you allow students to create their own discussion topics, a new setting in the discussion options for your course allows you to choose whether students can create anonymous discussions.

@ Mentions

Screenshot of two discussion replies with @ mentions. The mentions each include a student's name and are highlighted in purple.

With the Discussions Redesign, discussion participants can mention an instructor or student in their replies by typing “@” and the beginning of a person’s name and then selecting the full name from a list of matches from the class roster that appears. Mentioned names are highlighted in the post and will trigger a notification for the mentioned person if they have the “New Mention” notification type enabled in their Canvas Notifications settings. Students and instructors can use this feature to more clearly identify who they are responding to in a discussion thread and get their attention.

Quote Reply

Screenshot of the Quote Reply option on a reply. The options menu icon and Quote Reply option are highlighted.

The Discussions Redesign has a new “Quote Reply” action which lets you include the contents of the post you are replying to within your reply. Using this feature will help add clarity to long discussion threads when replying to a post that is higher up in the thread. You can find the Quote Reply option within the options menu (the three vertical dots icon) of any discussion reply.

Multiple Viewing Options for Discussion Threads

A Canvas discussion reply. The link that can be selected to reveal threaded replies is highlighted and reads, "9 Replies, 2 Unread"

The Discussions Redesign offers a more condensed initial view where only the top-level replies to the topic are visible after opening a discussion. If a reply to the main topic has threaded replies (i.e., replies to the reply) “underneath” it, they are initially hidden, and the post will have a link under its contents which reports the number of threaded replies that are “underneath” that post. You can select that link to reveal the threaded replies in either an “Inline View,” which shows all replies underneath one another with varying indentation (like the older discussions design does), or a “Split View,” which shows threaded replies in a side panel that flies in from the right side of the screen.

A screenshot of the search bar and buttons found at the top of a Canvas discussion. The "View Split Screen" and "Expand Threads" buttons are highlighted.

You can switch between using the Inline and Split view modes with the View Inline / View Split Screen button at the top of the discussion page. When using Inline View, you can select the Expand Threads button at the top of the discussion to quickly reveal all threaded replies at once.

Edit History

A screenshot of a Canvas discussion reply that has been edited. The reply's "View History" link is highlighted.

If a student edits a reply after posting it, Canvas will now keep each version of that reply in an “edit history” that is available to instructors. Instructors will see a “view history” link on any reply that a student edited after posting and can select it to view that reply’s previous versions. Students can only view the edit history of their own replies.

Coming Soon: Discussion Checkpoints!

Canvas will soon (finally) be adding the oft-requested feature for supporting multiple due dates in a discussion. This feature may not yet be available when we enable the Discussions Redesign in May, but Canvas plans to add it during Summer 2024. With this feature, instructors will be able to easily set separate due dates for initial posts and for replies to peers’ posts within the same discussion, which will help automate reminders for students by adding calendar and to-do list items for each “checkpoint.” Watch for more information on this feature as it gets closer to release!

New Locations for Important Buttons

Don’t get lost within the Discussions Redesign by taking note of the following new locations for some often-used buttons:

Edit Button

A screenshot of the options menu for a Canvas discussion topic as seen by an instructor. The "options" icon and "Edit" menu item are highlighted.

The Edit button is moving from its prominent position at the top of the discussion page to being tucked within the options (three dots) menu found in the top-right corner of the discussion topic. Look for the Edit link in that options menu whenever you want to adjust an existing discussion’s settings.

Group Discussion Navigation

A screenshot of a Canvas group discussion with the groups icon highlighted in the top-left corner.

Group discussions will no longer show a blue box at the top of the page with the links for accessing each individual discussion. Instead, a group discussion will have a button with the “groups” icon in the top-left corner which you can select to switch between the discussions of each group.

Publishing and Subscribing

Two screenshots of the publish and subscribe icons of a discussion topic. The first screenshot shows the unpublished and unsubscribed icon states; the second screenshot shows the published and subscribed icon states.

The buttons for publishing a discussion and subscribing to it (for notifications) have shrunk into smaller icons that can be found next to the options (three dots) menu in the top-right corner of the discussion topic. You can select these smaller publish and subscribe icons to publish or unpublish a discussion and subscribe or unsubscribe to a discussion.

Ready, Set, Discuss!

Knowledge of these new features and interface changes is all you need for a smooth transition to using the Discussions Redesign in your courses. Your existing discussions will automatically upgrade on May 13 with all existing topics and replies retained. We hope that the fresh look and new features will facilitate more robust interactions within your courses! If you want to discuss ideas for using Canvas discussions in your course with a member of our team, we encourage you to request a CATL Consultation or reach out to us at catl@uwgb.edu.

Implementing Open Educational Resources (OER) into Your Course

This article is the third part in our series on OER. You can read more about Open Educational Resources and Affordable Educational Resources in part one and two alternative models for textbooks, Inclusive Access and Equitable Access, in part two.

I’m ready to adopt an Open Educational Resource (OER) – how do I find a text?

First, realize that OER don’t have to be a formal textbook, although often they are. OER can be pieces of textbooks that you use in conjunction with each other. They can be a Canvas course, a module, or a series of resources that meet your learning outcomes and the topics you need to ensure your students are meeting the learning outcomes. They could even be podcasts, films, and websites. This broadens the field of where to find OER. So where do you start?

  • Start with the librarians on your campus. Librarians are experts in locating materials and can make the search easier.
  • Use the libguide created by the library about materials you already have access to that can be used as part of an OER course.
  • Use one of the many repositories available online that offer the distinct types of resources mentioned above. College of the Canyons maintains an up-to-date OER/Zero Textbook Cost (ZTC) Repository which is a good jumping-off point.

Can I create my own OER?

An option for integrating OER into your course is creating your own materials. Creating your own materials doesn’t necessarily mean writing a textbook. Open Educational Resources can be any of the items below or some combination thereof.

  1. Written textbook
  2. Videos
  3. Curated articles that are openly licensed
  4. Podcasts
  5. Curated textbook chapters taken from openly licensed books
  6. Media you create yourself

As you begin searching, you may decide you want help creating and licensing your materials. As mentioned earlier, the library is a great place to start. The library may be able to offer significant resources to help you create your OER, so be sure to reach out and see what support is available.

Ready to get started?

If you’re interested in getting started on creating low or no-cost resources for your class or just want to get some more information, you can reach out to Carli Reinecke, the OER Librarian to get started with your project.

Resources

Inclusive and Equitable Access Models for Course Materials: Comparisons with OER and AER

This article is the second part to our post about Open Educational Resources and Affordable Educational Resources.

It is important to acknowledge a few other contenders in the push to lower textbook costs for students: Equitable Access and Inclusive Access. Equitable access replaces the costs of textbooks with a fee added to students’ tuition at the beginning of a term that covers the cost of all course materials for that semester, no matter the discipline. Students have the option to opt out and can apply their financial aid. The cost is the same for every student, which creates some concerns when you consider the cost difference between a low-material-cost humanities course and a science course with books that may cost hundreds of dollars. There is an expected course savings with this, as deals have been negotiated between the publishers, the bookstore, and the university. This is a textbook system that is becoming more popular with universities.

Inclusive Access is more common, as it focuses on just one or a few courses instead of all the courses a student is taking. Like Equitable Access, it is a service provided by publishers and college bookstores, marketed as a tool to lower costs for students. Inclusive Access involves a plan to provide eBooks to students for an entire course section, course, or department, depending on the agreements entered into by the publisher and a bookstore. The selected text is provided to all students by the first day of class and is typically paid for as a registration fee instead of a separate textbook cost. This can provide significant savings to students who would be likely to buy a new copy of the textbook, but savings are debatable for those who would acquire their texts by other means. Students can normally opt out, but penalties could arise for departments that sign on and don’t end up with enough student participation.

Please note that there are certain concerns with both the EA and IA models. The cost savings suggested for both models are often based on the difference between students participating in the program or students buying full-price textbooks, which is the only option available to students. There have also been concerns about the issue of these programs being opt-out instead of opt-in for students. The Department of Education is presently reviewing whether financial aid will cover these programs if they are opt-out only.

Similarities and differences between OER, AER, IA, and EA

Conditions OER AER IA EA
Free to students yes possibly no no
Free to university yes possibly yes** yes
Low cost yes yes possibly possibly
Copyright applies no possibly yes yes
Reduces equity gaps yes yes possibly possibly
Open to share with others yes no no no
Able to be remixed yes no no no
Available on the first day of class yes yes yes no
Potential for hidden fees no no yes yes
Students can get a hard copy of the book possibly possibly possibly possibly
Students can get a digital copy of the book yes yes yes yes
Students get their books at the bookstore possibly possibly yes yes
Ability to make modifications to the materials yes no no no
Might include scholarly articles found in the library databases no yes no no
Who benefits from the use students students publishers publishers

** Free as long as certain conditions are met.

The table above presents in tabular format the distinctions between OER, AER, EA, and IA throughout this toolbox article. It highlights how materials can be shared, how costs are passed on, and who benefits from the specific textbook arrangement.

Resources