Sample Assignments for Different Approaches to GAI Use

In a previous CATL article, we recommended using the traffic light model to guide students on the appropriate use of generative AI (GAI) in assignments and course activities. Assuming you’ve already included a policy on GAI in your syllabus, it’s also important to provide clear instructions in your assignment descriptions. Below are some examples of assignment descriptions, using the traffic light approach and graphic. Instructors will vary on whether they want to use that visual or simply explain in words. If you choose to use the stoplight visuals, please be sure to provide an accompanying description of what that means for your specific assignment. While tailored to specific subjects, these samples share common strategies.

Consider the following general suggestions when designing your assignments:

  • Be clear and specific about GAI use in your syllabi and assignments. Clearly outline when and how GAI can be used for assignments and activities. Avoid ambiguity so students know exactly what’s expected. For example, if brainstorming is allowed but not writing, specify that distinction.
  • Include GAI usage disclaimers in assignment directions. Regularly remind students by adding a GAI disclaimer at the beginning of assignment instructions. This will make them accustomed to looking for guidance on AI use before starting their work.
  • Explain the rational for AI use or nonuse. Help students understand the reasoning behind when GAI can or cannot be used. This can reinforce the learning objectives and clarify the purposes behind your guidelines.
  • Clarify the criteria for evaluating AI collaboration. Specify how assignments will be graded concerning AI use. If students need to acknowledge or cite their AI usage, provide specific instructions on how they should do so.
  • Define which AI tools students can use. Should students stick to Microsoft Copilot (available to them with their UWGB account, so they don’t have to provide personal information to a third party or pay a subscription fee) or can they use others like ChatGPT?
  • Use the TILT framework. Leading with transparent design for assignments and activities helps students clearly understand the purpose, tasks, and assessment criteria. This framework can also help instructors clarify how GAI should be used and assessed in assignments.

Sample Assignment Instructions on AI Use

Red Light Approach: No GAI Use Permitted Assignment Example

The example below is for a writing emphasis course and the assignment purpose is to evaluate students’ own writing. For this assignment, GAI tools are not allowed. The instructor includes an explanation of this description to further clarify the assignment’s purpose.

Yellow Light Approach: GAI Use Permitted for Specific Tasks/Tools Examples

The yellow-light approach can be hard to define depending on what you want students to practice and develop for a given assignment. We’ve provided two samples below that each take a slightly different approach, but all clearly label what tools and for what tasks AI can be used and why.

Green Light Approach: All GAI Use Permitted

Instructors may choose to take a green light approach to AI for all assignments or allow AI use for selected assignments. The example below takes a low-stakes approach, permitting full AI use to encourage experimentation. Even with this method, instructors should provide clear assignment expectations.

Learn More

Explore even more CATL resources related to AI in education.

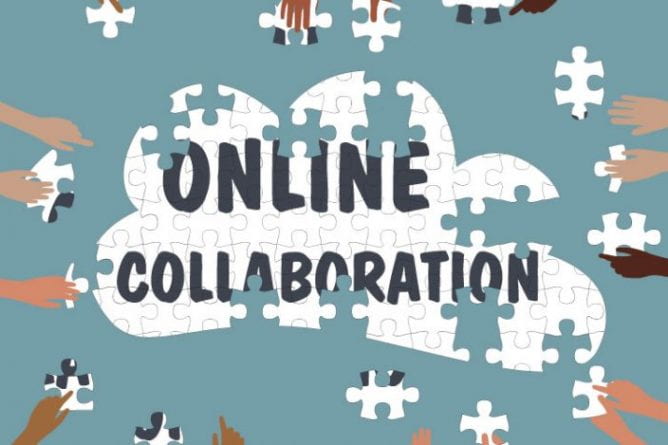
Hands of students completing a cloud-shaped puzzle which reads "Online Collaboration"

Up and Running with Remote Group Work

A Case for Group Work

Group work can elicit negative reactions from instructors and students alike. Often enough, students groan about doing it and instructors dread grading it. The process is ripe for communication breakdowns resulting in stress from both perspectives. On top of this, the digital learning environment tends to compound these issues. Why then is group work so prevalent?

The answer is that, when done well, group activities help foster engagement and build relationships. Collaborative work helps students develop important skills like effectively articulating ideas, active listening, and cooperation with peers. Collaborative assignments correlate strongly with student success positioning them as one of eight high-impact practices identified by the Association of American Colleges and Universities. Making group work a worthwhile experience for students requires extra consideration and planning, but the positive gains are worth the effort.

Designing Group Work for Student Success

How can we design collaborative activities that are a quality learning experience for students? Scaffolding makes sure students are confident in their understanding of and ability to execute the activity. UW-Extension has created a helpful guide on facilitating group work that outlines three key suggestions to get you started. First, be sure students understand the purpose of the activity, in terms of what they are supposed to learn from it and why it is a group activity. Second, provide support so students have the necessary tools and training to collaborate. You are clear how and when students are to collaborate or provide suggestions. You ensure students understand how to use the needed technologies. Finally, providing opportunities for peer- and self-evaluation can alleviate frustrations of unequal workload by having students evaluate their own and their peers’ contributions. As challenges arise, guide groups toward solutions that are flexible but fair to all members. When embarking on group projects, be prepared to provide students with guidance about what to do when someone on the team is not meeting the group’s expectations.

One example of this as you design your group projects is to ask yourself whether it’s important students meet synchronously. If so, how might you design the project for students with caregiving responsibilities or with full-time or “off hours” work schedules? These students may not be able to meet as regularly or at the same time as other students. You might also consider whether all students need to hold the same role within the group, or if their collective project be split up based on group roles.

Consider how the group dynamics can impact student experiences. Helping students come up with a plan for group work and methods of holding one another accountable promotes an equitable learning environment. Consider any of these tools to help your students coordinate these efforts:

Assessing Group Work

Equitable, specific, and transparent grading are crucial to group-work success. The Eberly Center for Teaching Excellence of Carnegie Mellon University has a great resource on how to assess group work, including samples. This resource breaks grading group work down into three areas. First, assess group work based on both individual and group learning and performance. Include an individual assessment component to motivate all students to contribute and help them to feel their individual efforts are recognized. Also assess the process along with the product. What skills are you hoping students develop by working in groups? Your choice of assessment should point to these skills. One way to meet this need is to have students complete reflective team, peer, or individual evaluations as described above. Finally, outline your assessment criteria and grading scheme upfront. Students should have clear expectations of how you will assess them. Include percentages for team vs. individual components and product vs. process components as they relate to the total project grade.

Tools for Working Collaboratively

Picking the right tool among the many of what is available is an important step. First, consider how you would like students to collaborate for the activity. Is it important that students talk or chat synchronously, asynchronously, or both? Will students share files?

The following suggestions include the main collaboration tools supported at UWGB. Click to expand the sections for the various tools below.

If you are interested in learning more about any of these tools, consider scheduling a consultation with a CATL member.

Canvas discussions are one option for student collaboration. Operating much like an online forum, discussions are best suited for asynchronous communication, meaning students can post and reply to messages at any time, in any order. If you have groups set up in Canvas, you can create group discussions in which group members can only see one another’s posts. You can also adjust your course settings so that students can create their own discussion threads as well.

Hypothesis is a Canvas integration that lets instructors and students collaboratively annotate a digital document or website. Hypothesis annotation activities can be completed synchronously, such as over a Zoom call, or asynchronously on students' own time. Activities can be created for either the whole class or for small groups and are a great way for students to bounce around ideas about a text or reading. 

Office 365 refers to the online Microsoft Office Suite, including Word, PowerPoint, and Excel. Students can work collaboratively and asynchronously on projects using online document versions of any of these software, which updates changes in nearly real time. Microsoft Office 365 has partial integration with Canvas, allowing students to set up and share Office documents from within Canvas using the Collaborations feature. Students will have to log in to Office 365 through their Canvas course before they can use most features of Canvas and Office 365 integration.

Zoom is one of two web conferencing tools supported by the university, the other being Teams. The Zoom Canvas integration allows instructors to set up meetings within a Canvas course. Students can then access meeting and recording links from within the Canvas course. As such, it is generally easy to for students to access and use. One downside to Zoom is that it is a purely synchronous meeting tool, so students will have to coordinate their schedules or find other ways of including members that may not be able to attend a live meeting. Students that wish to set up meetings amongst themselves are not able to set up meetings with the Canvas integration, though they can use the Zoom desktop app or web portal and their UWGB account.

Microsoft Teams is a collaboration tool that combines web conferencing, synchronous and asynchronous text communications (in the form of chat and posts), and shared, collaborative file space. Microsoft Teams also has partial integration with Canvas, meaning students and instructors can create and share Teams meeting links within the Rich Content Editor of Canvas (in pages, announcements, discussions, etc.).

Putting It into Practice

When we ask students to work collaboratively, it’s important we reveal the “hidden curriculum” by building in the steps they should take to be a successful team. As a starting point, asking students to answer these questions helps clarify the work of the group:

  • “Who’s on the team?”
  • “What are your tasks as a group?”
  • “How will you communicate?” (Asynchronously? Synchronously?)
  • “How will you ensure everyone can meet the deadlines you set?”
  • “If or when someone misses a meeting, how will you ensure that everyone has access to the information they’ll need to help you all complete the project on time?”
  • “When will you give each other feedback before you turn in the final assignment?”

For a ‘bare bones’ group assignment, take the above considerations on designing and assessing groupwork into account and create a worksheet for the student groups to fill out together. Create a Canvas group assignment to collect those agreements, assign it points that will be a part of the whole project grade, and set the deadline for turning it in early so that students establish their plan early enough for it to benefit their group. Scaffolded activities that give students enough structure and agency is a delicate balance, but these kinds of guided worksheets and steps can help students focus their energy on the project, assignment, or task once everyone is on the same page.

Let’s keep the conversation going!

Do you have some tried and tested strategies for helping students coordinate and complete group work online? Send them our way by emailing: CATL@uwgb.edu or comment below!

10 Tips for Recorded Lectures

You may choose to upload your PowerPoints to Canvas or provide written lectures, but you might also want to record video lectures to create multiple means of engagement for your students (it is always best to err on the side of greater flexibility!). Here are 10 tips for creating good video lectures (and the resources to go with them).

1: Keep is short. Chunk it.

Students can’t sustain attention when it comes to a long (video) lecture. A “regular” lecture in the 55-minutes–plus range is a virtual impossibility for students. Your best bet for students to retain the material you present to them through video is to break it up into smaller segments of no more than 10 minutes (and, more realistically, five or six, if possible).

One now well-known technique to do this is called “chunking”—chopping up a larger lecture into “bite-sized” pieces and matching these pieces up with related materials and framing language. In doing this, you might, for example, find that you will be able to re-purpose your lecture notes to have a written introduction, a 6-minute video explanation of a key topic, a short reading to go with it, some connecting language, another video, and so on. Depending on how you lecture, you may have already done this to an extent. It saves work for you, in the end, because a) you only have to make a few short videos for key ideas instead of recording (and potentially editing) a longer lecture, and b) it signals to students exactly what is most important.

Another benefit to chunking is that you aren’t repeating the same information in too many places. Students can feel like they’re spinning their wheels when the textbook, the readings, the lecture, and the take-home essay are redundant. The other side of that coin is that you can use videos to key students into the parts of their homework where they should pay particular attention. Shorter videos can also help guide students when it comes time to review the information they may have missed. They can, for example, watch the one video on a key concept from Chapter 4 rather than needing to scrub through the 55-minute recording about Chapters 3 and 4.

2: Make it interactive (when possible).

This one relates to chunking but stands on its own as well. Consider incorporating interactive elements into your videos. If you’re worried about the technical aspects of that, have no fear! While it is a relatively painless process to, for example, add a multiple-choice question to a Kaltura video, it’s even more painless to simply provide a literal pause in-video for students to reflect on a question. Especially effective questions are those which ask students to form opinions, draw connections, or apply information. Answers (if there are any clear ones) can appear after a short pause or, if your question(s) are posed at the end of one video, at the beginning of the next. If you are searching for a more dynamic interactive experience, consider utilizing PlayPosit (integrated with Canvas) for your videos

3: Make it dynamic.

When you’re in the classroom and you’re using the whiteboard—or even just as you move about the room—you’re providing valuable context to the information students are taking in. It’s sort of how temperature is not a flavor but definitely plays a role in how you taste and enjoy your food. Any addition that can make a video more dynamic will make it more memorable. Consider incorporating a whiteboard or scratch paper (either physical via webcam or digital as part of the recording) or manipulatives (when appropriate and realistic). You could also consider using the Lightboard (eGlass) Studio on the 5th floor of the Cofrin Library. It functions as a transparent whiteboard and can add a unique feel to your videos.

Another piece of making a video more dynamic is making sure students see your face. Putting a face to a lecture alone can help increase a video’s effectiveness (one hypothesis as to why is that we cannot help but engage more with a speaker when instinctively tracking their eyes).

4: Give specific & transparent instructions.

When should I watch this video? What should I be paying special attention to? How does this relate to the homework? Will this be on the test? It’s a bit tongue-in-cheek to ask these questions, but they are in the back of students’ minds. What is obvious in a face-to-face setting is often missing in the online environment. It never hurts to be exceedingly clear about the purpose of your videos and where they fit in the grander scheme of your course. Tell students exactly when to watch the material (for example, “after reading Chapter 6” or “before taking the Unit 3 quiz”), and why they’re watching. Provide framing language whenever possible (e.g. “This lecture covers Topic X and clarifies the most confusing parts of Chapter 6. In it, I provide two examples of Y. Try to think of another example or two. Ask yourself how the author would address the problem posed at the end of the video.”).

5: Set (reasonable) expectations.

With a large degree of certainty, students will not watch all of your videos. If your video material is one-to-one the same as face-to-face instruction, you’re likely to lose their focus early on. Be sure to take student bandwidth (mental and technical) into account. For example, can some of a longer lecture be written out? Many (not all) students prefer to read at their own pace to watching videos that require a certain level of real-time mental digestion. Also be aware of student (and your own) time. Recording video takes time—and watching it takes time as well. If students have multiple courses with video content, they can quickly become taxed by screen time. Consider saving video for key concepts, problems, and demonstrations. Also think about whether you might provide a transcript alongside your videos that students can review later on. You might also offer some lectures in a different format (such as downloadable audio) – just keep this in mind, less can be more.

6: Review, repeat, & be repetitive.

You have probably heard that it takes three times, five times, or some other number of times hearing a piece of information before you “remember” it. Of course, we know there’s no hard-and-fast number of times that will ensure you’ve “learned” something. Because students are constantly “filtering” what you say in this way, it’s critical to re-emphasize what’s most important—but doing so without alteration is likely to get filtered out yet again. When information is re-articulated rather than repeated, it’s easier for students to link what they’re hearing to prior knowledge, construct patterns, and form imagery around it—all tendencies tied to their ability to remember.

7: “Guide on the Side” (too).

Students aren’t present when you’re recording with a webcam in your home office. This often results in “talking to” rather than “talking with” students as you might in a face-to-face interaction. The old cliche in instruction is that there are “sages on stages” and “guides on sides”. While it is challenging to remain a “guide” on video, it can be done. To do so, remember to always provide context for your videos be it within the video itself or with framing text where the video is added to your course. Give students a way to interact with the material such as a study guide or guiding questions at the outset. The best videos are those that steer students to information and draw connections and conclusions rather than the more instinctual tendency to provide it directly.

8: Keep accessibility in mind.

When making video, remember that access may be restricted due to impairment or bandwidth limitations. It’s a good idea to make videos downloadable in the event students do not have strong internet. For the same reason—and to accommodate a variety of study habits—it is a good practice to provide a transcript of your video and audio content.  This will also provide an avenue for learning for the visually impaired. For the audio impaired, it is also good practice to accurately close caption all audio/video materials.

9: Use what already exists.

While there’s a lot of junk on the internet, there is also a wealth of quality content already available on YouTube, Vimeo, and other streaming sites. You may even be able to find audio/video materials available through PBS, NPR, TEDEd, Khan Academy, or the like. This will cut down on your workload and may well generate a more robust variety of perspectives as well as a variety of types of content that will help keep students engaged.

10: Record it especially for online.

This one is #10 because, while it’s good practice, it might not be practical depending on your course. What it comes down to is that lectures recorded specifically for online are more effective than a “repurposed” recording of a face-to-face session. The exception is when the face-to-face session is recorded and then uploaded for the same audience to return for review rather than as a “replacement” for face-to-face attendance.

Communication Methods & Recommendations

A communication challenge you might face whether you’re teaching in an in-person class, a hybrid one, or one that’s completely online, will be to try to communicate the same information to students who are not able to attend the in-person class, or to communicate with students who may have fallen behind. Remember, you should strive to provide equitable communication to all students, and opportunities for students to communicate with you and with each other, regardless of how they’re engaging with the course. Not only will some instructors have to consider how to communicate important information to students in different physical locations, but also across modalities and time.

The expandable sections below offer some additional information when considering how to communicate instructor to student, student to student, and student to instructor.

✅ Might work because

  • Efficient, but remember that your communication and that of your students will be limited by who attends in-person.
  • You can use the classroom environment to support your goals for the session: whiteboards, projectors, screens, and other equipment in a physical classroom.
  • Hand gestures and body language can help you get your point across.

❌ Might not work because

  • One group of students will get the information first.
  • We have limited interaction time with students, and may not be able to communicate everything we desire to in the time we have.
  • Potential classroom distractions may limit the intake of the communication for some individuals.

✅ Might work because

  • Personable and efficient.
  • Effective for one-to-one communication.

❌ Might not work because

  • Time intensive if you have to do this with every student.
  • Students don't necessarily talk on the phone—they may feel more comfortable communicating through email.
  • Ephemeral (unless you record it!)

✅ Might work because

  • A "distribution list" will allow you to send a message to your entire class at once.
  • Familiar to you and to students.

❌ Might not work because

  • One-on-one communication can get "noisy" and relies on the class list in SIS or Canvas (not Outlook).
  • Media limited.


✅ Might work because

  • Engage the whole class or specific groups of students.
  • Keep related things together.
  • Familiar in principle to students.
  • Less formal.

❌ Might not work because

  • Requires regular/frequent interaction for best results.
  • Small learning curve in Canvas initially.
  • Task needs clarification.
  • Less formal.

✅ Might work because

  • Intuitive and in Canvas.
  • Alert the whole class or sections of students all at once.
  • Allows for rich media (video messages, images, etc.).
  • Students get notified.
  • Allows for student comments (optional).

❌ Might not work because

  • Students can disable email notifications—but still see announcements when in Canvas.
  • Can get noisy with frequent use.


✅ Might work because

  • Feels more like being in the classroom.
  • Sessions can be recorded for review (or for those who miss).
  • Varying levels of interactive options (whiteboard, breakout groups, chat, polls, etc.).

❌ Might not work because

  • Steeper learning curve the first time.
  • Relies on a good connection and technology.
  • Logistically, some students cannot make it to synchronous sessions.

✅ Might work because

  • Allows instructors to create channels for specific people, or a whole class
  • Can @ people to notify them; and use emojis to respond to chats
  • Could be useful for communicating expectations for group work.

❌ Might not work because

  • Students may be more familiar with it as a synchronous meeting tool rather than as a communication tool
  • Easy to get lost in threads if users don't tag each other for communicating
  • Steep learning curve to utilize full functionality

✅ Might work because

  • Intuitive and familiar to students.
  • Easy to use.
  • Synchronous.
  • A "history" of the chat is available to the entire class making it good for Q&A-type sessions.

❌ Might not work because

  • Synchronous.
  • Media limited.
  • Whole-class only. Cannot be limited to specific students.

✅ Might work because

  • Displays course due dates automatically.
  • Can add other items (like reminders).

❌ Might not work because

  • Requires "due dates."
  • Only the names of events appear directly on the calendar.

✅ Might work because

  • Create blocks of time for students to sign up to meet one-on-one (e.g. office hours).
  • Can use a "feed" to add these blocks to Outlook.

❌ Might not work because

  • Required additional communication so students know how and to use them.

Three Types of Activities (Absorb, Do, Connect)

In higher education, the effectiveness of teaching plays a significant role in how students engage with the material and achieve learning outcomes. One approach to structuring the course activities involves categorizing them into three distinct types: Absorb, Do, and Connect. By classifying activities this way and designing them intentionally to meet dynamic learning objectives, instructors can ensure a comprehensive and engaging learning experience for their students.

Absorb

Absorb activities are those where learners gain the information they need. Examples include videos, readings, or podcasts. Typically, absorb activities take less time in online classes than they do in face-to-face classes where lecture is a popular form of instruction.

Here are some common examples of absorb activities:

Presentations (slide shows, videos, demonstrations)

Presentations are usually best used when information can best be conveyed visually, and the presentation can help the learner visualize something that is difficult to convey by other means. Learners typically tune out after five or six minutes, so it is important to keep presentations concise.

Readings

Use reading activities to present complex and difficult information in a stable form for careful study by the learner. Reading activities are important for moving beyond memorizing and recalling information and they can be used to encourage learners to find and understand information. It is often useful to have reading activities available to students where they will need to use it (as a reference in responding to a discussion, for example).

Stories by a teacher

Stories told by a teacher can be a great way to make a point memorable. They can be a type of presentation and should also be constructed in an efficient way. When done by a teacher, storytelling is an absorb activity. When done by a student, it is often a connect activity.

Do

Do activities are where students practice their knowledge. These are similar to formative assessments. Typically, “do” activities have lower stakes and allow for students to have multiple attempts. The focus is on mastering new knowledge or skills. This is equivalent to doing basketball drills to prepare for a game.

Here are some common do activities as well as some best practices:

Practice activities

Drill and practice (e.g., worksheets, quizzes from a textbook publisher) are best used for foundational material that will be used again and again.

Hands-on activities might include performing a calculation with an on-screen calculator, completing a dialogue in a foreign language, or filling in a missing term in a piece of computer code.

Guided-analysis activities, such as an activity where agronomy students may be asked to classify soil based on a chart that shows the proportion of sand, silt, and clay in the soil.

Discovery Activities

Case studies are when an instructor presents a situation that requires learners to draw upon course knowledge to reckon with a complex problem. These are usually best used when instructors would like learners to draw upon multiple sets of knowledge, draw fine distinctions, and work with shades of meaning. Case scenarios are often good to use once students have mastered foundational concepts.

Games and Simulations

Similar to case studies, games can be a good way for learners to draw upon multiple sets of knowledge and draw fine distinctions. Games can also help stimulate learners’ curiosity.

Connect

Connect activities help learners close the gap between learning and the rest of their lives. They prepare learners to apply learning in situations they encounter at work, in later learning efforts, and in their personal lives. The purpose of these activities is not necessarily to learn something new — that is typically for absorb and do activities — but rather to link something that is already known or prompt an application of learning.​

Here are some common connect activities as well as best practices:

Ponder activities

This type of activity requires learners to think deeply and broadly about a subject. Learners may answer rhetorical questions, meditate on a subject, identify or evaluate examples, summarize learning, or brainstorm ideas.

Questioning activities

Let learners fill knowledge gaps and resolve confusion by reserving time to ask questions of teachers, other experts, or fellow learners.

Stories by learners

These activities, which might take the form of a written reflection, in-class or online discussion, or oral presentation, let learners relate the subject matter to events in their own lives.

Research activities

Require learners to apply their knowledge while also discovering and using their own sources of information. These activities might include scavenger hunts and guided research.

Arraying Activities in a Sequence

A cycle showing absorb, do, and connect.

Not every lesson will have a connect activity, but in general, it is good to plan activities so that students acquire information (absorb) and then practice information (do) and apply information (connect). A common example is for students to read a textbook (absorb) and discuss their knowledge in a Canvas discussion (do) in preparation for an exam (connect).

Sometimes these activities overlap. For example, embedding questions in a video is one way to have students practice their knowledge while they absorb it.

On other occasions, students may practice their knowledge ahead of absorbing it. For example, a pre-reading quiz or scavenger hunt can point students to important information in a complicated text. This way the instructor can help students filter out the information that they should spend their time absorbing.

Connect activities often come at the end of an absorb/do sequence as students are often practicing for activities such as group projects, speeches, exams, etc. Yet, there are other activities that students connect to course material. A student survey, for example, may ask students about their motivations for taking the class. This can be a subtle way to orient the student learning toward their lived experience. Similarly, reflective exercises can be done prior to a new unit of instruction or as a way to bridge two modules together. In this way, connect activities can be the glue that holds modules together while also forging bonds between the students and the course material.

The sequence of absorb, do, and connect activities is often linear, but it does not have to be. Whatever order you go in, it is important to ask: how will students acquire knowledge (absorb)? How will they practice (do), and how will they apply their knowledge (connect)? Finding activities that lead students through all three phases will help answer the question “what do we do in class?” whether that class is in-person, online, or somewhere in-between.

If you would like to connect on a more detailed discussion of use cases and how you can harness the Absorb, Do, Connect schema in your own course, you can schedule a consultation with CATL.

Reference

The absorb, do, connect schema comes from William Horton, E-Learning by Design, second edition, New York: Wiley Publishing, 2011. (Requires UWGB login.)