Canvas is UWGB’s learning management system (LMS) and is used to facilitate the instruction of courses across all modalities. The role Canvas plays in a fully online course will differ from the role it plays in an in-person course, but Canvas’s ability to host course materials, assignments, quizzes, files, discussions, grades, and more make it useful for any course.
The online Canvas Guides contain video tutorials, feature overviews, and detailed how-to guides for both instructors and students. Here are some highlights from those guides that are recommended reading/viewing for beginning to build your Canvas courses:
Navigating Canvas
UWGB instructors and students log into Canvas via the Canvas Login page on UWGB’s website. After logging in you are taken to your Canvas Dashboard, which contains tiles that link to all your courses. Each term, your instructional Canvas courses will be created and appear on your Dashboard about 70 days before the first day of classes. These instructional courses will automatically populate with students and are the courses in which you will do your teaching.
Instructors can create their own “Sandbox” courses to prepare course materials before instructional courses are available, create templates to copy into instructional courses, or just test things out. Sandbox courses are for developmental purposes only and cannot contain students.
Navigating around Canvas is made easy by a Global Navigation Menu which is located along the left edge of any page in Canvas. Use this menu to jump between courses, return to the dashboard, access your notification settings, view your Canvas Inbox and Calendar, and view options to contact 24/7 Canvas Support.
Within a given course, there is also a Course Navigation Menu. The Course Navigation Menu is a series of links on the left side of your course that help you and your students access different course areas. The Course Navigation Menu is always visible on its respective pages. Depending on the structure of your course, you can choose to reorder and hide course navigation links. More information (and limitations) can be found on the UW System KnowledgeBase page about Canvas Navigation.
Building your Courses
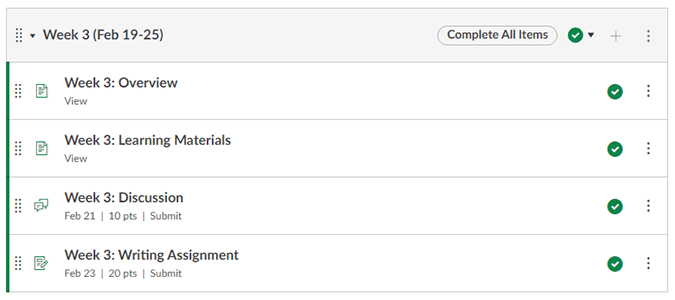
After navigating to one of your courses through the dashboard or courses list in the global navigation menu, you are taken to the course home page. The home page of Canvas courses at UWGB will always consist of the course Modules with recent Announcements displayed at the top. Modules are organizational containers that can be used to present course content in a logical order within the context of a week or unit of the course. A well-organized Canvas course will contain a module for each week or unit of the course and students will be able to access everything they need for that week or unit from within the items contained in that module. From the home page, you can add modules to your course and add course items (Pages, Assignments, Quizzes, Discussions, Files, External URLs, etc.) to those modules.
Creating Content
Your course and the modules contained within it will be comprised of several diverse types of Canvas content:
- Assignments: Assignments in Canvas are the graded items in your course. Each column in your Canvas gradebook will be an assignment within your course’s Assignments Index page. Assignments with the “Online” submission type let your students submit work within Canvas. Create assignments with the “on-paper” or “no submission” submission type to create columns in the Canvas gradebook for activities that students physically turn in or to grade participation.
- Discussions: Discussions allow instructors and students to interact in online asynchronous message board-like environment. You can assign points to a discussion to turn it into a graded assignment.
- Quizzes: Quizzes is the name of the online testing tool in Canvas. Yes, you can also use it for exams! Quizzes support many types of questions from auto-graded question types like multiple choice and fill-in-the blank to instructor-graded essay questions.
- Pages: Create pages in your course modules to convey information to students. Use pages to introduce yourself and the units/weeks of the course, guide your students through assigned readings (and provide links!) and share written and multimedia lectures.
- Files: Upload documents to your course files page to share them with students by linking them in course content or adding files as module items. UWGB students cannot access the course files page directly, so be sure to link your files in pages or add them to modules!
No matter which type of content you are creating, you will be using Canvas’s Rich Content Editor to author and format the text and multimedia within. If your course incorporates video lectures, use the integrated My Media tool to upload, create, and embed videos in your course without having those videos count against your course storage limit.
Communicating with Students
Throughout the term it will be important to regularly communicate with your students to keep them on track and help guide them through the course. Canvas provides a couple of options for timely communication with your students:
- Announcements: Use announcements to update your students with timely information. By default, the three most recent announcements in the course will appear on the top of the course home page.
- Inbox: The Canvas Inbox tool (sometimes called “Conversations”) is used by students and instructors to send direct, private messages to one another within Canvas. The Inbox tool works similarly to email except that messages, which Canvas refers to as “conversations”, reside in Canvas instead of Outlook. The Inbox is accessed by clicking the Inbox button in the Global Navigation menu along the left side of any Canvas page.
Grades and Grading
A key concept to understand about the Canvas Gradebook, which instructors access by clicking the Grades link in the course navigation menu, is that each column in the gradebook is an assignment in the course. To add a gradebook column, you create an assignment from the assignments page of your course.
By default, Canvas will Calculate a student’s final grade percentage by dividing the points earned by the student by the total points possible for all of their graded assignments. Instead of using the total points calculation, you can set up a weighted calculation for final scores by creating Assignment Groups and applying weights to them. For missing work, instructors should manually enter zeros in the gradebook, as Canvas does not include assignments with no score in the calculation of a student’s final grade. To show a letter grade in Canvas, enable a grading scheme in your course settings page.
Publishing Your Course
Before students can access your Canvas course, you must publish the course. Each item of course content must also be published before students can see it. For content contained within modules, both the module and the module content item must be published and show a green checkmark. Use the Student View feature to view your course as a test student, test content, and verify what can and cannot be accessed by students. Use the Course Link Validator tool to scan your entire course for links that may not work for your students.